Paint a car at home
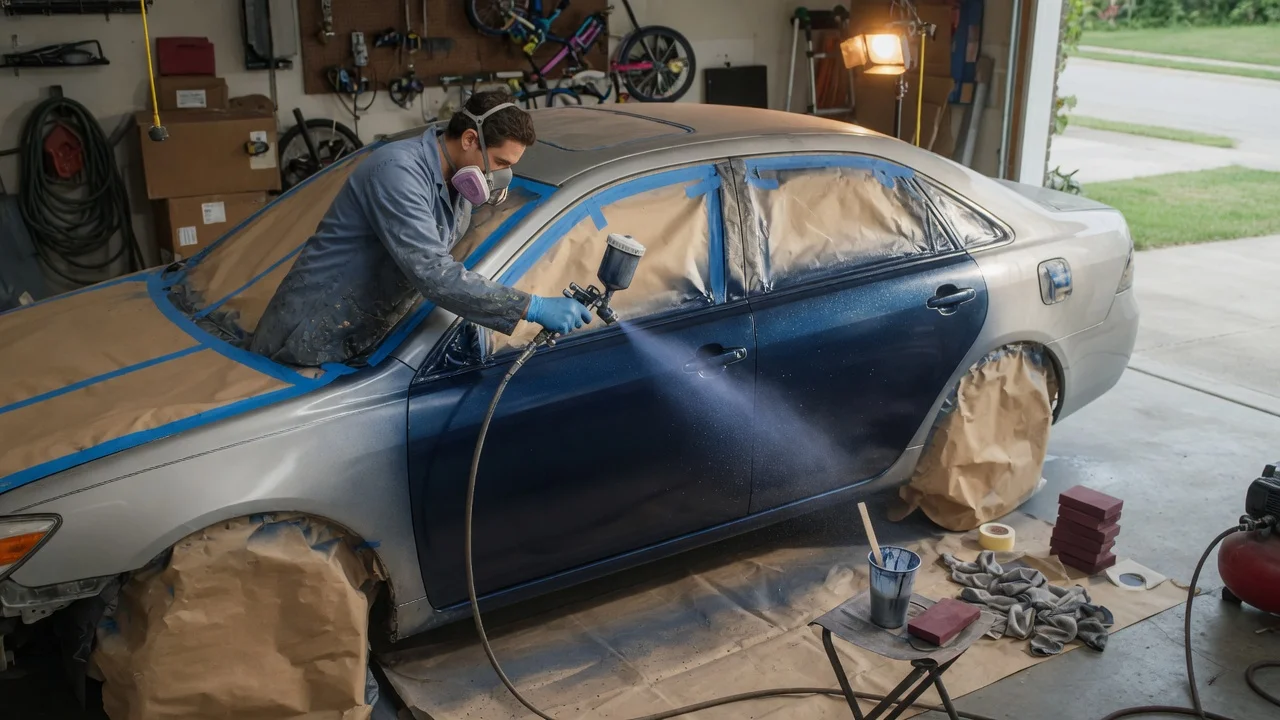
Painting a car at home involves repairing and preparing the surface, masking areas that must stay unpainted, applying a compatible automotive coating system and allowing it to cure. Before buying materials, establish whether your workspace can safely handle the products. The brief supplies no vehicle-specific repair guidance or paint manufacturer instructions, so exact sanding grades, mixing ratios, spray settings, coat counts and drying times cannot be verified here.
1) Check whether your workspace is suitable
Read the technical data sheet and safety data sheet for every coating, cleaner and hardener before starting. The technical sheet explains application requirements; the safety sheet identifies hazards and protective measures. Your workspace must meet their requirements for ventilation, ignition control, protective equipment and protection of nearby people from vapors and overspray. An open garage door alone does not establish that a space is safe.
Some two-component automotive coatings use isocyanate-containing hardeners, which present serious inhalation hazards. Do not assume a dust mask or ordinary cartridge respirator provides adequate protection. If you cannot meet the specified respiratory protection and ventilation requirements, have a suitably equipped refinishing shop perform the spraying. Check applicable local rules for spraying and disposing of paint waste.
2) Choose a complete paint system and gather supplies
Choose products documented as compatible with the vehicle's surface and with one another. Depending on the repair and selected system, these may include a surface cleaner, repair materials, primer, color coat and clear coat. Clear coat is the transparent finishing layer required by some paint systems. Confirm compatibility with the existing finish before committing to the whole car.
Prepare the application equipment specified for those products, suitable abrasives and sanding blocks, masking materials, cleaning cloths, mixing and measuring equipment, protective equipment and waste containers. For a spray gun, confirm that the air supply meets the gun's requirements. No particular compressor capacity, nozzle size or air pressure can be recommended without the equipment and coating specifications.
3) Clean, inspect and repair the body
Wash the car, then use the selected system's approved cleaning process before sanding. Inspect for rust, dents, peeling paint and previous repairs. Paint does not repair corrosion or stabilize a failing finish. Address those defects before coating, and obtain a body-shop assessment if corrosion involves structural areas or the extent of a previous repair is unclear.
Remove or protect trim and fittings as appropriate, using vehicle-specific instructions where removal could affect wiring, sensors or safety equipment. Sand and feather repair edges according to the coating manufacturer's substrate guidance. Feathering means gradually smoothing the transition between a repair and the surrounding finish. The required abrasives depend on the surface and the next coating; no universal sanding grade is established by the supplied information.
4) Mask and prepare for coating
Remove sanding residue and complete the prescribed final cleaning. Mask glass, tires, openings and components that must remain free of paint. Check masking edges and inspect the surface under good lighting. Before mixing any coating, confirm that the workspace temperature, humidity and ventilation meet its application requirements.
5) Apply the coatings in the specified sequence
Apply primer where the selected system requires it, then allow it to dry and prepare it as directed before applying color. Follow the product instructions for mixing, application equipment, coat thickness and intervals between coats. Observe any recoat window: the permitted period for applying the next layer.
Use a separate test panel to check the application setup and appearance before painting the car. Apply the color and any required clear coat using the manufacturer's sequence. Flash time is the specified interval that allows solvent or water to leave a coating before the next application; it is different from full cure. Exact timings and spray technique settings require the chosen products' instructions.
6) Allow curing and inspect the result
Protect the finish during the specified curing period. Follow the coating instructions for removing masking, handling panels, reassembling parts, washing and polishing. A surface that feels dry may still require additional curing time.
Check the cured finish under good lighting for coverage, uneven color, runs, trapped debris and missed edges. Confirm that removed fittings are correctly reinstalled and affected lights, locks or other equipment work. Use the coating manufacturer's repair guidance before sanding or polishing defects; the available information does not establish a safe correction method for a particular finish.