How to Route a Dash-Camera Cable Neatly
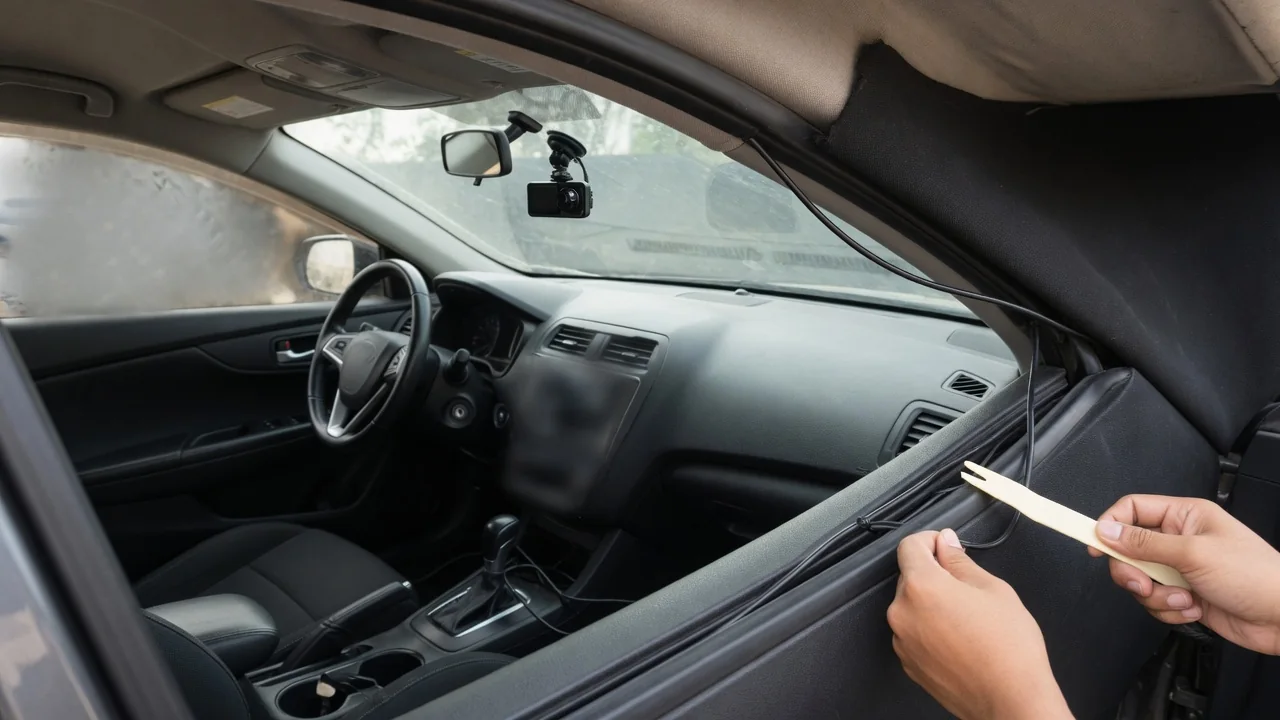
Learning how to route a dash camera cable neatly is mostly about two things: keeping the wire out of the driver's view and keeping it away from parts of the cabin that protect occupants. A tidy installation hides the lead along the headliner and trim, leaves airbags and controls undisturbed, and still lets the camera be removed or serviced later without damage.
Plan path
Start with the camera position, because it decides everything else. Most drivers mount the unit behind or just beside the rearview mirror, where it sits within the wiper sweep but outside the main field of vision. From there, the cable usually travels along the top edge of the windshield, down one side of the cabin, and under the dashboard to its power source. Before fixing anything in place, hold the cable loosely along that route to confirm the length is adequate and to see where slack will collect.
The power source shapes the lower half of the route. A 12-volt socket in the center console suggests running down the passenger side and across beneath the glovebox, while a fuse-box hardwire kit may favor whichever side houses the panel, which differs between vehicles. Look for the forward-facing sensor housing near the mirror on cars with driver-assistance features, and keep both camera and cable clear of its window. The owner's manual typically shows where airbags and fuse panels are located, which helps settle the path before any trim is touched.
Use trim safely
The gap between the headliner and the windshield is usually soft enough to accept a thin cable pressed in with a fingertip or a plastic trim tool. Metal blades and screwdrivers can scar the fabric or chip the glass edge, so a blunt plastic tool is the gentler choice. Along the door opening, the rubber weatherstrip often pulls back by hand, exposing a channel where the cable can sit before the seal is pressed back. The wire should disappear without the trim bulging or the seal lifting.
The windshield pillar deserves the most caution. Many vehicles house a side curtain airbag along the roof rail and down behind the pillar cover, often indicated by an embossed airbag or SRS marking on the trim. A cable draped across the front of that airbag could interfere with how it deploys. Where the cover must be loosened, the usual advice is to run the wire behind the airbag, alongside the factory harness, rather than over it. If the layout is unclear, staying under the weatherstrip or asking an installer is the safer option.
Check controls
Once the cable reaches the lower dashboard, the concern shifts from airbags to controls. Loose wire in the footwell can drift toward the pedals, so on the driver's side it needs to be secured high and well back from the brake, accelerator, and clutch travel. Many people choose the passenger side for exactly this reason. Under the glovebox, the cable can follow existing harnesses or sit behind the lower trim edge, held with small adhesive clips or soft ties so that it cannot sag over time.
Before calling the job finished, operate everything the cable passes near. Swing both sun visors through their full range, open and close the glovebox, adjust the steering column, and open the door to confirm the weatherstrip seals evenly without pinching the wire. On the windshield, check that the cable does not cross the rain sensor, the camera for lane-keeping or automatic braking, or the mirror's adjustment range. If a hardwire kit is used, the fuse position chosen should be confirmed against the vehicle's own fuse diagram, since layouts and circuit assignments vary widely.
Everyday Use and Observations
A well-routed cable should be almost invisible from the driver's seat. Only a short length between the camera and the headliner is typically exposed, and keeping that drop short and straight prevents it from swaying in the driver's peripheral vision. Leave a small amount of slack at the camera so the connector is not under tension when the mount is adjusted or the unit is removed. Excess length is better coiled and secured under the dashboard than bunched behind the mirror, where it can rattle against the glass.
Over the first weeks, a few observations are worth making. Cabin heat can soften adhesive clips, so a cable that sat flush in spring may droop by midsummer. Listen for new buzzes or ticks over rough pavement, which often point to a loose section touching hard plastic. Watch for the camera restarting or losing power, which can indicate a strained connector or a plug working loose in the socket. A rear camera adds a longer run along the roofline and through the tailgate or trunk hinge area, where repeated flexing demands extra slack.
Limits and Next Steps
Neat routing has limits that depend on the vehicle. Some headliners fit tightly against the glass, some pillar covers use clips or tethers designed to break or stay attached in a specific way, and some cars pack sensors, antennas, or heating elements around the mirror. If trim resists gentle pressure, forcing it risks broken clips and rattles that are harder to fix than a visible wire. In those cases, a slightly more exposed route held with discreet clips along the trim edge is a reasonable compromise.
Certain tasks are better left to a professional installer or dealer. Hardwiring for parking mode involves the vehicle's electrical system and may affect battery drain, so the kit's low-voltage cutoff and the chosen circuit deserve careful attention. Anything requiring removal of airbag-marked trim or work near pillar airbags is worth a second opinion if the service information is not at hand. It is also sensible to check local rules on windshield-mounted devices, since permitted positions differ by state. After any change, a quick recheck of visibility, controls, and seals confirms the result.