How to Replace Brake Rotors and Pads
The Short Answer
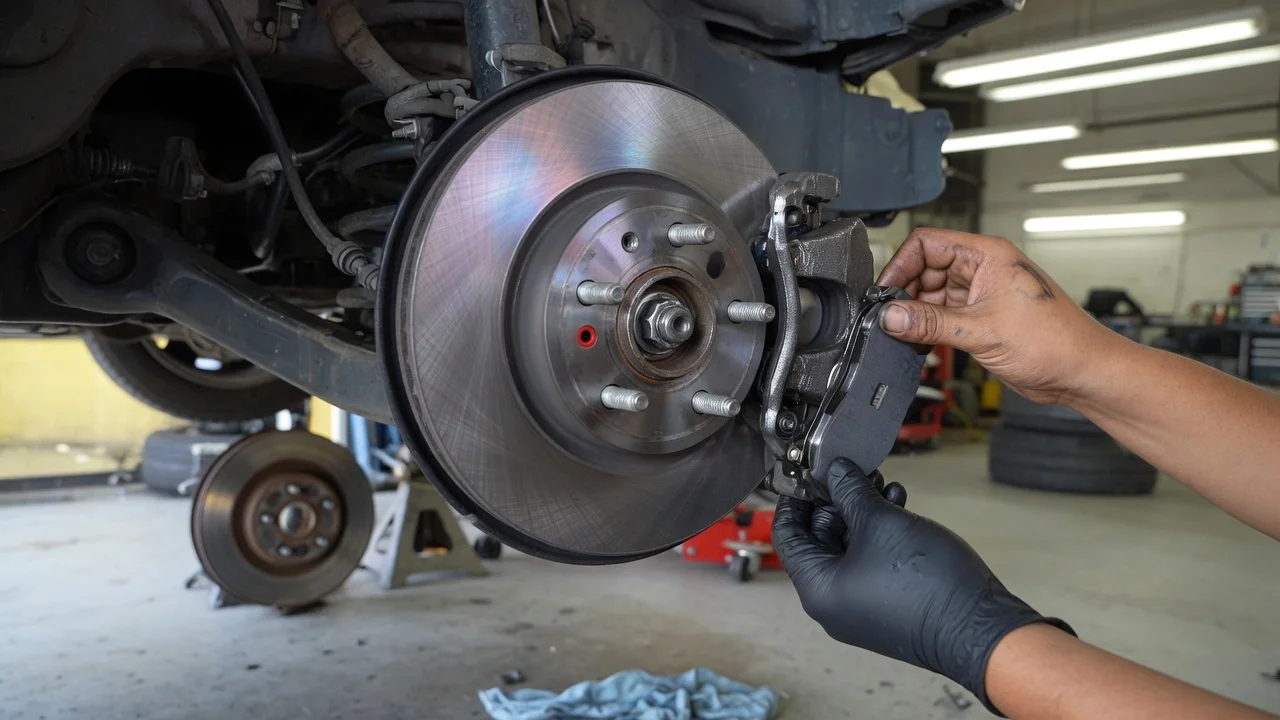
To replace brake rotors and pads, you secure the vehicle on stands, remove the wheel, unbolt the caliper and its mounting bracket, swap the old rotor and pads for new ones, retract the caliper piston, reassemble everything to the manufacturer's torque specifications, and then restore pedal pressure and bed in the new pads before normal driving. The rotor (also called a brake disc) is the metal disc that turns with the wheel. The pads are the friction blocks that the caliper squeezes against the rotor to slow the car.
Several conditions change how the job is done. Brakes are always serviced in pairs across an axle, so both front wheels or both rear wheels get new parts at the same time. Rear brakes with a parking brake built into the caliper may need the piston wound back rather than pushed. Vehicles with an electronic parking brake usually need a service mode, often activated with a scan tool, before the rear pistons can be retracted. Some vehicles use a separate drum-style parking brake inside the rear rotor hub. The exact procedure, fastener sizes and torque values depend on your make, model, model year and brake package, so confirm them in the service information for your specific vehicle.
Do You Need New Rotors or Just Pads?
Pads wear faster than rotors, so pads alone are sometimes enough. A rotor needs replacing if it is thinner than the minimum thickness the manufacturer specifies, which is often stamped on the rotor itself. It also needs replacing if it shows deep grooves, cracks, heat damage or warping that causes a pulsing brake pedal. Many owners replace rotors and pads together because new pads seat best on a fresh, flat surface, and because some modern rotors are thin enough that resurfacing would take them below minimum thickness. If you are unsure, measure the rotor with a micrometer and compare the reading against the specification for your vehicle.
When to Stop and Use a Qualified Technician
Brakes are safety-critical, so leave the job to a qualified technician if any of the following apply:
You do not have a torque wrench, jack stands or access to the correct specifications for your vehicle. The vehicle has an electronic parking brake and you cannot activate its service mode. A brake hose is cracked, swollen or leaking, or brake fluid is leaking at the caliper. The caliper piston will not retract, is seized, or the caliper slides do not move freely. You find damage to the wheel bearing, hub, suspension or brake lines. The brake warning light stays on, or the pedal feels soft or sinks after the work is finished.
Tools and Parts
New rotors and pads that match your vehicle's exact brake package, bought as an axle set; New hardware such as abutment clips and anti-rattle springs, if not included with the pads; Floor jack and properly rated jack stands; wheel chocks; Lug wrench and a torque wrench; Sockets and wrenches sized for your caliper and bracket bolts; C-clamp or piston compression tool; rear wind-back tool if your caliper requires it; Wire brush and brake cleaner; High-temperature brake lubricant for slide pins and pad contact points; Thread-locking compound, if your service information calls for it on bracket bolts; Wire or a bungee cord to support the caliper; Gloves and eye protection; Scan tool, if your vehicle has an electronic parking brake
Brake dust can be harmful to breathe. Clean components with brake cleaner instead of blowing dust off with compressed air.
Step-by-Step: Replacing Rotors and Brake Pads
1) Prepare and Secure the Vehicle
Park on level, solid ground. Engage the parking brake if you are working on the front axle, and chock the wheels on the axle you are not lifting. Loosen the lug nuts slightly while the wheel is still on the ground. Lift the vehicle at the jacking points listed in the owner's manual, then lower it onto jack stands. Never work under or beside a vehicle supported only by a jack. If you are working on rear brakes with an electronic parking brake, put the system into service mode before you go further.
2) Check the Brake Fluid Reservoir
Open the hood and look at the brake fluid level. When you push the caliper piston back, fluid returns to the reservoir. If the reservoir is full, it can overflow. Remove a small amount of fluid if needed. Brake fluid damages paint, so wipe up spills right away.
3) Remove the Wheel and Inspect
Remove the lug nuts and the wheel. Before you take anything apart, look over the brake hose, caliper and rotor. Note how the pads and clips are installed, and take a photo if it helps. If you find a leaking or damaged hose, stop here.
4) Remove the Caliper
Remove the caliper guide-pin bolts, which on most designs are on the back of the caliper. Lift the caliper off the pads. Hang it from the suspension with wire or a bungee cord. Do not let it hang by the brake hose, and do not twist the hose. Do not press the brake pedal while the caliper is off, because the piston can be pushed out of its bore.
5) Remove the Pads and Caliper Bracket
Take out the old pads and their clips. Unbolt the caliper mounting bracket, which holds the caliper assembly to the steering knuckle or hub carrier. These bolts are often very tight and may have thread-locking compound on them.
6) Remove the Old Rotor
Remove any retaining screw holding the rotor to the hub. Pull the rotor off. If rust has seized it to the hub, penetrating oil and a few firm taps with a rubber or dead-blow mallet around the hat section usually free it. Some vehicles have a rotor pressed or bolted behind the hub, which takes more disassembly. In that case, follow the service information or have a technician do the job.
7) Clean the Hub and Prepare the New Rotor
Use a wire brush to remove rust and scale from the hub face where the rotor sits. Any debris left here can make the new rotor run out of true, which causes pedal pulsation. Most new rotors come with a protective coating. Clean it off with brake cleaner unless the manufacturer says to leave it on. Fit the new rotor and reinstall the retaining screw if your vehicle has one. Some technicians check runout with a dial indicator at this point. Measure it if you have the tool and a specification to compare against.
8) Reinstall the Bracket and Service the Slide Pins
Bolt the caliper bracket back on and torque the bolts to the manufacturer's specification. Apply thread-locker first if your service information requires it. Remove the slide pins, clean them, check that their rubber boots are intact, and lubricate them with high-temperature brake lubricant. The caliper must slide freely. A sticking slide pin causes uneven pad wear.
9) Fit the New Hardware and Pads
Install the new abutment clips. Apply a thin film of brake lubricant where the pad ears touch the clips, and on the pad backing plates if the pad maker recommends it. Keep lubricant off the friction material and the rotor surface. Fit the pads in the same positions as the originals. Some pads include a wear indicator, which is usually a small metal tab, and it must sit in the position the pad maker specifies.
10) Retract the Caliper Piston
The new pads and rotor are thicker than the worn ones, so the piston needs to go back into its bore. On most front calipers, press it straight back with a C-clamp or piston tool, using an old pad to spread the force. On rear calipers with an integrated mechanical parking brake, the piston usually has to be turned and pushed at the same time with a wind-back tool. Forcing it straight back can damage the caliper. On electronic parking brake systems, the motor must be retracted through service mode first. If the piston will not move, stop. A seized caliper needs repair or replacement. Watch the fluid reservoir while you work.
11) Reinstall the Caliper and Wheel
Fit the caliper over the new pads and tighten the guide-pin bolts to specification. Refit the wheel and snug the lug nuts in a star pattern. Lower the vehicle, then torque the lug nuts to the manufacturer's value with a torque wrench. Repeat the same steps on the other side of the axle.
12) Restore Pedal Pressure
Before you start or move the vehicle, sit in the driver's seat and pump the brake pedal until it feels firm. The first several presses will go further than normal while the pistons move out against the new pads. Check the fluid reservoir and top it up to the correct level with the fluid type listed for your vehicle. If you used a service mode for the electronic parking brake, exit it as the procedure directs.
Completion Check and Bedding In
Before regular driving, confirm the following:
The brake pedal is firm and does not slowly sink under steady pressure. No brake warning lights are on. The fluid level is correct and there are no leaks at the calipers or hoses. All caliper, bracket and lug fasteners have been torqued to specification. The wheels spin freely by hand without heavy dragging (light pad contact is normal). The parking brake holds the vehicle.
New pads and rotors need bedding in. This means a series of controlled stops that lays down an even layer of pad material on the rotor and gives smooth, consistent braking. Procedures vary by pad compound, so follow the pad maker's instructions. Do the stops in a safe, legal place with no traffic behind you. Generally, avoid hard or prolonged braking during the early period, and do not hold the brakes on hard while they are very hot. If you notice pulling, grinding, pulsation or a soft pedal after the job, have the brakes inspected before you continue driving.
Limits of This Guide
This guide describes a typical floating-caliper disc brake layout, which many passenger cars and light trucks use. It does not supply torque values, minimum rotor thickness figures, runout limits or bedding-in schedules, because these vary by vehicle and parts manufacturer and none were verified for a specific model here. Fixed multi-piston calipers, rotors mounted behind the hub, electronic parking brakes and some hybrid or electric vehicles with regenerative braking systems may need different steps or special tools. Before you start, get the factory service information for your exact model year, market and brake package, along with the instructions supplied with your new parts.