How to Change Windshield Wiper Blades: Remove, Install and Test Step by Step
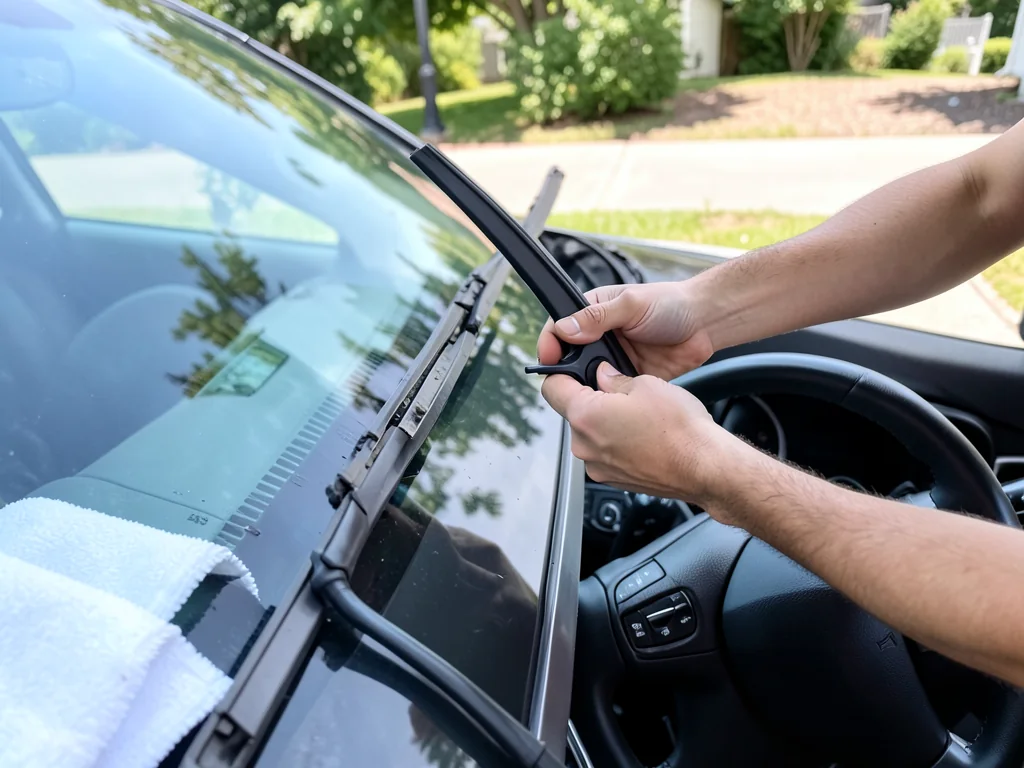
Worn wiper blades turn a rainy drive into guesswork, yet replacing them is one of the simplest jobs you can do at the curb. Once you know when blades are finished, which size and style to buy, how the connector releases from the wiper arm and how to seat and test the new blade, the whole job takes just a few minutes.
Signs Your Wiper Blades Are Due for Replacement
The clearest warning comes from the glass itself. Streaking leaves thin lines of water behind the blade, while smearing spreads a hazy film that glares under headlights at night. Skipping and chatter happen when the rubber stops flexing smoothly and hops across the windshield instead of gliding, often with a squeak or a rhythmic thump. If the blade misses an area entirely, usually at the tips or in the middle of the sweep, the rubber has probably lifted or the frame no longer presses it evenly against the curved glass.
With the car off, lift the arm and run a fingertip along the wiping edge. Healthy rubber feels soft and straight. Cracks, splits, a stiff or glossy surface, torn ends or rubber peeling away from its frame all mean it is time for new blades. Sun, heat, ice scraping and running the blades across dry glass wear rubber faster than miles do, so go by condition rather than a fixed calendar. If your vehicle has a rear wiper, check it too, since it is easy to forget until you can't see out the back window.
Choosing the Right Replacement Blades and Preparing to Work
Driver and passenger blades are often different lengths, so buying two blades of the same size can leave one side short or overlapping. Your owner's manual lists the correct sizes, a parts-store lookup by year, make and model will confirm them, and measuring the old blades end to end also works. Replacement blades come in three broad styles: conventional blades with a metal frame and pressure points, beam blades built around a single curved spring strip, and hybrids that combine a frame with a low-profile cover.
Length is only half the match. The fitting at the end of the wiper arm decides which blades will actually attach, which is why many blades come with an adapter set. Before you start, gather the new blades and their adapters, a clean towel to lay across the glass and washer fluid if the reservoir is low. Park the car, turn the ignition off and let the wipers sit in their normal rest position. Some vehicles tuck the arms under the edge of the hood and need a service position to raise them. The manual explains how to reach it.
How to Change Windshield Wiper Blades: The Basic Sequence
The job follows the same pattern on most cars. Lift the arm away from the glass, turn the blade so the connector is exposed, release the latch and slide the old blade off. Then attach the new blade, lower the arm back onto the windshield and run the wipers with washer fluid to confirm a clean sweep. Most connector types need no tools, and each blade usually takes just a few minutes, although some designs need a small flathead screwdriver to press a stubborn release tab.
Raise the arm slowly by hand until it stays upright on its own, since many arms have a detent that holds them there. Handle the arm carefully, because the spring that presses the blade against the glass is strong, and an arm that slips and snaps back can crack a windshield. A towel folded over the glass underneath is cheap insurance. Work on one side at a time so the other blade stays in place as a reference for which way the blade faces and how its connector locks in.
Removing the Old Blade: Releasing Common Connector Styles
The J-hook arm, which curls back on itself at the tip, is the most common design. With the arm raised, turn the blade so it sits at a right angle to the arm. This exposes the small plastic connector inside the hook. Press the release tab on that connector, then slide the blade down toward the base of the arm and out through the open end of the hook. If it resists, the tab usually has not been pressed all the way, and pressing more firmly generally works without forcing the arm.
Pin-type arms use a small pin that passes through the blade, and bayonet arms use a straight, flat end that locks into a slot. Both usually require pressing a tab or clip before the blade pulls free. Many beam blades use pinch tabs or a push button, and once released the blade slides straight off. Take a photo of the attachment before pulling, and never force a blade that won't come loose, since a bent arm wipes poorly. Once the blade is off, keep the bare arm supported, because its metal tip can chip glass.
Installing the New Blade: Seating, Locking and Testing
Open the new blade's package and compare the included adapters with the end of the arm. The right one should match its shape and width exactly, and some blades come with the most common adapter already installed. Slide the blade onto the hook or pin until it clicks, then give it a gentle tug to make sure it cannot slide loose. Check that the rubber edge will rest flat against the glass and that a curved beam blade follows the curve of the windshield, then ease the arm down rather than letting it drop.
Test the wipers before you drive. Spray washer fluid and let the wipers make several passes. Watch for a full, even sweep, quiet operation and glass left clear rather than striped. If a blade chatters or lifts away, turn off the wipers, check that the connector is fully latched and re-seat the blade. New rubber sometimes needs a wet wipe or two to settle in. If streaks continue after that, the cause is more often road film or wax on the windshield, or a bent arm, than a bad blade.
Common Mistakes and When to Get Help
Most problems after a blade change come from a few avoidable mistakes. Buying the wrong length, or swapping the driver and passenger blades so the longer one ends up on the shorter arm, can leave unwiped gaps or let a blade hit the windshield trim. Forgetting the adapter can leave a blade that seems attached but works loose at speed. The most expensive mistake is letting a bare arm drop onto the glass, where the spring can slam the metal tip down hard enough to chip or crack the windshield.
If a correctly installed blade still lifts at highway speed, drags or misses part of the glass, the arm itself may be weak or bent, and a shop can check its spring tension and alignment. If an arm won't lift, the connector looks unfamiliar or the arms sit under the hood and need a service position, the owner's manual or a parts counter can confirm the procedure for your model. Between changes, keep the windshield clean and the washer reservoir full, since wiping wet, grit-free glass helps new blades last longer.