Finding engine oil leaks
The direct answer
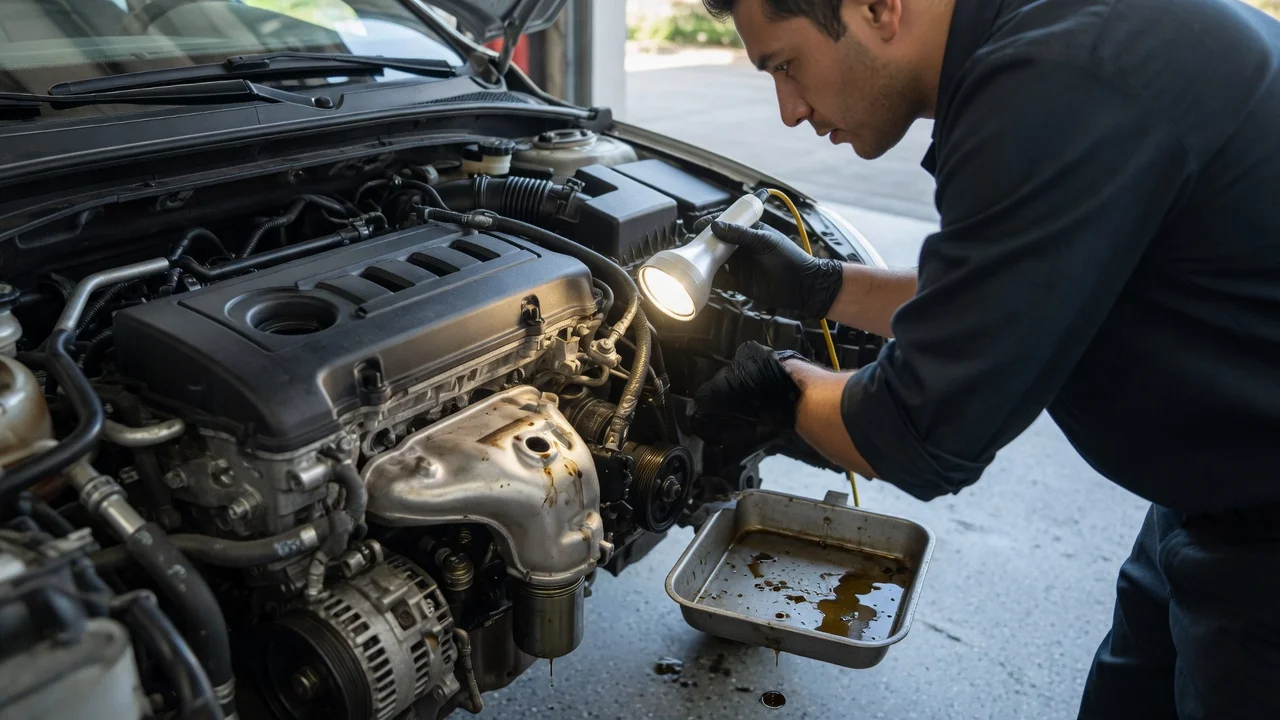
Finding an engine oil leak means identifying that the fluid is engine oil, then tracing it to the highest wet point on the engine or related plumbing rather than treating the lowest drip as the source. Oil travels with gravity, airflow, and belt splash, so a stain on the oil pan, subframe, or driveway is often runoff from a gasket, seal, filter, cooler line, or cover higher up.
The practical sequence is: confirm the fluid, clean or dry the area, run the engine under the conditions that produce the leak, and inspect from the top of the engine downward and from the front rearward. Stop at the uppermost fresh oil film. That point is the leak origin until a second independent source is proven.
Scope that changes the answer
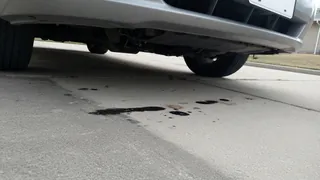
“Engine oil leak” is not the same as every dark stain under a vehicle. Automatic transmission fluid, power-steering fluid, gear oil, and some dampers can look similar when mixed with dirt. Coolant is usually thinner and may be brightly dyed, but mixed residue on a dirty engine can still confuse a first look. Fuel wetting is typically sharper-smelling and evaporates faster than oil. If the fluid is not engine oil, chasing valve covers or the oil pan will not fix it.
Layout also matters. A transverse four-cylinder, a longitudinal V-engine, a dry-sump setup, an engine with an oil cooler or turbocharger, and a hybrid with a different undertray all route oil and hide leaks differently. Common leak sites listed below are typical on many gasoline and diesel engines; they are not a universal map for every model year, engine family, or market. Use the actual covers, seals, filter, cooler, and drain hardware on that vehicle.
Confirm it is engine oil
Fresh engine oil is usually amber to brown, slightly viscous, and leaves a greasy film that does not dry to a hard crust. Used oil darkens. On paper or cardboard it spreads slowly compared with coolant or washer fluid. It typically does not have the sweet smell associated with some coolants or the sharp petroleum smell of gasoline.
Check the engine oil level on the dipstick or electronic display after the vehicle has been parked as the manufacturer specifies. A falling level with no visible exhaust smoke supports an external leak; burning oil can also lower the level without a drip.
Smell and feel a fresh sample from the leak, then compare it with oil on the dipstick from the same engine. Matching color, thickness, and odor is stronger evidence than color alone.
Note where the drip lands relative to the engine, transmission, and steering rack. Position under the vehicle is a clue, not a diagnosis.
If the level is stable and the residue is only old, dusty film, the leak may be inactive. Active leaks re-wet the same path after cleaning.
Why the lowest wet spot is often misleading
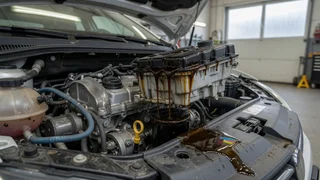
Oil follows the easiest downhill path along the block, pan rails, bellhousing, and splash shields. Cooling fans, belts, and road air can throw it sideways onto the inner fender or undertray. A rear main seal leak can appear at the bottom of the bellhousing. A valve-cover or cam-cover leak can run down the head and look like a pan gasket failure. A leaking oil-filter housing or cooler line can wet the entire side of the engine.
Trace the wet path uphill until the film starts. The origin is where dry metal or a dry gasket edge meets a fresh, local wetness. If two separate wet origins exist, treat them as two leaks.
Prepare the engine so the source can be seen
A dirty engine hides the start of a leak. Degrease the suspected area, or at least wipe it dry, then let the surface stand long enough that leftover cleaner is gone. Cardboard or a clean drain pan under the parked vehicle can show a new drip pattern after a drive. Avoid flooding electrical connectors, the alternator, and open air intakes while cleaning.
After cleaning, reproduce the leak. Some seepage appears only after a hot soak, only at idle, or only after highway speed. Park, then inspect while the engine is still warm enough for oil to flow, using care around exhaust parts and cooling fans. A second inspection after the engine has sat overnight can show slow seepage that does not drip while running.
Inspection order that usually finds the source
Work from easy, common service points to hidden seals. Look for fresh oil, not just staining. Pay attention to the upper edge of each wet patch.
Oil filler cap, dipstick tube, and any oil-cap O-ring or grommet. A loose cap or damaged seal can mist oil over the top of the engine.
Valve cover or cam cover gasket, cover bolts, and spark-plug-tube or injector-tube seals on engines that use them. Oil here often runs down the head and onto the exhaust or timing cover.
Oil filter, filter housing, drain-back valve area, and the filter cap O-ring on cartridge housings. A filter that is not fully seated, a pinched O-ring, or a housing seam leak can look like a major gasket failure after one drive.
Oil pan drain plug, pan gasket or RTV seam, and pan-to-block joint. Confirm the plug washer or seal is present and that the wetness starts at the pan rail rather than arriving from above.
Timing cover, front crankshaft seal, and camshaft or balance-shaft seals at the front of the engine. Belt or chain splash can throw this oil widely.
Oil cooler, cooler adapter, and rubber or metal oil lines, including turbocharger feed and return lines when a turbo is fitted. Cracked hose, weeping fitting, or cooler-core seepage often wets the inner fender or undertray.
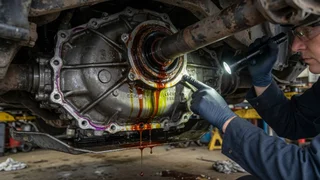
Rear main crankshaft seal and the engine-to-transmission joint. Oil at the bottom of the bellhousing, especially toward the engine side of the joint, points here; transmission fluid at the same joint is a different system.
Positive crankcase ventilation (PCV) plumbing, oil separators, and cam-cover breathers. A blocked or split hose can push oil out of gaskets that would otherwise hold, or leak oil at the hose itself.
Sensors and sending units threaded into oil galleries, including oil-pressure switches. A small fitting leak can run along a harness or the block.
On engines with a ladder frame, structural oil pan, or upper and lower pans, inspect every pan split. On engines with a timing-chain cassette or front-mounted oil pump, include those cover joints. Skip parts the vehicle does not have.
Aids when the path is still unclear
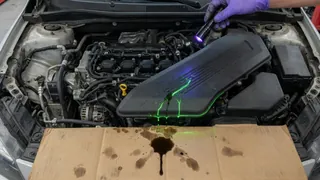
A clean sheet of cardboard under a parked vehicle maps drip location after a known drive. White powder or talc dusted on a cleaned, dry joint can show a new wet track after a short run. Ultraviolet (UV) dye added to the crankcase, used with a UV lamp and yellow glasses, can mark fresh oil among old dirt; follow the dye product’s mixing and running instructions and do not treat dye as proof until it appears at a specific joint.
A borescope helps behind exhaust manifolds, under intake runners, and around the rear of the engine where a mirror cannot reach. Pressure-testing the cooling system is useful only to rule coolant out; it does not locate oil leaks. Crankcase pressure that is abnormally high can force oil past several gaskets at once. If multiple unrelated joints seep after a PCV or separator problem, fix ventilation before replacing every gasket.
What a leak is not
Assembly sealer smear, residual oil from a recent filter change, and overfill misting from the breather can look like a failed gasket. An overfilled crankcase can push oil out of seals that are still intact. Condensation or light surface rust streaks are not oil. A wet clutch housing on some manual transmissions can be gear oil or engine oil; identify the fluid before replacing a rear main seal.
Smoke from the exhaust, blue-tinged tailpipe residue, or fouled spark plugs can mean oil is entering the combustion chamber through rings, valve guides, or a turbo seal. That is consumption, which may occur with or without an external leak. External leak finding still starts at the outside of the engine.
When the source stays uncertain
If cleaning, a hot run, and uphill tracing still leave several wet joints, record which joints re-wet first and whether the leak is a drip, a mist, or a seep. Mist at the front often points to a rotating seal. A drip that appears only after shutdown often points to a cover gasket or cooler hose that seeps when pressure falls and heat remains. A leak that appears only on one bank of a V-engine should be traced on that bank rather than assumed to be the pan.
Vehicle-specific torque, sealant, gasket type, and whether a seal is serviceable from below are not universal. Those details belong to the service information for that engine. The identification method above still applies: confirm oil, clean, reproduce, and take the highest fresh wet point as the leak.