Driveshaft Repair: Assessing Damage and Repair Options
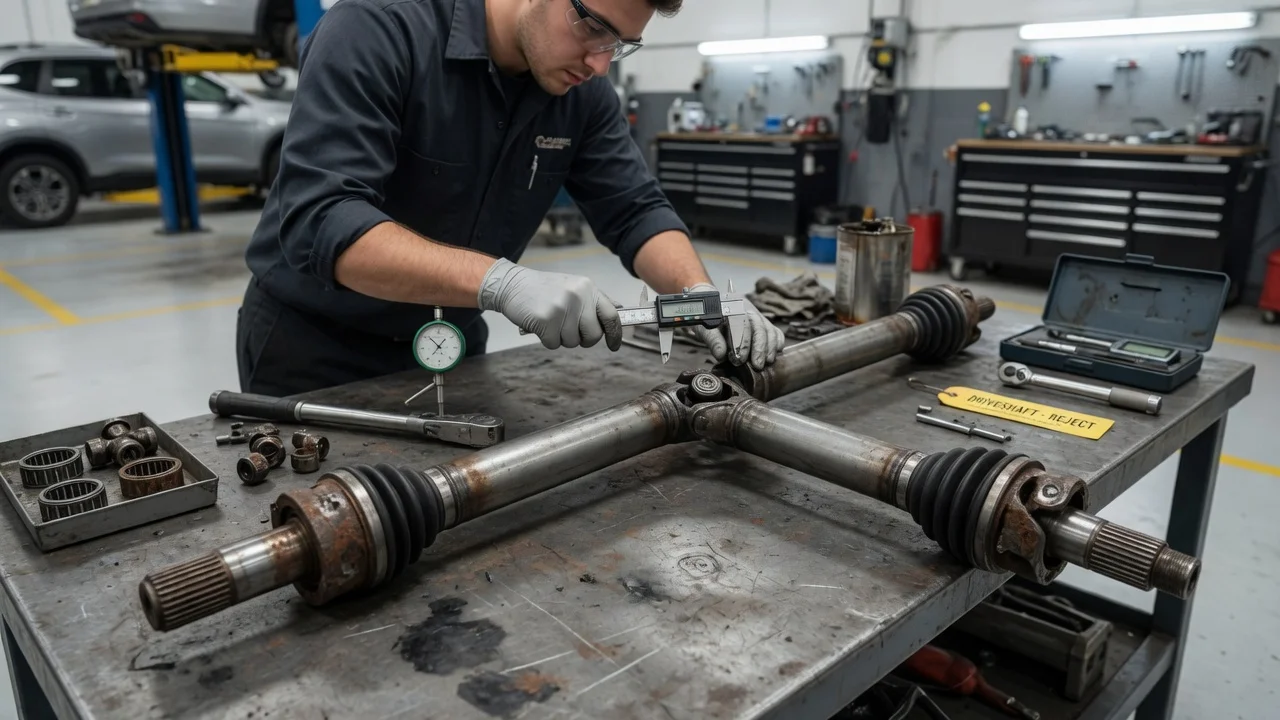
A vibration, clunk or whine from under the vehicle often points owners toward the driveshaft, but several other components cause similar symptoms. A driveshaft repair makes sense only after the fault is confirmed and its extent is understood. This guide explains how to tell a genuine driveshaft defect from similar problems. It also covers how your vehicle configuration shapes the repair scope, which options suit which kinds of damage, what the work requires and how to confirm the result afterward.
Confirm the fault before repair
Symptoms commonly linked to a failing driveshaft include vibration that changes with road speed, a clunk when shifting between drive and reverse or pulling away from a stop, a rhythmic squeak that follows wheel rotation, and grease flung around the underbody. None of these symptoms proves a driveshaft fault. Out-of-balance wheels, uneven tire wear, worn engine or transmission mounts, wheel bearings, axle shafts and differential faults can produce very similar complaints. Before anyone lifts the vehicle, note when the symptom appears: at what speed, under acceleration or coasting, while turning, and whether the engine is cold or warm. That record narrows the list of suspects considerably.
Confirmation comes from a physical inspection with the vehicle safely supported. A mechanic checks universal joints and constant velocity joints for play by twisting and lifting the shaft against its yokes and flanges. The inspection also looks for: • torn boots, missing balance weights, dents or bends in the tube; • rust trails at joint caps; • a worn center support bearing on two-piece shafts; • loose flange fasteners; • slip yoke wear and leaks at the transmission, transfer case or differential seals; If vibration is the main complaint and nothing visible is wrong, the shaft's runout can be measured. Driveline angles can be checked against manufacturer specifications. These measurements help separate a shaft defect from a mounting or balance issue. The strongest evidence is a road test that reproduces the symptom, followed by a second inspection.
Define the repair scope
Driveshaft layouts vary widely: • Rear-wheel-drive vehicles may use a one-piece shaft or a two-piece shaft with a center support bearing. • Four-wheel-drive and all-wheel-drive vehicles add a front shaft and a transfer case or power transfer unit. • Depending on the design, a shaft may use cross-type U-joints, CV joints or flexible rubber couplings, and some joints are staked in place rather than serviceable. • Front-wheel-drive cars use half shafts instead of a conventional propeller shaft. Because of these differences, the right fix for one vehicle is not automatically right for another. This holds even within the same model, since the driveline can change across years, engines or drivetrain options.
Start with the exact vehicle configuration: model year, drivetrain, transmission and any options that change the driveline. Next, review the service history. Earlier joint replacements, a lift kit or lowered suspension, regular towing and off-road use all affect wear and can explain repeat failures. Then record how far the damage extends. A single worn joint is a different job from a bent tube or from a failed center bearing combined with a dry joint. It is also different from damage that has spread to a pinion seal or transmission output bushing. Defining the scope this way avoids paying for a complete shaft when one part has failed. It also avoids fixing a single part when the root cause lies elsewhere.
Compare repair options
Adjustment is the least invasive option. It fits cases where the shaft itself is sound but its installation is not. Examples include loose flange bolts, a center bearing support that has shifted, or driveline angles altered by a suspension change. These can be corrected by tightening to specification or by realigning or shimming according to the manufacturer procedure. Adjustment does nothing for a joint that is already worn, so the inspection must confirm that the components are otherwise in good condition.
Component repair replaces only the worn parts. These can include U-joints, a center support bearing, a flexible coupling, a CV joint or boot, or a slip yoke. It is appropriate when the tube is straight, the yokes are undamaged and the joints can be serviced on that design. Component repair restores function but cannot correct a bent tube or an existing imbalance. Full replacement with a new or remanufactured assembly suits other cases: a damaged tube, non-serviceable joints, or several worn components at once. Replacing the shaft solves the shaft as a whole. It does not solve related problems with mounts, angles or the differential.
Specialist driveline service covers rebuilding a shaft with new tubing, changing its length after vehicle modifications, and dynamic balancing. This work requires equipment that most owners and many general shops do not have. The cost of driveshaft repair follows from several factors: • the option chosen; • the shaft design and parts availability; • labor time for your layout; • whether seals, mounts or other related parts also need work; An itemized quote that separates these elements is easier to compare between shops than a single total.
Requirements and limits
Safe driveshaft work starts with proper support. Use a lift or rated jack stands on level ground, chock the wheels, and make sure the vehicle cannot roll once the shaft is disconnected. On four-wheel-drive and all-wheel-drive vehicles, check how the transfer case mode affects the driveline before removal. Mark the shaft's position relative to its flanges and yokes so it can go back in the same orientation and balance is preserved. Service information for the specific vehicle is essential. It gives fastener torque values, notes whether bolts are single-use, and specifies joint phasing and lubrication requirements. Shafts can be heavy, and two-piece assemblies are awkward to handle, so plan for support during removal and installation.
Some work has clear limits: • Replacing cross-type U-joints requires a press or a suitable joint tool and correct seating of the retaining clips. Staked joints may not be serviceable at all. • Straightening, balancing and length changes belong to a driveline specialist. • If damage extends into the transmission, transfer case or differential, the job goes beyond driveshaft repair. Owners comfortable with basic inspection can often spot obvious problems. The repair itself should follow the factory procedure for that vehicle rather than a generic method.
Verify the outcome
After the repair, confirm that every fastener is torqued to specification. Joints with grease fittings should be lubricated as the service information directs. Then road test the vehicle under the conditions where the original symptom appeared: accelerating, coasting, shifting between drive and reverse, and cruising at steady speeds. The vibration, clunk or noise should be gone, not just reduced. Inspect the vehicle again after the drive to check for seal leaks, looseness or new signs of contact.
Record what was found, which parts were replaced with their part numbers, the torque specifications applied, and the road test results. That record becomes part of the service history and makes the next inspection quicker. For follow-up care, such as greasing serviceable joints, follow the maintenance schedule for your vehicle and operating conditions rather than a universal interval.
If the symptom returns or never fully disappears, avoid replacing more parts on guesswork. Recheck the original diagnosis, starting with tire and wheel balance, mounts, driveline angles, wheel bearings, and differential and transmission components. Vibration that continues after a straight, balanced shaft is installed may point to an angle problem or another rotating part. A specialist with balancing and measurement equipment can find the cause by measurement instead of trial and error.