How to Identify a Driveshaft Yoke for Repair
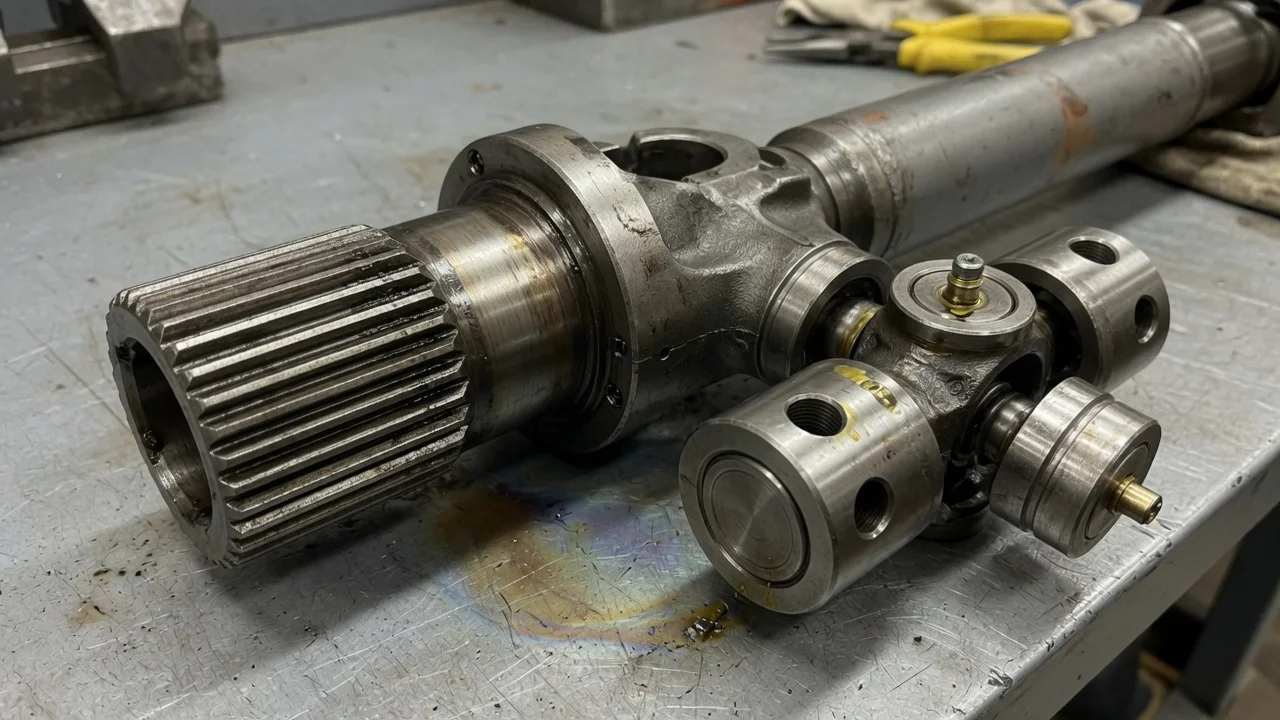
A worn or damaged driveshaft yoke can cause clunks, vibration and fluid leaks, but failing U-joints, worn mounts and driveline angle problems cause the same symptoms. Before ordering parts, confirm that the yoke is actually at fault, work out which yoke on the driveshaft is involved, and match the replacement to your exact vehicle configuration. This guide covers that process from a mechanic's point of view, including when the job belongs with a driveline specialist.
Driveshaft yoke types and where they sit
Most rear-wheel-drive and four-wheel-drive driveshafts use several yokes, and each has a different job. A slip yoke has internal splines and slides onto the transmission or transfer case output shaft. This lets the driveshaft change length as the suspension moves, and its smooth outer surface rides inside the tailshaft seal. An end yoke is splined onto the differential pinion or a transfer case output and held by a nut. A tube yoke is welded to the end of the driveshaft tube. Some vehicles use a flange yoke that bolts to a companion flange instead, and some use a double cardan or constant-velocity joint at one end of the shaft.
Identifying the correct part depends on details that vary from vehicle to vehicle. These include the universal joint series or bearing cap size and the span between the yoke ears. Bearing cap retention also varies: inside or outside snap rings, straps, U-bolts or bolted plates. Spline count and diameter matter too, and for slip yokes, so do seal surface diameter and overall length. Two driveshaft yokes that look nearly identical can differ in any of these respects, so appearance alone is not a reliable way to choose a replacement.
Confirm the fault before repair
Several symptoms can point toward a yoke: a clunk when shifting into drive or reverse, a vibration that builds with road speed, a squeak that follows wheel rotation, or fluid dripping at the rear of the transmission. However, each of these can also come from a dry or worn U-joint, an out-of-balance driveshaft, incorrect driveline angles, worn engine or transmission mounts, differential wear, or tire and wheel problems. Replacing a yoke based on symptoms alone often leaves the real cause in place.
With the vehicle safely supported, inspect each yoke closely. Some findings point to the yoke itself: • Cracked or bent ears. • Bearing cap bores that have become oval or let the caps shift. • Deep grooves or rust pitting on a slip yoke's seal surface. • Worn or twisted splines with noticeable rotational play. • An end yoke that moves on the pinion. Play inside the U-joint, where the cross moves within its bearing caps, points to the joint rather than the yoke. Also check for missing balance weights, a dented tube, or caked mud and undercoating, since any of these can mimic yoke-related vibration.
Define the repair scope
Note which yoke is damaged and where it sits: at the transmission, transfer case, center support bearing or axle. Then record the vehicle configuration, including drivetrain layout, transmission and transfer case, axle, and whether the driveshaft is one-piece or two-piece. The same model can use different driveshafts depending on these options, so a part that fits one version may not fit another. Look for part numbers stamped or cast into the yoke. Also review the service history for earlier driveshaft work, aftermarket parts or modifications, because a previously replaced component may no longer match the manufacturer specifications.
Measure rather than guess. With calipers, check the bearing cap diameter and the span across the ears, and count the splines. On a slip yoke, also measure the seal surface diameter and length. Next, judge how far the damage extends. A worn seal surface affects only the slip yoke and its seal, while elongated ear bores mean the yoke can no longer hold a U-joint properly. If a damaged yoke has been in service for a while, also inspect the mating output shaft, the pinion splines, the seals and the joints at both ends.
Compare repair options
If the yoke bores, ears and splines are sound and only the U-joint is worn, replacing the joint may be enough. A slip yoke with a scored seal surface or worn splines is usually replaced as a unit, together with a new tailshaft seal. That repair does not correct a worn output shaft, a worn transmission bushing, or the driveline angle problem that may have accelerated the wear. Operating conditions such as towing, off-road use or a modified suspension height can also shorten component life, and a new yoke does not change them.
An end yoke at the differential is held by the pinion nut, and on many axles that nut is part of the pinion bearing preload setup. Removing and reinstalling it without the correct procedure can damage the bearings, so follow the service information closely or have a specialist do it. A tube yoke is welded to the shaft. Replacing it means cutting, welding, straightening and balancing, which is driveshaft shop work. Replacing the complete driveshaft assembly avoids that rebuild, but the new assembly must match the original length, joint type and configuration. It also does not address worn mounts or incorrect angles.
Requirements and limits
Basic requirements include a lift or properly rated jack stands on solid ground, wheel chocks, and the correct pullers or a U-joint press. Do not hammer on yokes. On many rear-drive vehicles, once the driveshaft is removed the transmission's park position no longer holds the wheels, so secure the vehicle by other means. Before disassembly, mark the driveshaft's position relative to each yoke and flange to preserve balance and joint phasing. Expect some fluid loss when a slip yoke is pulled from the transmission, and be prepared to contain it.
Use the service information for your exact vehicle. It supplies fastener torque values, rules on reusing nuts, bolts and straps, the pinion nut procedure, and lubricant requirements; do not rely on generic figures. Greasable joints should be serviced according to the maintenance schedule. Welding tube yokes, balancing driveshafts, setting pinion preload and phasing two-piece shafts generally require specialist equipment and experience. If you lack the tools or data for any of these steps, have the work done by a qualified shop.
Verify the outcome
After installation, confirm that all fasteners and retainers are installed and tightened as specified. Check transmission, transfer case and differential fluid levels where the service information calls for it. Road test across the speeds and gear changes where the original symptoms appeared, including engagement into drive and reverse and gentle acceleration and coasting. After the drive, inspect the slip yoke seal area and the pinion seal for fresh leaks, and recheck the joints for play.
Record the replaced parts, part numbers, measurements, mileage and the torque values you used, so the service history shows exactly what was done. If vibration or clunking continues, do not assume the new part is defective. Instead, the original diagnosis may have been incomplete. Next steps include checking driveline angles, mount condition, driveshaft balance and runout, and the differential and wheels. A driveline specialist can measure these and pinpoint what the inspection missed.