DIY Windshield Chip and Crack Repair: What a Kit Can and Cannot Fix
The short answer
A windshield repair kit can fix small, fresh chips and some very short cracks in the outer layer of the glass. Fixed well, the damage becomes less visible and less likely to spread. A kit is not suitable for long cracks, damage at the edge of the glass, breaks that reach the inner layer, or damage in the driver's direct line of sight or in front of a camera or sensor. In those cases, professional repair or replacement is the safer route. Whether a kit will work depends on the type, size, location and age of the damage, so check those before buying one.
No product test data was supplied for this guide. The guidance below explains how these kits generally work and how to judge whether your damage suits one. It does not rank specific brands. That includes products sold through retail chains, such as the Visbella kit stocked by MR DIY. For any particular kit, its packaging and instructions are the authority on size limits, cure method and compatibility.
How a windshield repair kit works
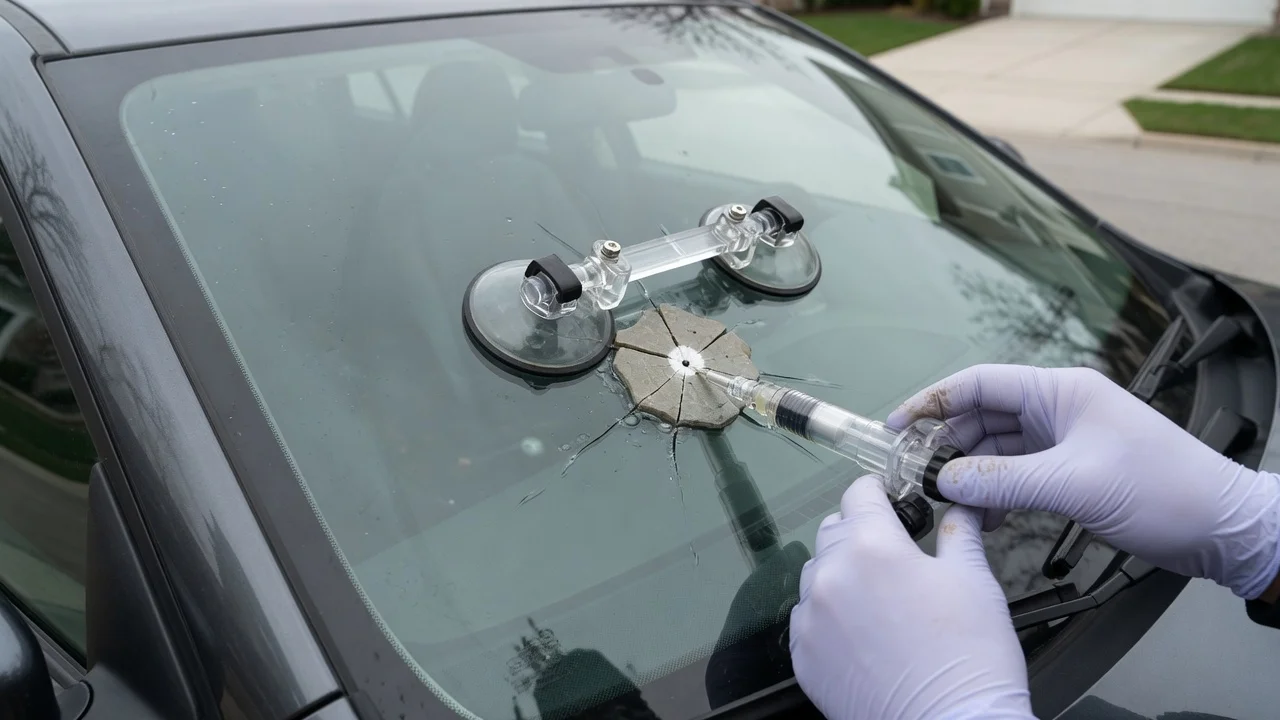
Most car windshields are laminated glass: two sheets of glass bonded to a plastic interlayer. A stone chip usually damages only the outer sheet, leaving a small air-filled cavity, sometimes with fine cracks radiating from it. A repair kit fills that cavity with a clear, low-viscosity resin, meaning a thin liquid that can flow into narrow gaps. Once cured, the resin bonds the damaged glass, reduces the light-scattering air gap that makes a chip visible, and helps stop the damage from growing.
Kits sold as a windshield repair system typically include:
Repair resin, usually in a small bottle or syringe; An applicator or pedestal that seals over the chip, held by suction cups or an adhesive disc; A plunger or syringe for creating pressure and sometimes vacuum, to push resin in and draw air out; Clear curing strips or film to hold resin in place while it hardens; A single-edge razor blade for scraping off excess cured resin; Sometimes a small pick for clearing loose glass from the impact point
Most consumer kits use resin that cures under ultraviolet light, either from sunlight or a UV lamp. Some kits include a lamp and some rely on the sun, so check which method yours requires before you start.
Is your damage suitable for DIY repair?
This is the decision that matters most. Use the table as a general guide, then confirm against the size limits printed on your kit, because these vary between products.
Damage type | What it looks like | DIY kit suitability; Bullseye | A round, cone-shaped chip, often with a dark ring | Usually a good candidate if small and clean; Star break | A central impact point with short cracks radiating outward | Often repairable; the legs can be harder to fill fully; Combination break | A bullseye with radiating cracks | Often repairable if within kit size limits; Short single crack | A thin line, usually starting from a chip | Only if very short and the kit explicitly supports cracks; Long crack | A line extending well across the glass | Not a DIY job; usually needs professional assessment or replacement; Edge crack | A crack reaching or starting at the edge of the glass | Not suitable; edges are structurally sensitive; Inner-layer or through damage | Damage felt or seen on the inside surface | Not suitable for a kit
Beyond damage type, check these four things:
Location: avoid DIY repair in the driver's primary field of view. Even a good repair can leave slight distortion, and rules on damage and repairs in this area differ by country and region. Sensors and cameras: many recent vehicles mount driver-assistance cameras or rain and light sensors behind the windshield. Damage in that zone should be assessed professionally, because the glass may need replacing and the camera may need recalibration afterward. Which models have these systems depends on model year, trim and market. Age and contamination: fresh damage repairs best. Dirt, water and car-wash residue that work into a chip over time can stop resin bonding and leave a visible mark. Covering a new chip with clear tape until you can repair it helps keep it clean. Size: kits usually state a maximum chip diameter and crack length. If your damage exceeds the stated limit, don't attempt it with that kit.
How to repair a windshield chip with a kit
The exact steps differ between kits, so treat this as an overview and follow your kit's instructions where they differ.
1) Work in shade on cool, dry glass. Resin can start curing early in direct sun, and very hot or very cold glass can make the damage spread. Don't aim the heater or defroster at the area during repair. 2) Clean the area around the chip and let it dry fully. Gently remove loose glass fragments from the impact point with the pick or a pin. Avoid pressing hard, which can extend cracks. 3) Fit the applicator or pedestal so its opening is centred over the impact point and fully sealed against the glass. 4) Add the specified amount of resin to the applicator. 5) Use the plunger or syringe as directed. Many kits alternate pressure and vacuum to force resin in and draw out trapped air. Give this the time the instructions allow, and look for the chip becoming clearer as air is replaced. 6) Remove the applicator, put a drop of resin on the impact point, and lay a curing strip over it, smoothing out air bubbles. 7) Cure the resin with sunlight or a UV lamp for the time stated by the kit. Overcast weather can lengthen curing time. 8) Once cured, remove the strip and scrape off excess resin with the razor blade held at a low angle, leaving the surface flush with the glass.
What results to expect
A successful DIY repair usually makes a chip much less noticeable, but it rarely makes it disappear. A faint outline or small spot at the impact point is common. The main practical aim is to stop the chip from turning into a crack, which is a frequent cause of windshield replacement.
The results depend on the damage and on technique. A clean, recent bullseye tends to respond best. Star breaks with long legs, old contaminated chips and cracks are less predictable. No measured success rates or comparative test results were supplied for this guide, so no specific kit's performance can be quantified here.
Limits and risks of a DIY repair
A failed or partial fill can't easily be undone. Cured resin in the break may limit what a professional can do later, so if you're unsure, have a professional assess it first. Pressing too hard on the glass, or sudden temperature changes during the repair, can make a chip spread into a crack. A kit can't restore a windshield that has a long crack, edge damage or inner-layer damage. Driving with that damage may be unsafe, and inspection and roadworthiness rules on cracks vary by market. If the glass sits in front of a driver-assistance camera, replacement may require recalibration. A home kit doesn't address this.
DIY kit or professional repair?
A kit is a reasonable choice for a small, fresh, clean chip outside the driver's direct view and away from any sensors, when you're willing to accept a repair that is improved but not invisible. Choose a professional repair if the damage is near the size limit, in the driver's sightline or a sensor zone, older and contaminated, or any type of crack beyond the shortest kind. Choose replacement for long cracks, edge cracks or damage through to the inner layer. Some insurance policies cover professional chip repair, but terms vary by insurer and market, so check your policy before paying for either option.