How to Diagnose a Brake Booster Vacuum Leak
The short answer
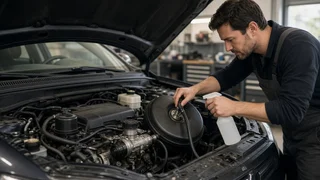
A vacuum brake booster uses engine vacuum, or vacuum from a separate pump, to multiply the force your foot puts on the brake pedal. When vacuum leaks out of the booster, its supply hose or its check valve, you lose part or all of that assist. The usual signs are a firm or hard pedal, a hissing sound near the pedal, and sometimes a rough or changing idle when you press the brakes. To diagnose the leak, confirm that assist is actually weak, then check the vacuum supply, the check valve and finally the booster itself, in that order, because the cheaper and more accessible parts fail often and are easy to rule out.
Brakes are a safety system. If the pedal is hard, sinks to the floor, or the vehicle does not stop normally, do not keep driving it to test the symptom. A booster fault makes the car harder to stop, but a pedal that sinks or feels spongy usually points to a hydraulic problem instead, which is a different and often more urgent issue.
First, confirm your vehicle uses a vacuum booster
Not every vehicle has a vacuum booster, so the type of assist system changes the whole diagnosis. Check what your specific model, engine and model year use before going further.
Vacuum booster fed by engine intake vacuum: common on many gasoline engines. A large round canister sits between the brake pedal pushrod and the master cylinder, with a rubber hose running to the intake manifold. Vacuum booster fed by a vacuum pump: used on most diesel engines and on some turbocharged or direct-injection gasoline engines that do not produce enough intake vacuum. The pump may be mechanical (driven by the engine) or electric. Hydraulic boost, often called hydro-boost: uses pressure from the power steering system rather than vacuum. A vacuum leak cannot cause its symptoms. Electric or integrated brake boosters: used on many hybrids, electric vehicles and some newer conventional vehicles. These are diagnosed through the vehicle's electronic systems, not with vacuum tests.
The rest of this guide applies to vacuum boosters, whether the vacuum comes from the intake manifold or a pump.
Separate the symptom from the cause
Several different faults can produce a hard pedal or a hiss, so it helps to note exactly what you observe before deciding what is wrong. The table below links common observations to the causes they suggest and the check that tells them apart.
Observation | Possible causes | Check that helps distinguish them; Hard pedal with engine running | Leaking booster hose, failed check valve, internal booster leak, low engine or pump vacuum | Booster function test, then vacuum supply check at the booster hose; Assist is fine at first but gone after the car sits | Check valve not holding, slow booster diaphragm leak | Vacuum hold test with engine off; Hissing at the pedal when pressing or releasing | Torn booster diaphragm, leaking pushrod seal or air valve inside the booster | Listen at the pedal area with the engine running while applying the brake; Idle drops, stumbles or rises when the brake is pressed | Internal booster leak pulling unmetered air into the engine | Watch idle while applying the brake; pinch-off or plug test of the booster hose; Lean fuel mixture codes | Any vacuum leak, including but not limited to the booster circuit | Smoke test or isolating the booster circuit; Brake fluid inside the booster or hose | Leaking rear seal of the master cylinder | Inspect booster port and vacuum hose for fluid
Check 1: Confirm the booster is losing assist
This simple function test shows whether the booster is providing assist at all. With the engine off, press the brake pedal several times until it feels firm; this uses up any stored vacuum. Hold steady, moderate pressure on the pedal and start the engine. On a working system, the pedal should move down slightly as vacuum builds and the booster starts helping.
If the pedal drops, the booster is receiving vacuum and responding, although it could still have a slow leak. If the pedal does not move at all, either vacuum is not reaching the booster or the booster cannot use it. This test does not tell you which, so the next checks narrow it down.
Check 2: Vacuum hold test
Run the engine for a minute or two to build vacuum, then shut it off. Wait a short while, then press the brake pedal a few times. A sealed booster and check valve should give assisted, easier pedal feel for the first one or more applications before the pedal becomes firm. If the pedal is hard on the very first press, the stored vacuum escaped, which points to a check valve that is not sealing or a leak in the booster or its seals.
A variation is to hold the pedal down with the engine running, shut the engine off while still holding it, and wait. If the pedal slowly rises against your foot, vacuum is leaking from the booster while it is applied, which is consistent with a diaphragm or internal valve leak.
Check 3: Inspect the vacuum hose and fittings
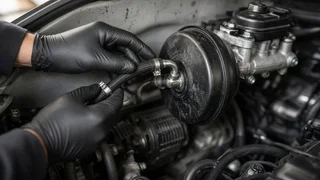
Follow the hose from the booster to its vacuum source. Look and feel for cracks, splits, soft or collapsed sections, oil-soaked rubber, loose clamps, and a hose that is loose on its fitting or on the booster grommet. The rubber grommet where the check valve plugs into the booster shell can harden or crack and leak. On some vehicles the hose includes plastic sections, inline filters or tee fittings to other systems, and any of these can crack.
With the engine idling, a hissing sound near the hose or grommet strongly suggests a leak at that point. A visible defect in the hose explains the symptom only if the rest of the circuit checks out; replace the faulty piece and repeat the function and hold tests to confirm the repair.
Check 4: Test the check valve
The check valve is a one-way valve, usually located where the hose enters the booster or inline in the hose. It lets air be drawn out of the booster but stops it from flowing back in, so the booster keeps its vacuum when engine vacuum drops, such as under heavy acceleration or after shutdown.
Remove the valve, or the hose section containing it, and check flow in both directions. Air should pass when you try to draw it from the booster side toward the engine side, and it should be blocked in the opposite direction. Be cautious about putting your mouth on parts that may contain fuel vapor or oil; a hand vacuum pump is a cleaner way to test. A valve that flows both ways, or that will not flow at all, is faulty. Rattling or oil inside the valve can also indicate trouble upstream.
Check 5: Measure the vacuum supply
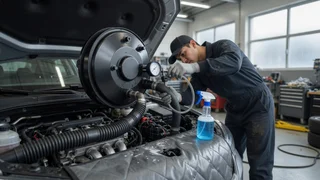
A booster cannot work properly if it is not receiving enough vacuum. Connect a vacuum gauge to the booster supply hose, using a tee if needed, and read it with the engine at a warm, steady idle. Compare the reading with the specification for your engine in the service information; normal values vary with engine design, altitude and operating condition, so a general number from another vehicle is not reliable.
If vacuum at the booster is low but vacuum directly at the intake or pump is normal, the restriction or leak is in the hose, fittings or check valve. If vacuum is low at the source too, the problem is not the booster: engine-side causes include other vacuum leaks, valve timing or mechanical issues, or, on pump-equipped vehicles, a weak or failed vacuum pump or a problem with its drive or power supply. If supply vacuum is normal and steady yet assist is still poor, attention shifts to the booster itself.
Check 6: Look for an internal booster leak
An internal leak usually comes from a torn diaphragm or a leaking air valve or pushrod seal. Signs include a hiss heard from under the dash when the pedal moves, a pedal that rises during the hold test, and an idle that dips or stumbles when the brakes are applied, because air is being drawn through the booster into the engine.
To confirm, watch idle speed or the vacuum gauge while slowly applying the brake. A noticeable, repeatable change that does not occur when the booster hose is temporarily isolated and plugged at the intake points to the booster. Isolate it only briefly with the vehicle stationary, since braking assist is lost while the hose is plugged. Boosters are generally replaced as an assembly rather than repaired.
Check 7: Rule out a leaking master cylinder seal
The master cylinder bolts to the front of the booster. If its rear seal leaks, brake fluid can be drawn into the booster, damaging the diaphragm and sometimes appearing in the vacuum hose or at the booster mounting flange. Look for fluid or dampness where the master cylinder meets the booster, and for a falling fluid level in the reservoir with no visible leaks at the wheels. If fluid is present, the master cylinder likely needs attention, and the booster may need replacement too, since fluid contamination can degrade its internal rubber parts.
How to read fault codes in this situation
On many vehicles, a booster vacuum leak does not set a brake-specific code. Instead, the engine computer may detect unmetered air and set general lean-condition codes, such as the generic OBD-II (On-Board Diagnostics, second generation) codes P0171 or P0174, which mean the system is running too lean on bank 1 or bank 2. These codes indicate that extra air is entering or that fuel delivery is low; they do not identify the brake booster as the source. Any vacuum leak, a dirty airflow sensor or a fuel supply problem can set them.
Some vehicles, particularly those with vacuum pumps or advanced braking systems, have a brake booster vacuum or pressure sensor and can set codes related to booster vacuum or the sensor circuit. The exact codes, their definitions and the conditions under which they set depend on the manufacturer, model and model year. Look up the definition and test procedure for your vehicle, and treat any code as a starting point for the checks above rather than proof that the booster or sensor must be replaced. A sensor code, for example, can come from wiring or connector faults as easily as from a real vacuum loss.
Suggested order of checks
1) Confirm the vehicle uses a vacuum booster and not hydraulic or electric assist. 2) Perform the engine-start function test to confirm whether assist is present. 3) Run the vacuum hold test to see whether stored vacuum is retained. 4) Inspect the supply hose, clamps, fittings and booster grommet, listening for hissing at idle. 5) Test the check valve for one-way flow. 6) Measure vacuum at the booster hose and compare it with the specification and with vacuum at the source. 7) If supply is good, look for internal booster leakage through noise, pedal behavior and idle changes. 8) Inspect the master cylinder to booster joint for brake fluid. 9) Recheck pedal feel and repeat the function and hold tests after any repair.
When to get professional help
If checks point to an internal booster leak, a master cylinder problem, a vacuum pump fault or an electronic booster code, consider having a qualified technician confirm the diagnosis and perform the repair. Booster and master cylinder replacement often involves working under the dashboard, disconnecting brake lines and bleeding the hydraulic system, and an incorrect installation or pushrod adjustment can affect how the brakes release and apply. Whatever the cause, the vehicle should stop normally and the pedal should feel consistent before it goes back into regular use.