How to Fix a Leaking Coolant Reservoir
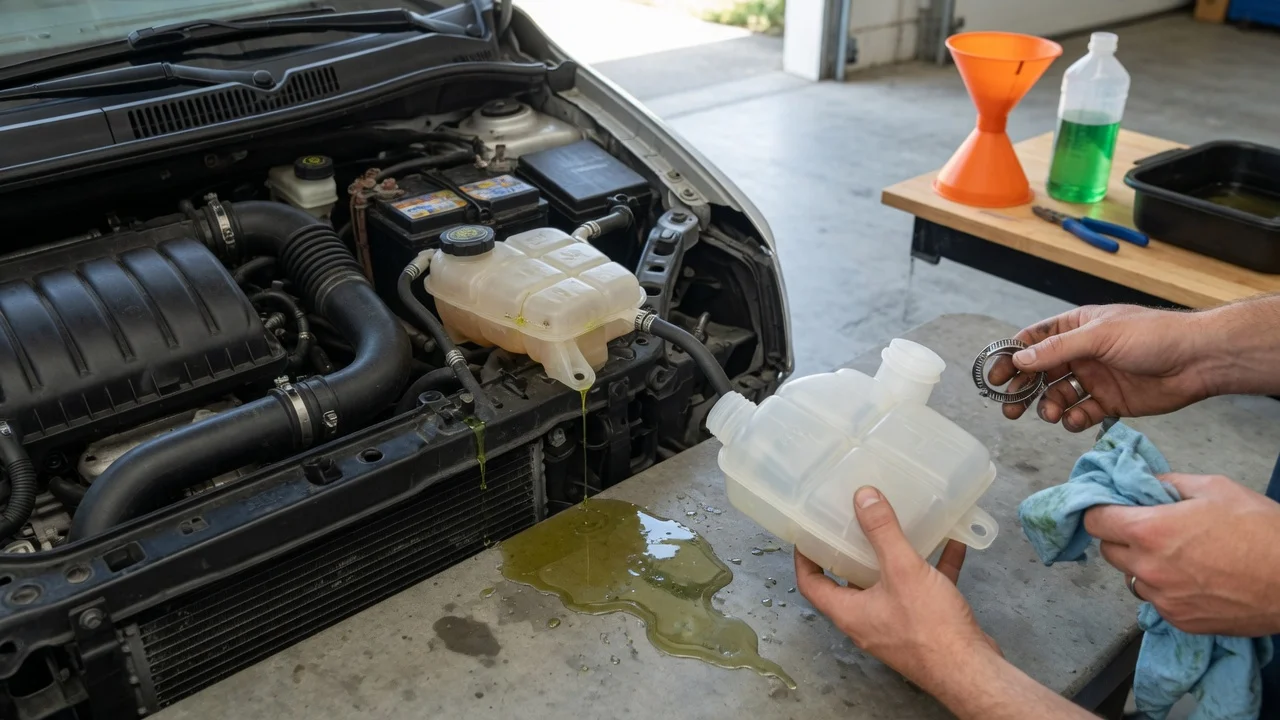
Identify the symptom and environment
A coolant reservoir leak usually appears as a puddle or drip under the reservoir area, a low coolant level, or a sweet smell after driving. Make a note of exactly when the leak is visible: after a hot shutoff, while the engine is running, or only after the system has cooled. Record the vehicle make and model, the reservoir location, and whether the leak is coming from the tank body, cap, hose connection, or the ground below it.
Isolate where the fault occurs
Wait for the engine and coolant to cool before touching anything near the cooling system. Clean the outside of the reservoir and the surrounding area with a rag, then inspect the tank, cap, hose, and clamp in good light. Look for cracks, whitish stains, wet seams, swollen hose ends, or a loose or corroded clamp. If you can safely run the engine briefly and watch from a distance, note whether the drip appears at a fitting or farther down a hose.
Compare the cap and reservoir opening while the system is cool. A cap that is cross-threaded, has a damaged seal, or no longer clicks into place may release pressure and coolant. If the coolant level is slightly above the maximum mark after a recent overfill, the loss may be from expansion overflow rather than a damaged part.
Try reversible fixes in order
Inspect the cap first. Remove it only when the engine is cool, check the seal for cuts or flattening, then reinstall it straight and tighten it to its stop. Tighten or reposition hose clamps. If a spring clamp or screw clamp is loose at the reservoir neck or hose end, place it back over the fitting and snug it without overtightening. Check the overflow or vent hose for kinks, cracks, or contact with a sharp edge. A blocked vent can build pressure and push coolant out through a weak point. Wipe everything dry, then observe the area again without adding new parts.
If the reservoir has a removable hose and the end is damaged, straighten or trim the end slightly as a temporary measure only if that does not leave the hose too short. Do not use kitchen tape, household adhesives, or barrier sprays as a permanent coolant repair. If the tank body itself is cracked, replacing the reservoir is the appropriate fix rather than patching a pressurized coolant leak.
Confirm the result
Run the engine until the cooling system reaches normal operating temperature, then shut it off and place a clean piece of cardboard under the reservoir area. Check for new drops after the engine cools. Recheck the cold coolant level against the minimum and maximum marks, and top up only with the type specified for the vehicle if needed. A dry area and a stable level after one or two heat cycles indicate the leak is controlled.
If the problem remains
Keep a note of whether the leak follows the tank, cap, hose, or clamp, and whether it appears only when hot, only when cold, or only after refilling. Do not treat a wet reservoir as proof of failed internal engine parts. If the leak continues after the cap, clamps, and hoses have been checked, the reservoir or its fittings should be inspected by a repair shop for replacement or system pressure testing.