Choosing a motorcycle solo seat and mounting kit
The short answer
Choose a solo seat and mounting kit as a matched pair, confirmed for your exact motorcycle: make, model, model year and, where it applies, frame or chassis generation and market version. The seat must suit your body and your riding, and the kit must attach it securely without interfering with the rear suspension, fender, wiring, battery or fuel tank. Fitment is the condition that most often changes the answer. A seat that looks right in photos can be wrong for your bike if the frame, tank shape or fender mounting changed between model years or regional versions, even when the model name stayed the same.
A second condition matters just as much. A solo seat usually means giving up passenger carrying, at least until the original seat and passenger parts are refitted. If you sometimes ride two-up, plan for a reversible installation or look at seats with a removable passenger pad instead.
What a solo seat and mounting kit actually are
A solo seat is a single-rider seat. It replaces a dual seat or covers the area where a passenger would sit. On many cruisers and custom bikes, the factory seat is designed for two people and uses the bike's existing mounting points. A solo seat may need different attachment hardware, which is where the mounting kit comes in.
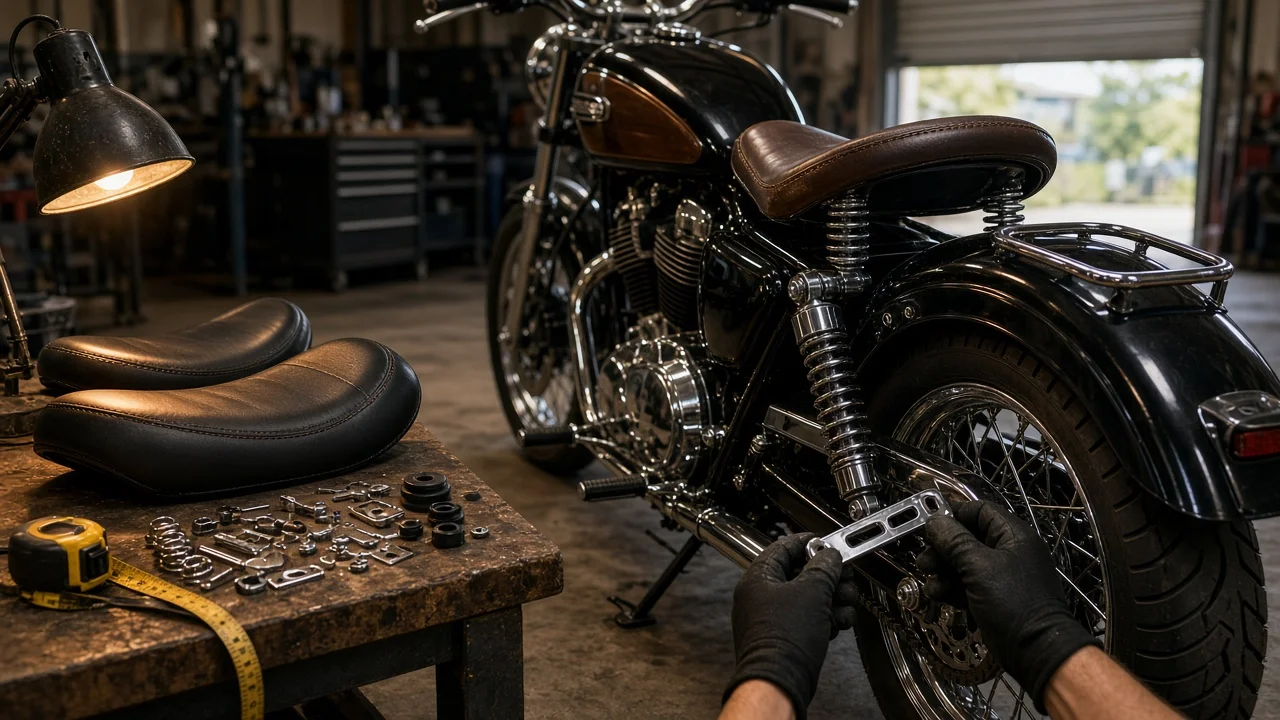
A mounting kit is the set of brackets, hinges, springs, bolts and sometimes a tank or fender tab that holds the seat in place. Some seats include the kit. Others sell it separately, and some kits are sold for a family of bikes with model-specific parts. Check which pieces are actually in the box before comparing listings.
On sport bikes, the term "solo seat" often refers to a solo seat cowl. That is a cover that replaces the passenger pad on the tail section, not a separate rider seat. If that is what you are after, fitment still depends on the exact model and year, but the rider-comfort considerations below apply less.
Common mounting approaches
Mount type | How it works | What to weigh; Fixed bracket | Seat bolts to the frame or factory mounts at a set position | Simple and stable; little give, so comfort depends on the seat foam and the bike's suspension; Spring mount | Seat pivots at the front and rests on springs at the rear | Adds some cushioning and a classic look; spring rate should suit rider weight, and the seat pan must clear the rear tire and fender through full suspension travel; Hinge or pivot kit | Front hinge lets the seat tilt up for access underneath | Makes battery or wiring access easier; check hinge quality and that latching is secure; Quick-release or tool-less | Seat attaches with a latch or knob for fast removal | Convenient for swapping between solo and two-up setups; confirm it is designed for your frame rather than adapted
Which approach fits best depends on your bike's frame design and how you ride. Treat the descriptions above as general behavior, not measured performance. No test data comparing specific products was available for this guide.
Checks before you buy
1) Exact fitment
Confirm the make, model, model year and, where relevant, the frame or chassis generation and market version listed by the seat and kit maker. Check whether fitment changes with fuel tank size or shape, rear fender style, or factory accessories already on the bike. If the seller lists a range of years, ask whether any years within that range need different hardware. Treat unresolved differences, such as a mid-year change or an import model, as a reason to ask the manufacturer before ordering.
2) Rider fit
A solo seat can change your seating position. It may sit lower, higher, further forward or further back than the stock seat. That affects how easily you can put your feet down at a stop, how far you reach to the handlebars, and how much your knees bend to reach the footpegs or forward controls. Where the maker publishes seat height or rider-position changes, compare them with your stock setup. Where they do not, ask, because these figures were not available here and differ by product and bike.
Width and shape: a narrower seat front can help you reach the ground, while a wider rear pocket may support you better on longer rides. Foam and padding: thin, firm seats suit short rides and a low look; longer rides generally call for more support. Rider weight: on spring mounts, check that the springs are offered for your weight range or can be swapped. Riding style: commuting, short urban trips and long-distance touring place different demands on the same seat.
3) Clearance and mechanical interference
With the suspension compressed, the seat pan, springs and brackets must not contact the rear tire or fender. Check that the battery, fuses, wiring harness and any electronics under the stock seat can still be reached and are not pinched. Confirm the seat front sits correctly against the fuel tank without stressing tank mounts or paint. Make sure lights, license plate mounts and turn signals are unaffected.
4) Passenger accommodation and reversibility
Removing the passenger seat ends two-up riding unless you can reverse the change. If carrying a passenger is part of your plans, look for a kit that bolts on without cutting or welding and keep the stock seat, passenger pegs and hardware. Some solo seats are offered with a matching passenger pad that attaches to the fender. Check its fitment as carefully as the main seat. Rules on passenger seating and footrests vary by US state, so check your state's requirements before carrying anyone on a modified bike.
5) Installation work and warranty
Kits range from bolt-on parts that use factory mounting points to installations that need drilling, frame tabs or welding. Permanent modifications affect resale and may affect warranty coverage on the parts involved. Read the installation instructions before buying to see what tools and steps are required. If you plan to have a shop do the work, ask for a quote based on the specific seat and kit.
6) Total cost
No verified prices were available for this guide, so compare the full cost yourself. That can include the seat, the mounting kit if sold separately, springs or hardware upgrades, a passenger pad, shipping, and installation labor. When comparing quotes, note the date, that the price is in US dollars, and exactly what is included. For used parts, an asking price in a listing is not the same as what similar parts have actually sold for. Completed sales give a better sense of value.
7) Condition, if buying used
Inspect the cover for cracks, tears, fading and separated stitching. Press the foam for flattened or crumbling areas. Check the seat pan for cracks, bending and rust, especially around mounting holes. Check springs, hinges and brackets for corrosion, wear or modification. Confirm all mounting hardware is included, since a missing bracket can make a used seat unusable on your bike. Ask which bike the seat came off, including model year, to confirm it matches yours.
8) Seller terms
Fitment surprises are common with seats, so check the return policy before ordering. In particular, check whether you can return a seat after test-fitting and whether installed or modified parts are excluded.
Information gaps to close before ordering
This guide does not include specific products, prices, seat heights, spring rates or fitment lists, because none were verified. Before buying, get the maker's fitment confirmation for your exact bike, any published change in seat height or rider position, the full list of included kit parts, and a dated, itemized price. If any of these cannot be confirmed, treat that as a reason to ask the seller directly or keep looking.