Choosing Intercooler Pipes and Piping
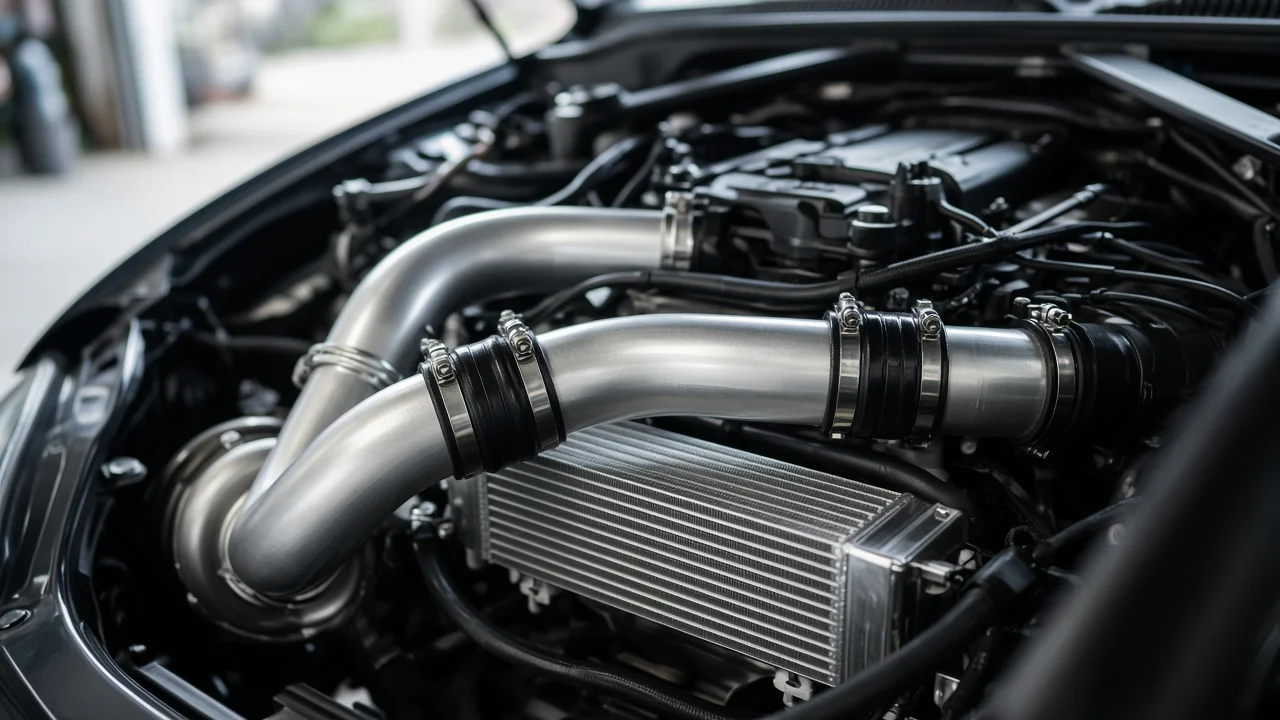
Intercooler pipes carry compressed air from the turbocharger or supercharger to the intercooler and then on to the throttle body. When one splits, blows off or collapses, the engine loses boost and drivability suffers. Choosing replacement intercooler piping means confirming the pipe is actually at fault, matching the part to your exact engine configuration, and understanding what material and coupler choices really change. This guide covers each step so your money goes to the right part.
Define the job the product must do
Start by deciding why you are shopping. Most owners fall into one of three situations: replacing a single pipe that has cracked or failed, upgrading a factory plastic or rubber section on an engine that already runs more boost, or buying an intercooler and piping kit as part of a larger build. Each calls for different parts. A stock daily driver usually needs a direct replacement that restores factory routing and sensor ports. A tuned engine may justify stronger aluminum hard pipes or reinforced silicone sections.
Separate symptom reports from verified failures before you buy anything. Power loss, a hiss or whoosh under load, a check engine light, or excess smoke on a diesel can all point to a boost leak, but they also match a failing turbo, a sticking wastegate, a faulty sensor or a vacuum leak elsewhere. Online reports that a model is known for bad charge pipes are useful leads, not proof that your vehicle has the same fault. A verified failure is something you can see or measure: a visible crack, an oil-soaked split, a collapsed hose, a loose clamp, or a leak located with a smoke or pressure test. Write down the symptom conditions, such as whether the problem appears only under hard acceleration, after the engine is hot, or in cold weather, because this helps narrow which section is leaking.
Finally, note your practical constraints: budget, whether the vehicle is still under warranty, local emissions inspection rules, and how much disassembly you are willing to do. Some pipes are reachable from above, while others require removing the bumper cover or undertray.
Check compatibility
Fitment depends on more than make and model. The same model name can use different engines across model years and trim levels, and a gasoline turbo, a diesel and a high-output variant may route charge air in completely different ways. Confirm the model year, engine code or displacement, and drivetrain where it matters, and look for the factory part number on the old intercooler pipe if it is still legible. Matching that part number, or a listing that cross-references it, is the most reliable route to a direct fit.
Next, compare the interfaces. Check inlet and outlet diameters, the connection style (quick-connect fittings with O-rings, slip-on hose ends with clamps, or beaded ends for couplers), the number and position of sensor ports for boost pressure or intake air temperature sensors, any blow-off or diverter valve flange, breather or PCV connections, and mounting brackets. A pipe that fits the intercooler but lacks the sensor boss for your engine can leave a sensor unmounted or trigger diagnostic codes. If you are also replacing the intercooler, confirm the new core's end tanks match the piping you plan to use.
Larger-than-stock aftermarket kits may need different couplers, sensor adapters or a relocated blow-off valve. Read the listed applications carefully and check them against manufacturer specifications for your vehicle instead of trusting a vague universal-fit claim.
Features that affect the choice
Material is the main trade-off. Factory charge pipes are often molded plastic, rubber hose, or a mix of both with metal sections. Plastic is light and inexpensive but can become brittle after years of heat cycles. Rubber can soften, swell or collapse when it is soaked in oil. Aluminum hard pipes resist cracking and hold their shape under boost, but every joint depends on good couplers and clamps. Silicone couplers tolerate heat and movement better than plain rubber, and their quality depends on wall thickness and reinforcement layers, which a reputable seller should state.
Treat performance claims with caution. On a stock engine, replacing a sound factory pipe with a larger one generally does not produce a meaningful power gain; the realistic benefit is durability and resistance to leaks. Bigger diameter also adds volume between the compressor and throttle, which can change how the engine responds. More useful evidence includes the stated material and wall thickness, coupler reinforcement, whether sensor ports and mounting points are included, whether clamps are supplied and what type they are, and an application list broken down by engine variant. If a seller cites test results, check whether the tested engine and tune match yours.
Smaller details matter too. Beaded pipe ends help keep couplers from blowing off, T-bolt clamps typically hold more evenly than basic worm-drive clamps on larger joints, and a durable finish helps aluminum resist corrosion in road-salt regions.
Limitations and ownership costs
Installation time varies widely by vehicle. Budget for new clamps, O-rings and couplers where applicable, because reusing hardened seals is a common cause of leaks after a repair. A light oil film inside charge pipes is normal on many turbocharged engines because of crankcase ventilation, but heavy pooling can indicate a turbo seal or ventilation problem that a new pipe will not solve. Clean residue from the system during installation so a fresh leak is easier to spot later.
Piping cannot fix a failing turbocharger, a leaking intercooler core, a bad boost or temperature sensor, or a calibration problem. On modified engines, switching to larger aftermarket piping may require tune adjustments or sensor adapters. Aftermarket parts can also affect warranty coverage or emissions compliance depending on the part and local rules, so check both before ordering.
Plan for ongoing inspection. Recheck clamp tension after the first few heat cycles, look for coupler cracks and oil weeping at routine services, and record the date, part number and failure in your service history. That record makes the next diagnosis faster and shows whether a particular section keeps failing.
Build a practical shortlist
Confirm the fault first: complete a visual inspection, run a smoke or pressure test if a leak is not obvious, and read stored diagnostic codes along with any freeze-frame data. Then compare options with a short checklist. Does the listing name your model year and engine variant, or match your factory part number? Do diameters, connection styles, sensor ports and brackets match your setup? Are the material and coupler construction clearly stated? Are clamps, O-rings and needed hardware included? How much disassembly will installation require? Will the part affect your tune, warranty or emissions status?
For a stock vehicle with one cracked or split pipe, an original or equivalent direct-fit replacement is usually the simplest and most predictable choice. For a modified engine running higher boost, a complete intercooler and piping set designed for that specific engine is often easier to get right than mixing pieces from different sources. Either way, the best choice is the part that matches your engine and fixes the failure you have actually verified.