Brake Line Repair: How to Fix a Damaged Brake Line the Right Way
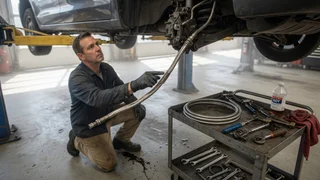
A damaged brake line is repaired by replacing tubing, not patching it. You can replace the entire line or cut out the damaged section and splice in new tubing with properly flared ends and matching union fittings. Tape, epoxy, hose clamps, and compression fittings are not acceptable repairs for a hydraulic brake circuit. If a line is leaking, the vehicle should not be driven until it is fixed. Whether the job suits a home mechanic depends on where the damage is, how corroded the rest of the system is, and whether you have the tools to make and bleed a leak-free repair.
What a Brake Line Is and How It Differs From a Brake Hose
Hard brake lines are rigid metal tubes that carry pressurized brake fluid from the master cylinder, usually through the ABS module, along the body or frame toward each wheel. Near the wheels, flexible rubber or braided brake hoses take over so the suspension and steering can move. The hoses then connect to each caliper or wheel cylinder.
The distinction matters. A hard line can be repaired by splicing in new tubing. A cracked, bulging, or leaking flexible hose is never spliced. The whole hose is replaced as a unit, using one that matches your vehicle's fittings and length.
Signs of a Damaged Brake Line and What to Check Next
Several brake symptoms overlap, so confirm a line problem before buying parts. A warning light or dashboard message is a reason to investigate, not proof that a particular part has failed.
Symptom | Possible causes | What to check | What the result suggests; Fluid level dropping in the reservoir | External leak; normal drop from pad wear | Look for wet spots or residue along lines, at fittings, hoses, and calipers; measure pad thickness | Wetness points to a leak. Dry lines plus thin pads suggests the level fell as caliper pistons extended to follow worn friction material. Soft or spongy pedal | Air in the system; a leak; a flexible hose swelling under pressure; old, moisture-laden fluid | Inspect for leaks; have a helper press the pedal while you watch the hoses; note when the fluid was last changed | A visible leak or ballooning hose needs repair. With no leak, air or degraded fluid is more likely and bleeding is the next step. Pedal slowly sinks under steady pressure | External leak; internal master cylinder leak | Hold firm pedal pressure with the engine running and look for fluid appearing anywhere | Fluid appearing externally confirms a leak. No external fluid suggests an internal master cylinder fault, which calls for professional diagnosis. Wet, oily residue near a wheel | Leaking hose, line fitting, or caliper seal; possibly a different fluid such as a shock absorber or axle seal | Trace the residue to its highest point; check its feel and smell against brake fluid | The source location identifies the failed component. Brake fluid on a tire, rotor, or pad contaminates them. Visible rust, flaking, kinks, or dents on a line | Corrosion; road debris; previous jacking or lifting damage | Inspect the full length of each line, especially at clips, bends, and over the rear axle and fuel tank | Surface rust may be cosmetic. Scaling, pitting, swelling, or crushed tubing means the line should be replaced. Vehicle pulls to one side when braking | Fluid loss to one corner; sticking caliper; contaminated pads; uneven rotor or pad wear | Check for leaks at that wheel; inspect pads and rotors against wear limits; look for a seized caliper slide or piston | A leak at one corner points to the line or hose. With no leak, the caliper, pads, or rotors are more likely.
When checking pads and rotors as part of this process, compare pad friction material and rotor thickness to the wear limits for your specific vehicle rather than a general rule of thumb. Specifications vary by model, axle, and brake package.
When to Stop Driving
Brake hydraulics are split into circuits, so a single leak may not cause total failure right away. That does not make it safe to drive. Park the vehicle and arrange a tow or roadside repair if you notice any of the following:
Brake fluid actively dripping or spraying from a line, fitting, or hose; The pedal sinking toward the floor or needing to be pumped to stop; The red brake warning light staying on with low fluid in the reservoir; A line that is visibly crushed, split, or swollen; A sudden, noticeable increase in stopping distance
Also get professional help if the pedal feels wrong but you cannot find an external leak. An internal master cylinder leak or an ABS fault requires proper diagnosis.
Repair Options: Full Line Replacement vs. Section Splice
Replacing a full line from fitting to fitting gives the cleanest result, since there are no extra connections that could leak. It is usually the better choice when the line is corroded along much of its length. It can be harder to do because original lines are often routed over the fuel tank, between the body and subframe, or through tight spaces that may require removing other parts.
Splicing replaces only the damaged section. You cut out the bad tubing, flare the remaining good ends, and join a new piece using union fittings. This approach is common when damage is localized and the rest of the line is solid. Before you splice, inspect the line on both sides of the damage. If a nearby section is also scaling or pitting, splicing into weak tubing only moves the failure point.
Tubing Materials
Coated steel: similar to many original lines, inexpensive, and strong, but it eventually corrodes, especially where road salt is used. Copper-nickel alloy: resists corrosion well and bends and flares easily by hand, which makes it popular for home repairs. It is a different material from plain copper tubing, which must never be used for brakes. Stainless steel: highly corrosion resistant, but much harder to bend and flare. It typically requires heavier-duty flaring tools and more care to seal.
Flare Types and Fittings Must Match
Brake lines seal with a formed flare on the tube end pressed into a matching seat in the fitting. The two common types are the double (inverted) flare, which many US-market domestic vehicles use, and the ISO or bubble flare, which many European and some Asian vehicles use. These types are not interchangeable. Fitting nut threads also differ, with both inch (SAE) and metric threads in use, and some vehicles mix them within the same system.
Tube diameter varies as well. A 3/16-inch line is common on many passenger vehicles, but other sizes exist, so measure the existing line or check your vehicle's specifications. A mismatch in flare type, thread, or diameter can feel tight during assembly and still leak or let go under hard braking.
Choosing a Brake Line Repair Kit
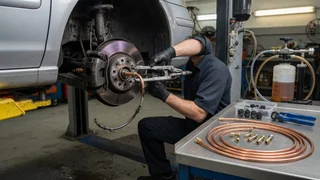
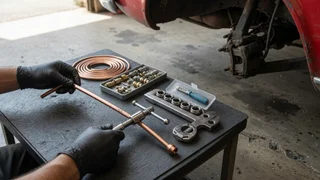
A brake line repair kit usually bundles pre-flared lengths of tubing with fitting nuts already installed, union connectors for joining sections, and sometimes a flaring tool or tubing cutter. Pre-flared lines are convenient because the factory-formed flares are generally more consistent than a first attempt with a hand tool. You still have to flare the cut ends of the original line where you splice in, unless you replace the line all the way to an existing fitting.
Kit contents and quality vary widely between brands, so check vehicle fitment and these points before buying:
Flare type matches your vehicle (double inverted or ISO bubble); Tube outside diameter matches the existing line; Fitting nut thread size and pitch match the components you are connecting to; Tubing material suits your climate and your ability to bend and flare it; Enough length to reach good, uncorroded tubing on both sides of the damage; Unions designed for brake use, not general-purpose plumbing fittings
Avoid any kit built around compression fittings for brake use. Compression fittings are not designed for the pressures and vibration of a braking system, and many inspection standards do not accept them on brake lines.
How a Proper Splice Repair Is Done
The outline below shows what a correct repair involves so you can judge whether to do it yourself. Exact procedures, torque values, and bleeding sequences depend on the vehicle and should come from model-specific service information.
Support the vehicle securely on jack stands on level ground and wear eye protection; brake fluid irritates eyes and damages paint. Locate the damage and inspect the full line to decide where to cut into sound tubing. Cut the line squarely with a tubing cutter, not a hacksaw, and deburr the inside and outside of the end. Slide the fitting nuts onto the tube in the correct direction before flaring. This step is easy to forget, and missing it means re-cutting the tube. Form the correct flare type with a proper flaring tool and inspect it for cracks, splits, or an off-center shape. Bend the new section with a tubing bender to avoid kinks, matching the original routing. Connect the sections with brake-rated unions and tighten them with a flare-nut (line) wrench to avoid rounding the nuts. Secure the line in its original clips, away from exhaust heat, sharp edges, and moving suspension or steering parts. Refill the reservoir with the brake fluid type specified for the vehicle, usually printed on the reservoir cap. Bleed the system to remove air, following the vehicle's specified sequence. Some ABS systems require a scan tool to cycle the module during bleeding. With the engine running, hold firm pedal pressure and check every new connection for weeping. Then test the brakes at low speed in a safe area before normal driving.
Brake Fluid Considerations
Use only the fluid grade your vehicle specifies. DOT 3, DOT 4, and DOT 5.1 are glycol-based. DOT 5 is silicone-based and must not be mixed with the others. Glycol-based fluid absorbs moisture from the air over time, so use fluid from a sealed container and do not reuse fluid drained from the system. If fluid gets on brake pads or rotors during the repair, clean the rotors with brake cleaner. Pads soaked with fluid generally need replacing, because the friction material cannot be reliably cleaned.
DIY or Professional Repair?
A localized splice on an accessible line is a reasonable job for an experienced home mechanic with a quality double-flare or ISO flaring tool, a tubing bender, flare-nut wrenches, and a reliable way to bleed the brakes. A shop is usually the better choice in these cases:
Corrosion affects several lines or long stretches of tubing; The damage is over the fuel tank, inside the frame, or at the ABS module; Fitting nuts are seized and likely to round off or twist the tube; The ABS system needs a scan tool for bleeding; You cannot make a consistent, crack-free flare
A brake repair that leaks under hard stops can fail when you need it most. If you have any doubt about a flare or connection, redo it or have a professional verify the work before the vehicle goes back on the road.
Preventing Future Brake Line Damage
Inspect lines and hoses whenever the vehicle is lifted for tire rotation or brake service; Rinse the underbody in winter if you drive on salted roads; Keep lines secured in their clips so they cannot rub or vibrate against the body; Use correct lift and jack points to avoid crushing lines; Replace brake fluid at the interval in your owner's manual to limit internal corrosion