Brake Line Repair: Choosing Repair Kits and Flaring Tools
What is the essential answer?
A brake line flaring tool creates the formed end on brake tubing so a flare-nut fitting can seal against a mating seat. It is the key tool for repairing or replacing lines, but it is only one part of the job: the line must be cut cleanly, deburred, fitted with the correct flare nut before flaring, and routed and fastened using the right line material and fittings for that vehicle.
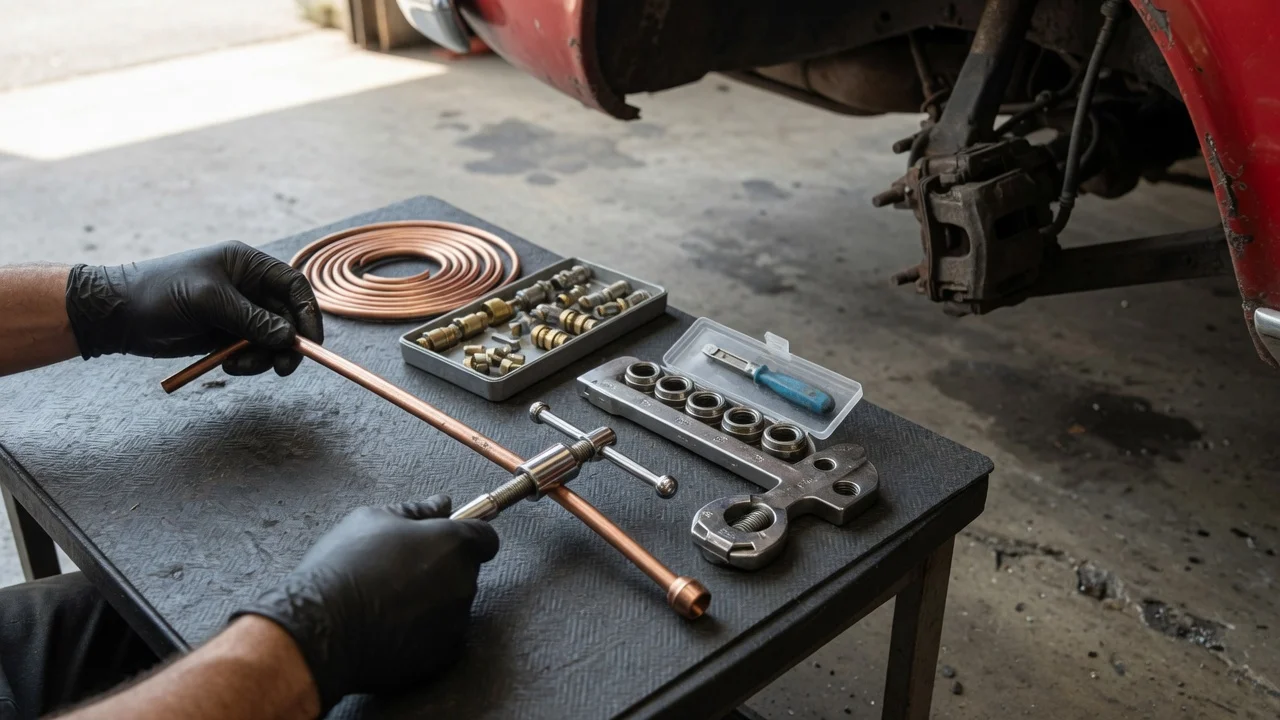
Flaring tools generally fall into handheld kits and bench or hydraulic units. Basic handheld kits can produce acceptable flares in steel, nickel-copper, and other brake tubing when used carefully, while better sets clamp the tubing more firmly and help keep the flare centered. The main choices for passenger vehicles are the double flare, which is the common inverted-flare design, and the bubble flare used on many imports. A single flare is normally not considered appropriate for automotive brake lines because it is more likely to crack under pressure.
What should you check before repairing a brake line?
Start by finding the source of the leak or damage. A wet spot on a line, a swollen flexible hose, a crushed hard line, or fluid loss near a fitting can all point to different repairs. Brake fluid is hygroscopic and can take a few days to strip paint, so the area around the wet spot should also be inspected for softened or rusted metal. A damp connection does not automatically mean the flare is bad; it may be a loose fitting, dirt on the seat, the wrong flare type, or a damaged seat in the hose, caliper, or wheel cylinder.
If the leak is at a junction and the fitting is tight, remove the connection only after cleaning it and supporting the vehicle safely. Compare the old line end with the seat before making a new line. Mixing bubble and inverted flares can prevent a reliable seal even when the fittings appear to thread together.
What hard line and fittings should you use?
Steel brake line is the typical production material and is inexpensive, but it is also harder to bend and flare cleanly by hand. Nickel-copper alloy brake line is more corrosion-resistant and easier to work with, which makes it popular for repairs, though it can cost more. Whatever material you choose, use seamless brake tubing of the correct outside diameter for the vehicle, usually 3/16 inch on many passenger cars, with some trucks or systems using 1/4 inch.
The fittings on the new line must match both the line diameter and the fitting thread and seat type. Keep the old fittings for comparison until the new parts are confirmed correct. Brake fittings should be tightened by feel to the point where they stop leaking without being overtightened, rather than being treated as a place to use maximum force.
What does a repair kit typically contain?
A brake line repair kit can mean different things. Some kits contain a flaring tool, a tubing cutter, deburring tools, and a selection of standard flare nuts in a case. Others are more like line-repair kits containing several lengths of pre-made brake line with nuts already installed, which can replace a damaged section using a union or a direct route. A third type is a universal or hand-bendable line kit with a coil or straight lengths of tubing and separate nuts that you cut, bend, and flare to length.
A pre-shaped replacement line for a specific vehicle can be the easiest option when one is available because it removes the flaring step and typically fits the original routing and clips. A universal line or hand-made replacement becomes more useful when a pre-formed line is unavailable, when the original routing is blocked by corrosion or prior repairs, or when only one section of a long line has failed.
How do you use the flaring tool correctly?
Cut the new line with a proper tubing cutter, not a hacksaw, and deburr the inside and outside edges. Slide the correct flare nut onto the line before flaring, with the threaded end facing the end being formed. Clamp the line at the height specified by the tool: the amount of tubing standing proud of the die is what controls the first and second operations on a double flare. Lubricate the flaring cone lightly, then drive it onto the tube until the first operation bottoms out. Take the pressure off, inspect the fold, and perform the second operation the same way.
If the fold is off-center, split, wavy, or too shallow, cut the end off and start again; do not install a questionable flare and expect the fitting to correct it. Practice on a scrap end with the same tubing before using your final measured length.
When should you stop and seek professional diagnosis or repair?
Do not repair a line and return the vehicle to the road if the rest of the system is not sound. Spongy pedal travel, a brake warning light, one side pulling, a soft section in a flexible hose, a damaged ABS component, or brake fluid leaking inside a drum brake all require inspection beyond the line itself. If a line failed because of widespread corrosion, the undamaged sections may be too weak to reconnect safely.
Because a brake system failure can leave a driver unable to stop safely, this is one area where uncertainty should not be worked around. If you cannot confirm that the flare type, line diameter, fitting threads, and final pedal feel are correct, the car needs professional inspection before it is driven.
How do you check the repair before driving?
After repair, bleed the affected circuit according to the vehicle procedure, refill using the brake fluid type specified for that system, and inspect every connection dry. Apply firm pressure to the brake pedal with the engine running and hold it while another person looks for weeping or a soft pedal. Then test at low speed in a safe area, gradually increasing braking effort only if the pedal remains firm and consistent with how it was before the repair. Recheck the fluid level after the first heat cycle and look again for moisture at any connection that was opened.
Which flaring tool and kit choices make practical sense?
A light handheld kit is reasonable for occasional use and soft nickel-copper line. If you expect to form more than a few steel flares, a heavier set with strong clamping, replaceable dies, and room to work under the vehicle is easier to use repeatedly. Pay attention to the tool's supported line sizes and flare types, because not every kit includes both double and bubble flare adapters.
Where possible, use a pre-formed line or a compatible repair assembly to reduce the number of hand-made flares. Regardless of the tool, buy or reuse only clean, damage-free fittings, route the new line away from exhaust and sharp edges where the original design did, and return any heat shields, retainers, or clamps to their original positions.