Brake Hose Repair: Why Replacement Is the Fix and How to Diagnose a Failing Hose
The Short Answer: A Brake Hose Is Replaced, Not Repaired
When people search for brake hose repair, the safe answer is that a damaged flexible brake hose should be replaced as a complete assembly. Tape, hose clamps, sealants, splices and other patches cannot be trusted to hold the pressure a hydraulic brake system generates during hard stops. A hose that leaks, bulges, cracks or has been chafed through is a failed part, and the correct fix is a new hose made for that vehicle, followed by bleeding the brakes.
One qualification changes the answer: the rigid metal brake lines that run along the body and frame are a different component. A corroded or damaged section of hard line can sometimes be repaired by replacing that section with proper brake tubing, correctly formed flares and matching fittings. Flexible rubber or braided hoses, which connect the hard lines to the calipers or wheel cylinders and allow the suspension and steering to move, are not repairable in that way.
Brake Hose vs. Brake Line: Knowing Which Part Failed
Most vehicles use a combination of rigid and flexible lines. The distinction matters because it determines what kind of repair is possible.
Component | Where it is | Typical failure | Accepted fix; Flexible brake hose | Short sections near each wheel, connecting body or axle lines to calipers or wheel cylinders; some rear axles use a single hose to the axle | Cracking, bulging, external leaks, chafing, internal collapse or delamination | Replace the whole hose assembly; Rigid brake line (hard line) | Metal tubing routed along the frame, body and axle | Corrosion, kinks, impact damage, leaks at fittings | Replace the line, or replace a damaged section using proper tubing, correct flares and approved fittings
Compression fittings sold for general plumbing are generally not considered acceptable for brake lines. Hard-line repairs depend on correctly formed double or ISO bubble flares that match the vehicle's existing fittings, which is why many owners leave that work to a shop with the right flaring tools.
Symptoms That Can Point to a Brake Hose Problem
Brake hoses fail in two broad ways: externally, where fluid escapes or the hose swells, and internally, where the inner lining deteriorates while the outside still looks acceptable. The symptoms differ accordingly.
Soft or spongy brake pedal, or a pedal that travels farther than normal; Pedal that slowly sinks toward the floor while held under steady pressure; Wet spots, residue or drips near a wheel, on the inside of a tire, or on the hose itself; Brake fluid level in the reservoir dropping over time; Brake warning light on the dashboard; Vehicle pulling to one side when braking; One brake dragging, a wheel that is noticeably hotter than the others after a drive, or a burning smell; Visible cracks, bulges, abrasion marks or a hose rubbing against a tire or suspension part
What Each Symptom Can Mean and What to Check Next
Many of these symptoms have more than one possible cause, so a hose should not be condemned on a single clue. The checks below help separate a hose problem from issues elsewhere in the brake system. Treat a warning light or a scan-tool code as a reason to investigate, not as proof that a particular part has failed.
Observation | Possible causes | Next check; Spongy pedal | Air in the system, a swelling hose, low fluid, a leak anywhere in the hydraulic circuit, or a master cylinder problem | Check the fluid level, inspect every hose and line for wetness, and have a helper press the pedal while you watch each hose for bulging; Pedal sinks under steady pressure | External leak, or internal leakage in the master cylinder | Look for fluid at the wheels, calipers, lines and the back of the master cylinder; no external leak points toward the master cylinder; Fluid near one wheel | Leaking hose, loose or damaged fitting, leaking caliper or wheel cylinder | Clean the area, apply the brakes several times, and see exactly where fresh fluid appears; Pulling to one side under braking | Collapsed hose restricting fluid to one side, sticking caliper, contaminated pads, uneven tire pressure, or a suspension or alignment issue | Check tire pressures, inspect pads for contamination, and compare how freely each wheel spins after braking; One wheel hot or dragging | Internally collapsed hose holding pressure in the caliper, seized caliper piston or slide pins, or a sticking parking brake | With the wheel lifted, see if it frees up when the bleeder is briefly opened; if it does, the restriction is upstream of the caliper, often the hose; Cracks or surface checking on the hose | Age and heat exposure | Bend the hose gently and look closely; cracks that open up or reach the reinforcement layer mean replacement; Brake warning light | Low fluid, parking brake engaged, worn pad sensor on some vehicles, or a system fault | Check the parking brake and fluid level first, then read any stored codes as a starting point for diagnosis
An internally collapsed hose is a classic hidden failure. The deteriorated inner lining can act like a one-way valve, letting pressure reach the caliper but slowing its release. The outside of the hose may look fine, so dragging or pulling that clears when pressure is relieved at the bleeder is an important clue.
When to Stop Driving
Brake hydraulic problems can get worse quickly. Park the vehicle and arrange for towing or professional repair if any of the following apply:
The brake pedal goes to the floor, or stopping distance has clearly increased; Fluid is actively dripping or spraying from a hose, line or fitting; A hose is visibly bulging when the brakes are applied; The reservoir is low and keeps dropping after being topped up; The red brake warning light stays on while driving; The vehicle pulls hard to one side or a wheel is dragging badly enough to overheat
Topping up the fluid can restore some pedal feel temporarily, but it does not fix a leak and is not a reason to keep driving.
What Brake Hose Replacement Involves
Replacing a hose is a common repair, but it is part of a safety-critical system. The general process is similar across many vehicles, though fitting types, routing brackets, torque values and bleeding procedures vary by make, model, year and brake system design. The vehicle's service information should be used for those specifics.
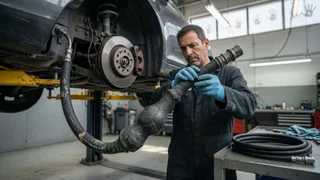
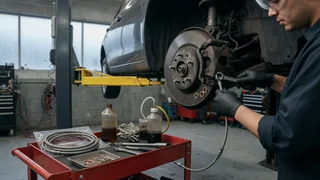
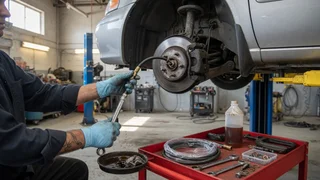
Get the correct hose for the exact vehicle and wheel position; left and right hoses, and front and rear hoses, are often different; Replace the sealing washers on banjo-type fittings with new ones rather than reusing the old ones; Safely raise and support the vehicle on stands, then remove the wheel; Use a flare-nut (line) wrench on the hard-line fitting to avoid rounding the soft nut; penetrating oil helps on corroded fittings; Disconnect the hose from the hard line, remove any retaining clip or bracket bolt, then disconnect the caliper or wheel-cylinder end; Install the new hose without twisting it, follow the original routing, and reattach all brackets and clips so it cannot contact the tire, wheel or suspension; Tighten fittings to the specification in the service information; Bleed the brakes to remove air introduced during the repair; Check the full range of steering and suspension travel for clearance, inspect for leaks under pedal pressure, and confirm a firm pedal before a careful low-speed test drive
Some vehicles with ABS or electronic stability control require a scan-tool-activated bleeding procedure if air reaches the hydraulic control unit. Opening the system only at one wheel often avoids that, but not always.
Brake Fluid and Parts Considerations
Use the brake fluid type specified for the vehicle, usually printed on the reservoir cap or in the owner's manual. Glycol-based fluids such as DOT 3, DOT 4 and DOT 5.1 must not be mixed with silicone-based DOT 5. Brake fluid can damage paint, so wipe up spills promptly. Because it absorbs moisture over time, use fluid from a sealed container.
In the US, brake hoses are covered by Federal Motor Vehicle Safety Standard 106. Whether you choose an original-equipment hose or an aftermarket option such as a braided stainless hose, choose one that is labeled as compliant and listed for your vehicle. Braided hoses can feel slightly firmer under the pedal, but correct fit and routing matter more than construction style.
If one hose on a vehicle has failed from age, the others have experienced similar heat, weather and time. Inspecting all of them, and considering replacing hoses in pairs on the same axle, is a reasonable approach since the system has to be bled anyway.
DIY or Professional Repair?
Replacing a flexible hose is within reach for owners who have the right tools, can safely support the vehicle, can bleed brakes correctly, and have access to torque specifications. A professional is the better choice when fittings are badly corroded or seized, when a hard line is damaged and needs new flares, when the vehicle requires a scan-tool bleed procedure, or when the symptoms do not clearly point to a hose. Brakes leave little room for error, and the result should always be verified with a firm pedal, no leaks and straight, consistent stopping before the vehicle returns to normal use.