6L80 Transmission Cooler Line Diagram: Routing and Flow
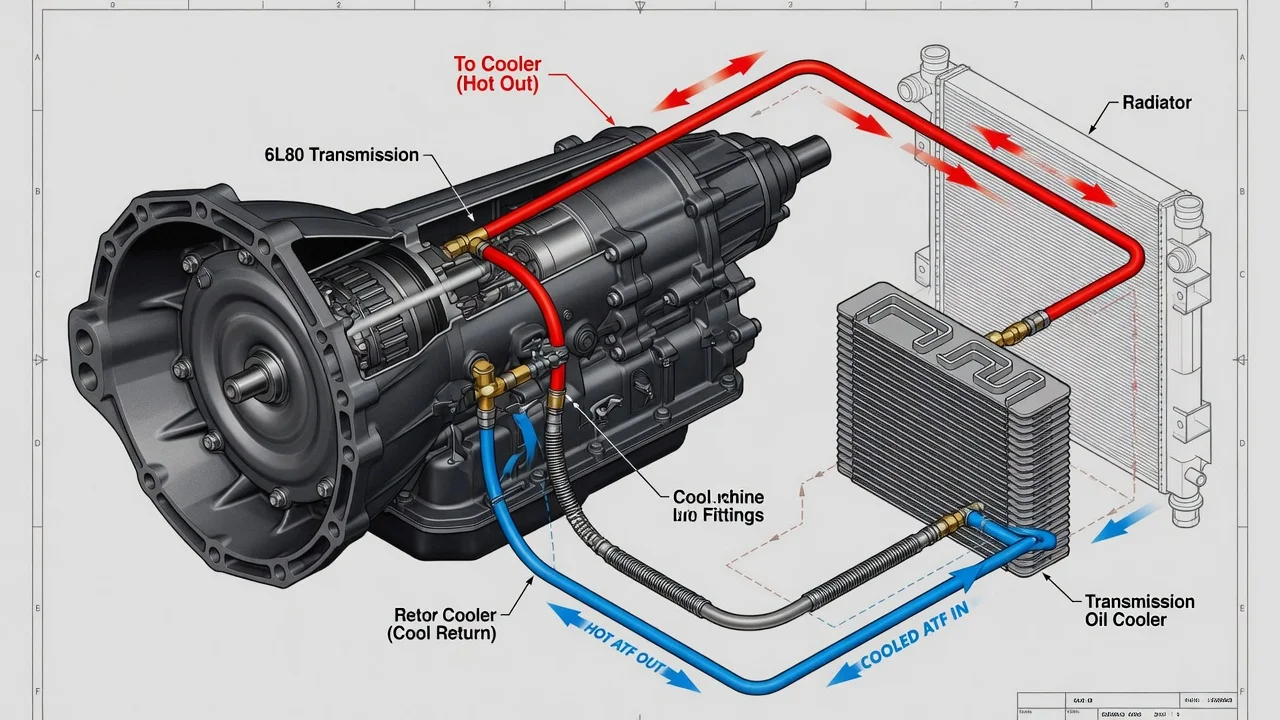
The 6L80 is GM's six-speed rear-wheel-drive automatic used in many full-size trucks, SUVs and performance cars. Its cooler lines carry hot fluid from the transmission to a heat exchanger and bring it back. No single diagram covers every vehicle, because routing depends on the platform, the model year and whether an auxiliary cooler is fitted. This guide explains the general flow path, what changes it, and how to confirm the layout on your own vehicle.
Short Answer: How 6L80 Cooler Lines Are Routed
On a 6L80, two cooler lines connect to fittings on the transmission case, typically on the passenger side near the front of the case. One line carries hot fluid out to the cooler, and the other brings cooled fluid back. From the case, the lines run forward along the engine or frame rail to a heat exchanger. On most vehicles this is a cooler built into one of the radiator tanks. Vehicles with a factory tow or heavy-duty cooling package may also route fluid through a separate auxiliary cooler mounted in front of the radiator before it returns to the transmission.
A generic diagram cannot reliably tell you which fitting is the outlet and which is the return on your vehicle, how the auxiliary cooler is plumbed, or where the lines are clipped. Those details differ between the trucks, SUVs and cars that use this transmission. Treat any general drawing, including the description here, as a map of the circuit. It does not replace the routing diagram for your vehicle's model year and build.
How Fluid Moves Through the Cooler Circuit
The transmission pump pressurizes fluid whenever the engine runs. Much of the heat in an automatic comes from the torque converter, especially during towing, slipping or stop-and-go driving. Fluid from the converter circuit is therefore sent out of the case to the cooler. The cooler passes heat to the engine coolant or, in an air-to-oil auxiliary unit, to the air flowing over its fins. The cooled fluid then returns to the transmission. In many automatic designs, this return flow supplies the lubrication circuit for bearings, bushings and the geartrain.
For that reason, the cooler circuit affects more than fluid temperature. A restricted line, a plugged cooler or a kinked hose can reduce return flow, which raises fluid temperature and starves lubrication at the same time. Some applications also include a thermal bypass valve that limits flow through the cooler until the fluid reaches operating temperature. On those vehicles, low flow on a cold transmission is not automatically a fault. Check the service information to learn whether your vehicle has such a valve and where it sits.
What Changes the Routing on Your Vehicle
Start by confirming the transmission type. The 6L80 is closely related to the heavier-duty 6L90. It was used across full-size GM pickups, SUVs and several performance cars, and the cooler plumbing was designed around each platform rather than the transmission alone. The service parts label on GM vehicles lists option codes that identify the installed transmission. A parts lookup by VIN is the most dependable way to confirm fitment for replacement lines.
Several factors change the layout. Model year and engine affect line length, bends and clip positions. Two-wheel-drive and four-wheel-drive versions may route differently around the transfer case and crossmember. A tow package can add an auxiliary cooler, either in series with the radiator cooler or in a different order. Some vehicles also place the radiator's transmission cooler in the opposite tank from the one a generic diagram shows. Aftermarket coolers, replacement radiators or earlier repairs can leave the circuit plumbed differently from the factory design. The lines on your actual vehicle are a more reliable guide than any drawing.
What the Owner Can Check
With the engine off and cool, trace both lines from the transmission case to the cooler and back. Look for wet residue at the case fittings, at the crimped joints where steel tubing meets rubber hose, and at the radiator or auxiliary cooler connections. Also check for lines rubbing on the frame, crushed sections, missing retaining clips, and hoses that are cracked or swollen. Photograph the routing before disconnecting anything, because those photos will be the most accurate diagram you can get for your vehicle.
Next, check fluid level and condition. Most 6L80 applications have no conventional dipstick. The level is checked at a fill-check plug with the engine running and the fluid within a specified temperature range, which you read with a scan tool. Use the fluid specification listed for your vehicle, which for this transmission is a DEXRON-VI type fluid. Note any diagnostic codes, such as a transmission fluid over-temperature code. If your scan tool can show live fluid temperature, watch it while driving. Record any changes in shift behavior, such as harsh or delayed shifts when hot. These point to a condition worth investigating, but they do not prove that a cooler line is the cause.
If you suspect low flow, the standard check is a cooler flow test. The return line is disconnected and directed into a container while the engine runs briefly in park. The volume collected over a set time is then compared with the service specification. This procedure drains fluid from a transmission that is sensitive to fluid level. Follow the vehicle-specific steps and refill correctly afterward, or have a shop perform the test.
Repair Options for Leaks and Restricted Flow
A leak at a quick-connect fitting on the case may only need a new seal or retaining clip, as long as the line end is undamaged. Leaks at crimped hose sections are commonly fixed by replacing the line assembly. Repair kits that splice in new hose also exist, but the hose and fittings must be rated for transmission fluid at operating pressure and temperature. Corroded or kinked lines are usually better replaced than patched.
After internal transmission damage, debris can lodge in the cooler and lines and then be carried into a rebuilt or replacement unit. In that situation, many repair plans include flushing the cooler circuit, or replacing the cooler if it cannot be cleaned reliably. Your service history helps here. Knowing whether the radiator, cooler or lines have been replaced, and with which parts, can explain why the routing or flow does not match the factory design.
Limitations and Next Step
This article describes the general cooler circuit on a 6L80. It does not give the exact routing, fitting orientation or flow specification for any particular vehicle. Those details come from service information matched to your VIN, and they can change between model years and options. A leak near the exhaust can create a fire risk, and running the transmission low on fluid can damage it quickly, so repair active leaks before driving further.
You may have confirmed the transmission and inspected the lines but still see high fluid temperatures, over-temperature codes or shifting problems. In that case, the next step is a professional diagnosis. A transmission shop can perform a measured flow test and check for internal causes of excess heat, such as torque converter clutch problems. It can then recommend repairs based on test results rather than a single symptom.