4L60E Valve Body Torque Specifications: How to Find and Apply Them
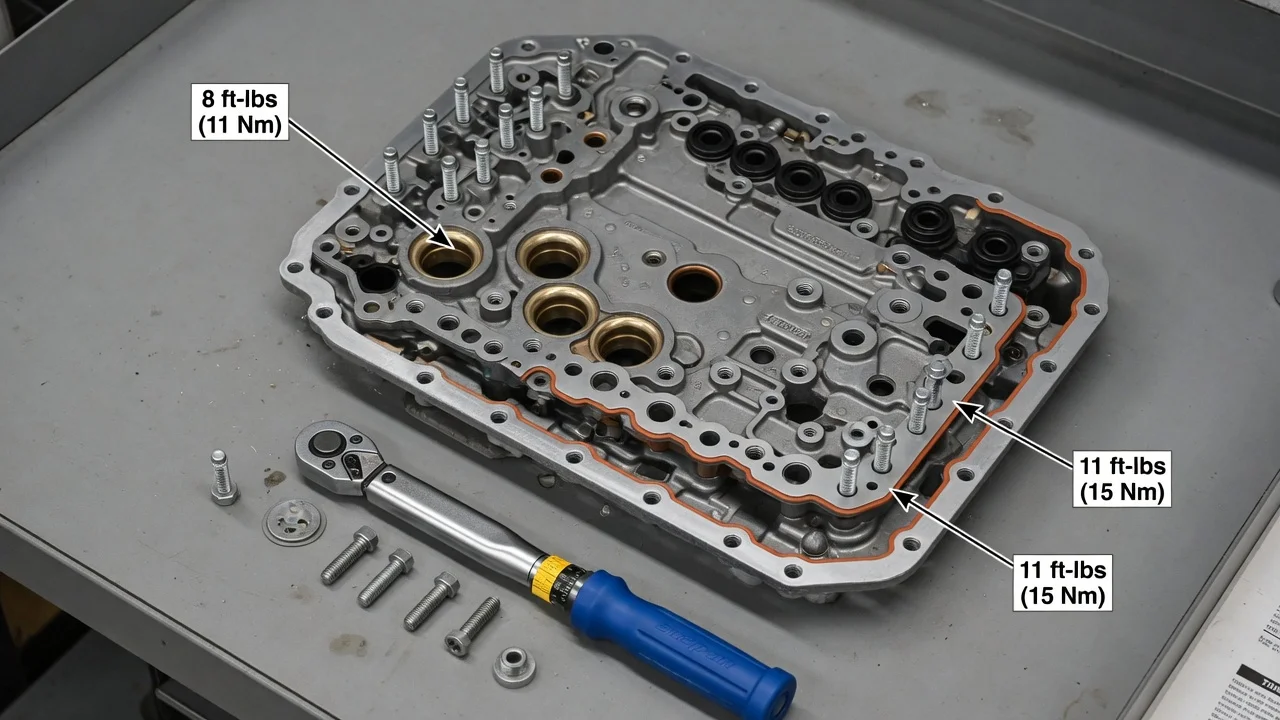
The valve body on a 4L60E bolts directly to an aluminum case, and its fasteners are tightened to low values that leave little room for guesswork. Overtightening can distort the valve body or strip threads. Undertightening can let fluid leak across the separator plate and upset shift behavior. This guide explains what the torque specification represents, how to confirm which version of the transmission you have, where the correct values are published, and what to verify before you tighten anything.
What the specification means
The valve body torque specification is the target tightening torque for the bolts that clamp the valve body, separator plate and gaskets against the transmission case. On the 4L60E these values are low. Service information therefore commonly lists them in newton-meters and inch-pounds rather than foot-pounds. Reading an inch-pound figure as foot-pounds is one of the most common ways case threads get pulled out, so check the unit label on every line before you set the wrench.
A specification applies to a defined condition: clean, undamaged threads, the specified fasteners in their correct holes, and a stated tightening order. Some procedures also call for stages, where you snug all bolts first and then bring them to final torque in sequence. The number does not account for damaged threads, thread repair inserts, substitute bolts or added lubricants. It is a target, not a figure to exceed for extra security. Related fasteners, such as those for the pan, solenoids, wiring harness retainers, detent spring and accumulator cover, may have their own values. Do not assume they match the valve body bolts.
Identify the applicable version
The 4L60E is an electronically controlled four-speed automatic that GM used in many rear-wheel-drive and four-wheel-drive trucks, SUVs and cars, and its design changed during production. Closely related units such as the 4L65E and 4L70E share much of the layout but are not interchangeable in every detail. Start with the vehicle's model year and its regular production option code. On many GM vehicles this code appears on the service parts identification label, often found in the glove box. The 4L60E is commonly identified by the code M30, and related transmission types carry different codes.
Next, confirm the transmission itself. The case carries an identification stamp or tag that indicates the model, build information and application. This is more reliable than the vehicle badge or a seller's description, especially if the transmission has been replaced. Valve bodies, separator plates and gaskets were revised over the years, so match part numbers or markings on the components you are installing. Service history matters too. A rebuilt unit, an aftermarket valve body or a shift kit may use hardware or instructions that differ from the original.
Read the correct specification
The authoritative source is the factory service manual or GM service information for the exact model year and transmission application. Look in the automatic transmission unit repair section or the valve body removal and installation procedure. That section normally gives the torque value, its unit, the bolt locations by length and the tightening sequence together. Professional repair databases that reproduce factory data are also reasonable references, provided you select the correct year, vehicle and transmission option.
Be cautious with values passed around on forums, in video descriptions or in generic torque charts. They may come from another year, a related transmission or a misread unit. If you are installing an aftermarket valve body, a remanufactured unit or a shift kit, the supplier's instruction sheet may specify its own torque, sequence or bolt changes. Read those instructions alongside the factory procedure. Where the two disagree, ask the supplier which value applies rather than splitting the difference.
Apply the limits correctly
Use a calibrated torque wrench that covers the required range; a large foot-pound wrench is not accurate near the bottom of its scale. Clean the case threads and bolts, inspect them for damage, and return each bolt to its original location. Valve body bolts come in different lengths, and a long bolt in a shallow hole can bottom out or crack the casting. Do not add thread locker, oil or sealant unless the procedure calls for it, because lubrication changes how much clamping force a given torque produces.
Before tightening, check the following: the check balls are in their correct pockets, the separator plate and gaskets are the right versions and properly aligned, the manual valve is engaged with its linkage, and the wiring and solenoids are positioned so nothing is pinched. Start every bolt by hand, then follow the published sequence in the stated stages. Uneven or excessive torque can warp the valve body or plate and cause valves to stick, which can show up as erratic shifts or pressure problems.
A shift complaint or a stored diagnostic code after the job does not by itself prove that torque was wrong or that a particular part failed. Codes and symptoms point to a diagnostic path. Confirm the fluid level and the correct fluid specification first. Then check wiring, solenoid operation and line pressure according to the service procedure before you decide between repair options.
A short verification checklist
Before buying parts, servicing the valve body or reinstalling the pan, confirm these points: the vehicle's model year and transmission option code; the identification stamp or tag on the case, especially on a replaced or rebuilt unit; part numbers or markings on the valve body, separator plate and gaskets, so fitment matches the case; the torque value and its unit, read from service information for that exact application; the tightening sequence and bolt length for each location; any supplier instructions for aftermarket or remanufactured components; the condition of the case threads and whether any repair inserts are present; the calibration and range of your torque wrench; and the fluid specification and fill procedure for refilling afterward.
If you cannot confirm any item, stop and resolve it before tightening. A stripped thread in the case or a distorted valve body is far harder to correct than the few minutes it takes to look up the right service record.