How to Replace the 48RE TCC Solenoid
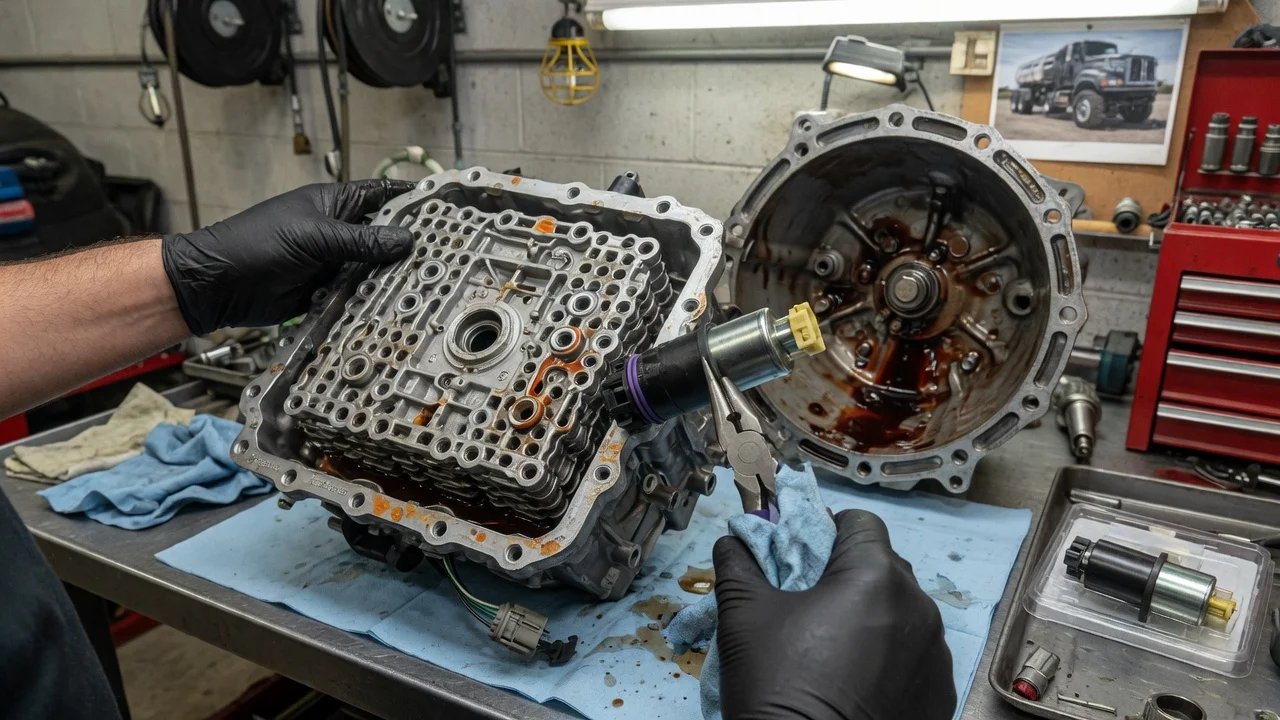
The 48RE is the four-speed automatic used mainly in Ram 2500 and 3500 trucks with the 5.9L Cummins diesel from mid-2003 through the 2007 model year. Its torque converter clutch is applied by a solenoid that is usually serviced as an assembly with the overdrive solenoid on the valve body. Replacing it is a pan-off job, but it only fixes the problem when testing shows the solenoid itself has failed. This guide covers confirmation, preparation, removal, installation and final checks.
Confirm the part and repair scope
Start by confirming the transmission type. The 48RE is a hydraulically shifted four-speed with electronic governor pressure control, overdrive and converter clutch, and it replaced the 47RE in these trucks. Later trucks moved to the 68RFE, which uses a completely different solenoid and pressure switch assembly, so parts and procedures are not interchangeable. Check the build data, the identification tag on the case or a parts lookup by VIN before ordering. On the 48RE, the converter clutch solenoid is normally sold as part of an assembly with the overdrive solenoid, mounted on the valve body and wired through a single connector on the driver side of the case. Fitment can vary with model year and with any aftermarket valve body installed, so match the replacement to what is actually in the transmission.
Next, make sure the solenoid is really the problem. Common complaints include no lockup at highway cruise, engine speed staying higher than normal in overdrive, rising transmission temperature, shudder during engagement, or a stall when coming to a stop if the clutch fails to release. Diagnostic codes such as P0740 or P0743 point to the converter clutch circuit or its performance, not to a specific failed part. The same symptoms can come from a damaged case connector, a chafed harness, low or burnt fluid, a brake switch input fault, the control module, low line pressure or a worn converter. Read codes and live data with a capable scan tool, inspect the wiring and connector, and check solenoid resistance and circuit integrity against the published values for your year.
Review the service history as well. Fluid changes, prior solenoid or valve body work, aftermarket lockup controls and converter replacements all change how you interpret the symptoms. If testing confirms an open or shorted solenoid, swapping the solenoid assembly is a reasonable repair. If the circuit tests good but lockup still fails or slips, the realistic repair options shift toward hydraulic diagnosis, converter replacement or an overhaul, and a new solenoid alone is unlikely to cure it.
Prepare tools and safe access
Use the factory service information for your exact model year as the reference for fastener torque, the fluid level procedure and whether the solenoid assembly can come off with the valve body in place. Gather a drain pan large enough for several quarts of fluid, sockets and extensions, a torque wrench, a plastic gasket scraper, lint-free rags, a new filter, a new pan gasket or the sealer the manual calls for, the correct solenoid assembly and enough fresh fluid. Chrysler specified ATF+4 for the 48RE; confirm the fluid specification for your truck and avoid generic fluids that do not meet it.
Park on level ground, chock the wheels and support the truck on rated jack stands; never work under a vehicle held only by a jack. Let the transmission cool, because fluid in a working diesel transmission can be hot enough to burn. Disconnect the negative cables at both batteries before unplugging transmission connectors. If the job turns into valve body removal, it involves small check balls, springs, the manual valve, park linkage and throttle valve linkage that are easy to misplace or misassemble. Owners without experience on Chrysler RE-series transmissions should consider leaving that stage to a transmission shop.
Remove without avoidable damage
Clean around the pan and the external connector first so dirt cannot fall into the transmission. If the pan has no drain plug, loosen the bolts progressively, leave a few at one end snug and let the pan tip to drain before removing it. Inspect the pan and magnet: a light gray paste is normal wear, but metal chips, heavy clutch material or a burnt smell suggest problems a solenoid will not fix. Remove the filter, then unplug the solenoid harness connector on the outside of the case. Note how the internal wires are routed before touching anything.
Locate the solenoid assembly on the valve body and remove its retaining screws while supporting the assembly. The case connector sits in a bore in the case and seals with an O-ring; release it as the manual describes and guide it out gently instead of prying, which can damage the bore or the valve body. If the procedure for your truck requires lowering the valve body, disconnect the linkage as directed, support the valve body evenly, keep it level and lay out every part in order. Do not loosen valve body screws that are not part of the procedure.
Install and restore the system
Compare the new solenoid assembly with the old one: the connector, mounting points, wire length and seal details should match. Lightly lubricate the connector O-ring with clean transmission fluid, seat the connector squarely in the case bore and fit any retainer. Position the assembly on the valve body, start the screws by hand and tighten them to the specified torque. Route the wires exactly as before so they cannot touch the linkage, filter or pan. If the valve body was lowered, reinstall it with the linkage correctly engaged, and check the throttle valve cable adjustment if the procedure calls for it.
Fit the new filter, clean the pan and magnet, and remove all old gasket material from both sealing surfaces. Install the pan with a new gasket or the specified sealer and tighten the bolts evenly in stages. Reconnect the external connector until it locks, then reconnect the battery cables. Refill through the dipstick tube with the specified fluid, start the engine, move the selector through each position and set the level using the manual's temperature-based procedure. The 48RE is not generally associated with the quick-learn adaptation used on Chrysler RFE transmissions, but confirm whether any procedure applies to your year, then clear stored codes.
Check the completed work
Before driving, look for leaks at the pan and connector and recheck the fluid level. On a road test, warm the transmission fully, then hold a steady light-throttle cruise in overdrive. Lockup should produce a clear, smooth drop in engine speed, and the clutch should release when you touch the brake pedal or slow toward a stop. A scan tool helps here: compare the commanded converter clutch state with engine speed and transmission temperature. Shift behavior should be normal, with no shudder during engagement, no stalling at stops and no returning codes.
Recheck the fluid level after the drive and again after a few days, and inspect the pan for seepage. If a circuit code returns, go back to the harness, connector and control module rather than assuming the new part failed. If the solenoid is commanded on and the circuit tests good but engine speed does not drop or the converter slips, the fault is likely hydraulic or inside the converter, and diagnosis by a transmission specialist is the next step. Persistent high transmission temperatures or harsh or delayed shifts also call for further investigation.