Convert 240SX Rear Brakes to Z32: What the Swap Involves and How to Approach It
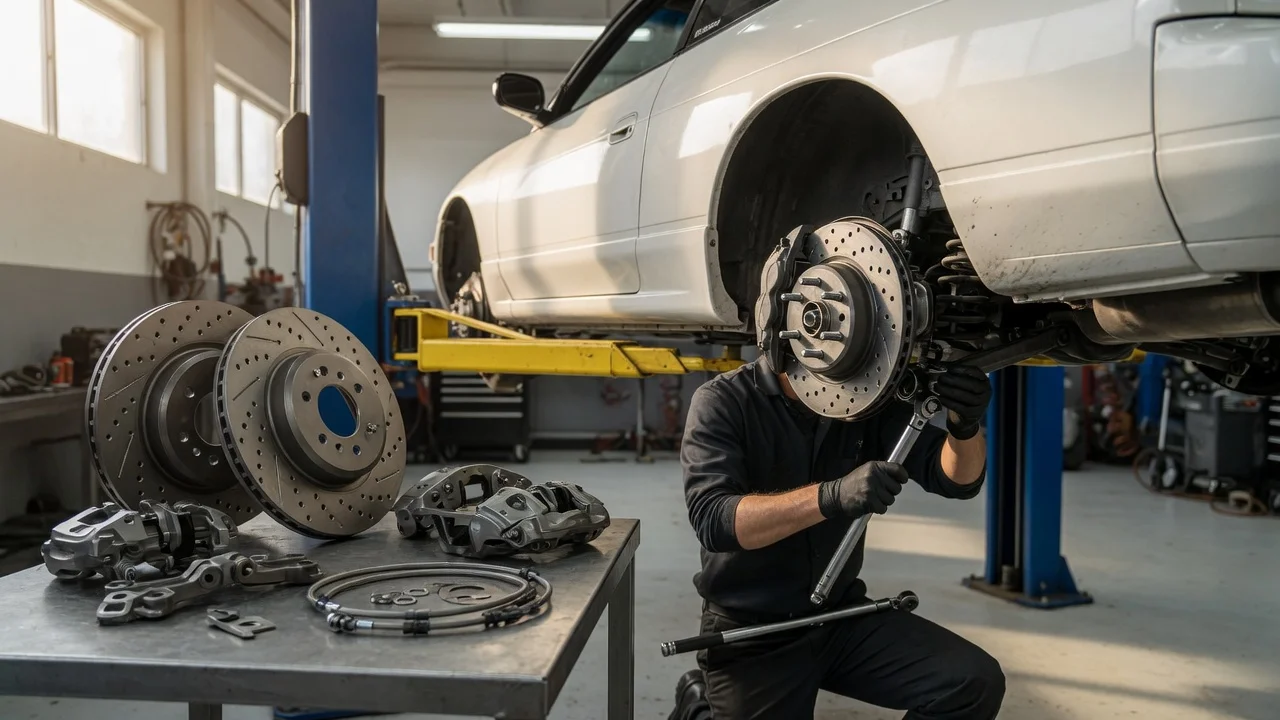
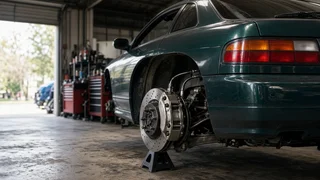
Swapping the rear brakes from a Nissan 300ZX (Z32) onto a Nissan 240SX is a well-known upgrade in the 240SX community. It replaces the factory single-piston sliding rear calipers and smaller rotors with the Z32's larger rear rotors and calipers. This guide explains what the conversion generally involves, which chassis details change the answer, and the order of work. Where exact part numbers, measurements or tightening values are needed, verify them against the Nissan factory service manual (FSM) for both vehicles, because no verified specifications were supplied for this article.
The short answer
A Z32 rear brake conversion on a 240SX is achievable and widely done. How much work it takes depends mainly on which 240SX you have. In North America, the S13 (1989 to 1994) uses a 4-lug hub pattern, while the S14 (1995 to 1998) and the Z32 300ZX use 5-lug hubs. On an S14, the conversion is generally described as a parts swap at the corners plus parking brake changes. On an S13, the Z32 rotors will not mount on the factory 4-lug hubs, so a 5-lug conversion (or another hub solution) is usually needed first, which makes the job considerably larger.
The other major difference is the parking brake. The factory 240SX rear caliper has the parking brake mechanism built into the caliper. The Z32 uses a separate drum-in-hat parking brake, where small brake shoes sit inside the hat section of the rear rotor. That means the conversion also requires Z32-style parking brake shoes and hardware, and the parking brake cables usually need to be replaced or adapted.
Qualifications that change the answer
Chassis generation: S13 cars need a 4-lug to 5-lug solution before Z32 rotors will fit; S14 cars already have 5-lug hubs. ABS versus non-ABS: early 240SX rear brake hardware varied by ABS fitment, so the parts your car currently has may differ from those described in generic parts lists. Confirm what is on your car before ordering. Z32 donor variant: confirm whether the rear brake components you source match across naturally aspirated and twin-turbo 300ZX models and across model years. This could not be verified for this article, so check part numbers before buying used parts. Market: Japanese-market Silvia and 180SX variants, and right-hand-drive cars, may differ in hub pattern and parking brake routing from North American 240SX models.
Parts commonly involved
Parts lists shared by owners typically include the following Z32 rear components. Treat this as a starting checklist rather than a verified bill of materials, and confirm compatibility for your exact chassis.
Z32 rear calipers, left and right; Z32 rear rotors (drum-in-hat design); Z32 rear caliper mounting brackets or the hardware required to mount the calipers to the 240SX knuckle; Z32 rear backing plates or dust shields that carry the parking brake shoes; Z32 parking brake shoes, springs, adjusters and related hardware; Parking brake cables compatible with the Z32 drum-in-hat mechanism, or a cable adaptation method; Brake hoses or fittings that match the Z32 caliper inlet and your 240SX hard lines; New rear brake pads; Fresh brake fluid of the specification listed in your FSM; For S13 cars: a 5-lug hub conversion solution
Brake balance considerations
Upgrading only the rear brakes changes the front-to-rear braking balance. Rear brakes that are too strong relative to the fronts can lock the rear wheels earlier under hard braking, which can reduce stability. Many owners pair the rear swap with a Z32 front brake conversion and a different master cylinder, but whether your specific combination of pads, calipers, master cylinder and proportioning setup is appropriate cannot be confirmed here. If you convert only the rear, test braking behavior carefully in a safe, controlled area, and consider having a brake specialist evaluate the setup.
Before you start
Brakes are a safety-critical system. If you are not comfortable working on brake hydraulics, bleeding the system or adjusting a drum-in-hat parking brake, have the work done by a qualified shop. Have the FSM for both the 240SX and the Z32 on hand for torque values, bleeding order and parking brake adjustment procedure. No tightening values or fluid specifications are given in this article because none were verified for it.
Tools typically needed
Floor jack and properly rated jack stands; Wheel chocks; Socket set, wrenches and breaker bar; Flare-nut (line) wrenches for brake fittings; Torque wrench; Brake fluid, a bleeding kit or a helper, and a catch container; Brake parts cleaner; Tools for removing and installing drum brake springs; Wire brush and thread locker if specified by the FSM
Installation steps
The sequence below describes the general order of work for an S14, or for an S13 that already has a 5-lug hub setup. Always follow the FSM where it differs.
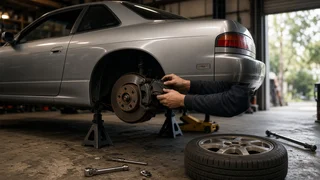
1) Park on level ground, chock the front wheels and release the parking brake. Loosen the rear lug nuts, then lift the car and support it on jack stands at the correct chassis points. Never work under a car supported only by a jack. 2) Remove the rear wheels. 3) Disconnect the parking brake cable from the factory 240SX caliper. 4) Disconnect the brake hose from the caliper or hard line using a flare-nut wrench. Cap or plug the line to limit fluid loss and contamination. 5) Remove the factory caliper, caliper bracket and rotor. 6) If required for your parts combination, remove the factory dust shield and install the Z32 backing plate or dust shield. 7) Install the Z32 parking brake shoes, springs and adjuster on the backing plate, following the FSM layout. Check that the shoes move freely and that the adjuster is oriented correctly for each side. 8) Route and connect the new or adapted parking brake cables to the Z32 parking brake mechanism, and confirm the cable does not contact suspension or exhaust parts through the suspension's travel. 9) Install the Z32 rear rotor over the parking brake shoes. If the rotor will not slide over the shoes, back off the shoe adjuster. 10) Mount the Z32 caliper (and bracket, if used) and tighten the fasteners to the FSM value. Confirm the caliper is centered on the rotor and that the rotor turns without binding. 11) Connect the brake hose to the caliper with the correct fitting and new sealing washers if a banjo fitting is used. Check that the hose is not twisted and has clearance at full suspension droop and compression and at full steering lock is not relevant at the rear, but check suspension travel. 12) Install the pads if they were not already fitted. 13) Repeat on the other side. 14) Bleed the brake system following the FSM bleeding sequence until no air remains, and keep the reservoir topped up so air is not drawn into the master cylinder. 15) Adjust the drum-in-hat parking brake shoes, then adjust the parking brake cable at the lever per the FSM so the brake holds within the specified number of clicks. 16) Reinstall the wheels, lower the car and tighten the lug nuts to specification.
Completion checks
With the car stationary, the brake pedal should feel firm and should not sink under steady pressure. A soft or sinking pedal indicates air in the system or a leak, so do not drive the car. Inspect every fitting you touched for leaks with the pedal held under pressure. Confirm the parking brake holds the car on an incline and releases fully, with no drag at the rear wheels. Spin each rear wheel by hand with the car lifted to check for binding or rubbing. At low speed in a safe area, test the brakes repeatedly before normal driving, then bed in the new pads following the pad manufacturer's procedure. After the first drive, recheck lug nut torque, fluid level and fittings for leaks.
Gaps to resolve before buying parts
Several details that matter for this conversion could not be verified from the information available for this article: exact rotor and caliper dimensions, whether a caliper bracket or adapter is needed for each 240SX chassis, the correct parking brake cable part numbers, brake hose fitting compatibility and all tightening values. Confirm these against the Nissan FSM, current part catalogs and the supplier of any conversion kit before ordering parts or starting work.