What Is a Center High-Mount Stop Lamp? Placement, Wiring, and Inspection
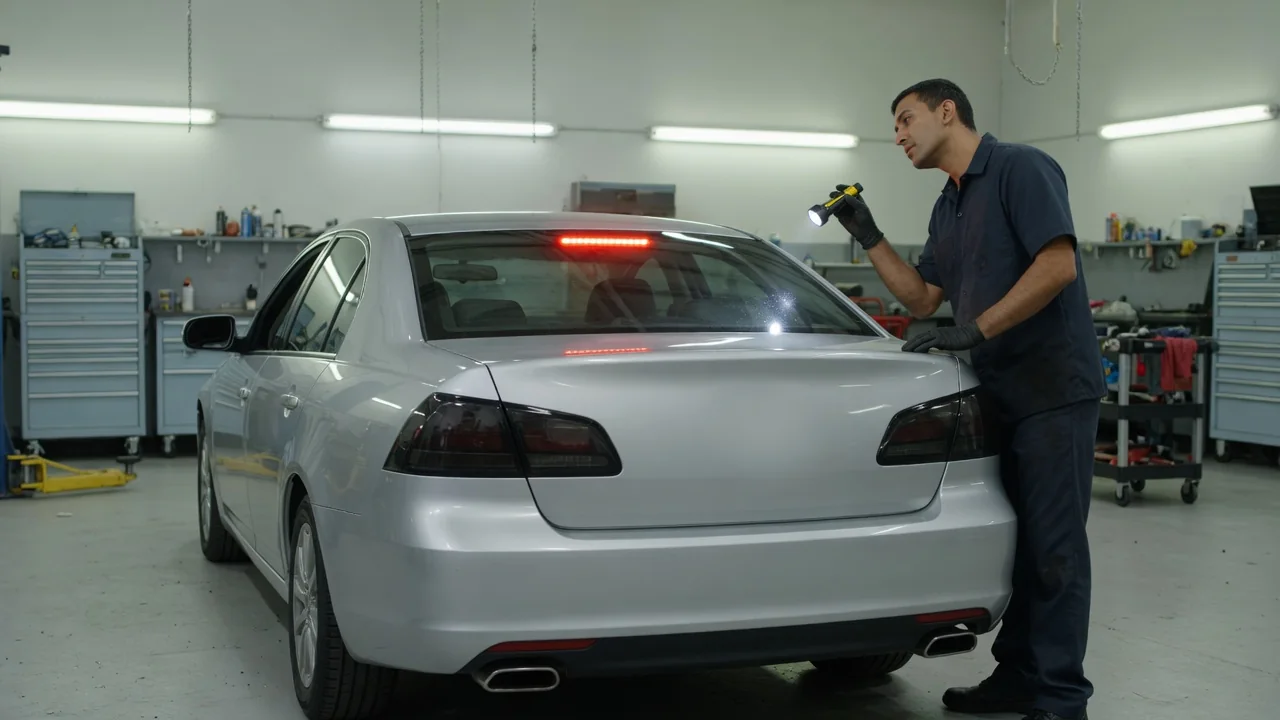
A center high-mount stop lamp, often abbreviated CHMSL and commonly called the third brake light, is a red stop lamp mounted on the vehicle's centerline above the two main rear stop lamps. It lights whenever the brakes are applied, giving following drivers a signal closer to their line of sight and often visible through or over the vehicle directly ahead. This guide explains where the lamp sits, how it is wired, and how to inspect it when it fails.
Placement: Where the Third Brake Light Sits
The defining features of a center high-mount stop lamp are in its name: it is centered left to right, and it is mounted higher than the main stop lamps. In the United States, vehicle lighting is governed by Federal Motor Vehicle Safety Standard 108, which requires a CHMSL on passenger cars and light trucks and sets requirements for its location, color, and visibility from behind. The reasoning is that a single elevated light stands apart from the lower pair of stop lamps, which share space with taillamps, turn signals, and reflectors. A driver several cars back may also see the elevated lamp through the windows of the car in between, which gives earlier warning of braking further up the line of traffic.
Exact placement depends on body style. On many sedans the lamp sits along the top of the rear window, either inside the cabin behind the glass or outside at the roof edge, while others place it on the trunk lid or build it into a rear spoiler. Hatchbacks, wagons, SUVs, and minivans usually mount it at the top of the liftgate, sometimes inside a roof spoiler above the glass. Pickup trucks commonly place it at the top center of the cab's rear wall, and many combine it in one housing with a cargo lamp that illuminates the bed. Convertibles, which lack a fixed roof, typically use the trunk lid or rear deck.
Third brake light construction is relatively simple. A typical assembly includes a molded plastic housing, a red lens or a clear lens over red light sources, and either one or more incandescent bulbs in sockets or a strip of LEDs on a small circuit board. Exterior units rely on a gasket or sealant to keep water out, and they are held in place with screws, clips, nuts on studs, or adhesive. Interior units mounted behind the rear glass do not need the same weather sealing but must be shaped and angled so the glass does not reflect or block the light.
Wiring: How the Lamp Gets Its Signal
In a conventional stop lamp circuit, a fused power supply runs to a brake light switch at the brake pedal. When the pedal is pressed, the switch closes and sends power to the stop lamps, including the CHMSL, and each lamp completes its circuit through a ground connection to the body or a dedicated ground wire. On vehicles where the main rear lamps also serve as turn signals, the signal to those lamps passes through the turn signal switch or flasher circuit so a single filament can either glow steadily for braking or blink for turning. The third brake light must not blink with the turn signals, so it receives a feed that comes from the brake switch side only and bypasses the turn signal logic.
Many newer vehicles use electronic control instead of a switch that carries lamp current directly. A brake pedal switch or position sensor reports to a body control module or a similar controller, often over the vehicle's data network, and that module switches power to the lamps through its own outputs. This arrangement lets the vehicle monitor lamp circuits, set fault codes, and display a warning when a lamp appears to be out. LED-based CHMSL units may include their own resistors or driver circuitry. How a particular vehicle routes, controls, and monitors its third brake light varies by design, so a wiring diagram for that vehicle is the reliable reference.
Physically, the harness for a roof-edge or liftgate lamp has to travel a long way from the rear body wiring. It often runs through a roof pillar, along the headliner, or through a rubber conduit that bridges the hinge between the body and the trunk lid or liftgate. Wires in that hinge conduit flex every time the lid opens and closes, and connectors near the lamp can be exposed to moisture if the lamp seal deteriorates.
Inspection: Checking a Center High-Mount Stop Lamp
The basic check is visual. With the ignition on as required by the vehicle, have a helper press the brake pedal while you watch from behind, or use a reflection in a garage door or shop window if you are alone. The third brake light should come on together with both main stop lamps and stay steadily lit as long as the pedal is held. Also look at the lens for cracks, fogging, or water droplets inside, and check that every LED segment lights, since partial failure of an LED strip is common.
The pattern of failure points to where the problem is. If none of the stop lamps work, suspect the shared parts of the circuit: the fuse, the brake light switch or sensor, or the controlling module. If the two main lamps work but the CHMSL does not, the fault lies in the lamp itself or its dedicated wiring, such as a burned-out bulb, failed LED board, corroded socket, loose connector, or broken wire in a hinge conduit. If the CHMSL works only when a lid or gate is in a certain position, a break inside the flexing harness is a strong possibility.
For electrical testing, unplug the lamp connector and use a multimeter to check for voltage on the feed terminal while the brake pedal is pressed, then check continuity from the ground terminal to a clean body ground. Voltage and good ground at the connector, with a dark lamp, indicate a failed lamp assembly. No voltage means tracing the feed back toward the switch or module. On module-controlled vehicles, stored diagnostic codes can help narrow the search before any wiring is disturbed.
Practical Implications and Limits
Because the lamp only helps if following drivers can see it, anything mounted at the rear can reduce its value. Hitch-mounted cargo carriers, bike racks, roof boxes overhanging the rear, tonneau or camper shells on pickups, and heavy cargo stacked against the rear glass can all partially or fully hide it. Window film over an interior-mounted lamp can dim it. Aftermarket modules that make the third brake light flash or pulse are sold widely, but the federal standard calls for steady-burning stop lamps, and state rules on such modifications vary, so they may not be legal where the vehicle is driven or inspected.
Repairs often involve replacing the entire assembly, particularly for LED units where individual diodes are not designed to be serviced. When switching from an incandescent bulb to an LED replacement, the lower current draw can trigger a lamp-out warning on vehicles that monitor the circuit. A lamp mounted outside on the roof or liftgate can also become a water entry point if its gasket hardens or its fasteners loosen, which may show up as stains on the headliner or moisture in the cargo area rather than as a lighting problem.
This explanation covers general principles shared by most vehicles. Mounting methods, removal steps, wire colors, fuse locations, and how the lighting system is controlled differ from one design to another, and state safety inspection criteria are not the same everywhere. For any specific repair, the service information for that exact vehicle and the inspection rules in your state are the authoritative references.