What Is a Body Panel Bonding Flange? Joint, Cure and Repair Basics
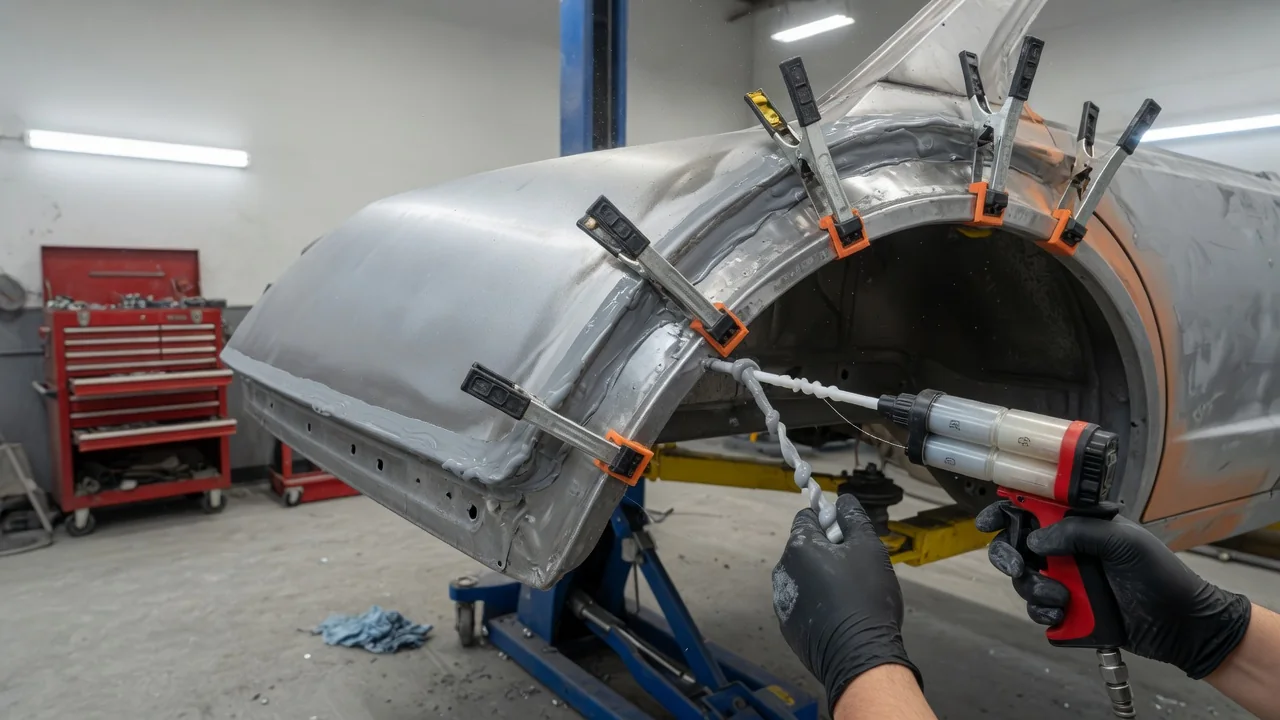
A body panel bonding flange is the narrow edge, or lip, of a vehicle panel that overlaps a mating surface and carries an adhesive bond. Instead of relying only on spot welds or fasteners, many modern bodies use these flanges to join outer skins, roof panels, and quarter panels to the structure beneath. Knowing how the flange works explains why bonded joints depend on careful surface preparation, controlled clamping and cure, and disciplined repair practice.
Joint area: where the bond actually lives
The flange is usually formed when the panel is stamped: the edge is bent to create a flat land that sits parallel to the part it joins. Several common shapes exist. A lap flange simply overlaps another panel. A hem flange folds the edge of an outer skin back over an inner panel, a construction widely used on doors, hoods, and liftgates. A joggled flange has a small offset step so the outer surfaces sit flush once the panels are joined. In each case, the adhesive fills the overlap and spreads load across the whole bonded area rather than concentrating it at individual weld spots or rivets.
Several factors decide whether a car panel adhesive flange performs as intended. The overlap must be wide enough to give the adhesive useful contact area, and the bondline, meaning the adhesive layer between the two surfaces, needs a consistent thickness. A starved joint with too little adhesive leaves voids, while an excessively thick layer can be weaker than intended. Bonded joints are generally strongest when loaded in shear, sliding one surface along the other, and weakest in peel, where an edge is pried apart. Flange design therefore tries to keep loads in shear. Besides holding panels together, the adhesive seals the overlap against water and helps damp vibration and noise.
Flanges may join bare or coated steel, aluminum, or composite panels. Where dissimilar metals meet, a continuous adhesive layer can act as a barrier that reduces direct metal contact and the associated corrosion risk. It also helps to separate the products involved: structural adhesives carry load, hem and anti-flutter adhesives mainly support skins and control movement, and seam sealers close exposed edges. Which product sits in a given flange is decided by the vehicle manufacturer and varies between designs.
Clamp and cure: holding the flange while the adhesive sets
Clamping keeps the two surfaces in full contact, holds the panel in its correct position, and maintains an even bondline until the adhesive can support itself. The aim is firm, uniform pressure, not maximum force. Overtightened clamps can squeeze too much adhesive out of the joint or distort a thin flange, leaving a wavy edge or uneven gaps. Some adhesives contain small solid beads that set a minimum bondline thickness. In factory production and some repairs, rivets, spot welds placed through the adhesive, or the hem fold itself can serve as the fixture instead of separate clamps.
Cure is the chemical process that turns the applied adhesive into a solid, load-bearing layer. Two-part repair adhesives begin reacting once mixed and pass through a working time, when panels can still be positioned, a handling or clamp time, after which the assembly can be moved carefully, and a full cure, when the joint reaches its design strength. Temperature has a strong effect: cold conditions slow the reaction, and controlled warmth can speed it within limits set by the adhesive maker. Many factory joints use one-part adhesives cured by heat during the paint process. Actual times and temperatures come from the specific product data sheet, not from a universal rule.
Typical clamp and cure faults include assembling the joint after the working time has passed, so the adhesive no longer wets the surface properly; moving or loading the panel before it has cured enough; uneven bead coverage that leaves dry patches; and contamination such as oil, dust, or fingerprints on prepared surfaces. These problems are often invisible from outside the vehicle but can reduce strength and create pockets where moisture collects.
Repair: separating, preparing and rebonding a flange
A bonded panel cannot simply be unbolted. Replacement generally involves cutting away most of the damaged panel and then separating the remaining strip from the flange. Depending on the manufacturer's procedure, technicians may apply controlled heat to soften the adhesive, use chisels or dedicated separation tools, and drill out rivets or spot welds in joints that combine adhesive with mechanical fastening. The priority is to protect the inner flange on the vehicle structure, because that surface becomes the foundation for the new bond.
Preparation follows removal. Old adhesive is taken down to the level the repair instructions specify, the flange is straightened if it was bent during separation, and the bonding surfaces are abraded and cleaned. The new panel is dry-fitted first to confirm alignment and gaps before any adhesive is mixed. Corrosion protection matters here as well: procedures differ on whether the bonding area should be bare metal or primed, so the adhesive maker's and vehicle maker's guidance must agree before work proceeds. Nearby wiring, coatings, and trim also need protection from heat and abrasion.
Rebonding means applying a continuous bead across the flange, joining the panels within the working time, clamping them, and cleaning off squeeze-out before it hardens. Exposed edges are then sealed and cavities treated to resist corrosion. Whether a given joint may be bonded at all, whether supplemental rivets or welds are required, and which adhesive class is approved are decisions set by the vehicle manufacturer's repair information, so a method suitable for one vehicle does not automatically transfer to another.
Practical implications and limits
For owners, bonded flanges matter mostly when something goes wrong. Rust bubbling along the lower edge of a door skin, cracked sealer along a roof or quarter panel joint, or a new rattle around a panel edge can point to moisture or movement at a flange. Corrosion in these areas frequently begins inside the overlap, where it cannot be seen until it reaches the surface. A visual check can reveal symptoms, but it cannot confirm how strong or complete the bond is underneath.
Bonded flanges are not universal: many vehicles mix adhesive joints with welded and bolted ones, and some panels are cosmetic while others contribute to body stiffness. General-purpose construction or household adhesives are not substitutes for automotive panel bonding products. Work elsewhere on a vehicle can also affect bonded areas, since heat from welding or cutting near a flange may degrade adhesive in the adjacent joint. When evaluating a vehicle with body repair history, it is reasonable to ask whether bonded panels were replaced according to the manufacturer's procedure, because that is the only practical reference for what a correct repair should look like.