Universal Parking Brake Cables and Kits: Fitment and Selection
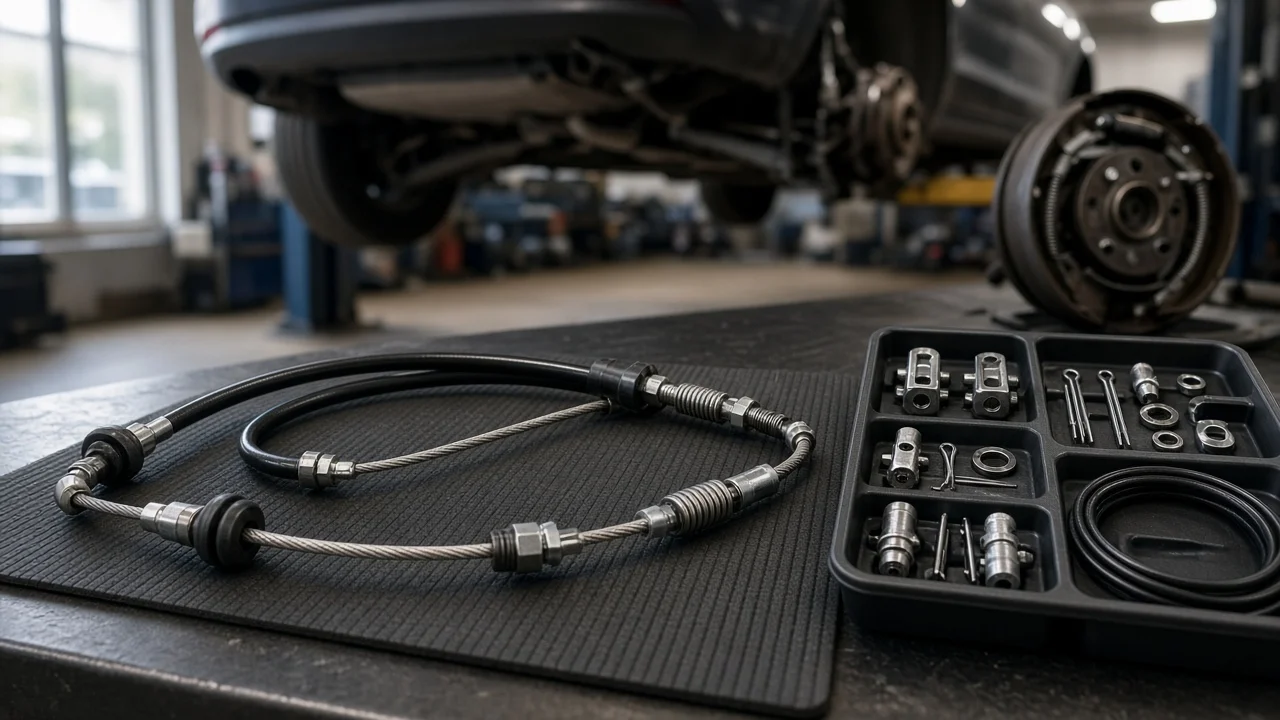
A universal parking brake cable kit lets you build a cable run to your own measurements instead of ordering a part made for one model. That flexibility suits custom builds, swapped rear axles and older vehicles where direct-fit cables are hard to find, but it also shifts the fitment work onto you. This guide explains how to decide whether a universal cable suits your job, which dimensions and end fittings matter, and what a kit can and cannot fix.
Define the job the product must do
Start with what the parking brake has to do on your vehicle. Its basic task is to hold the vehicle stationary on a grade, and on many designs it also acts as a mechanical backup if the hydraulic system loses pressure. Universal kits are most common on hot rods, restomods, kit cars and vehicles with rear axle swaps, where the original cable no longer lines up between the pedal or hand lever and the rear brakes. They can also replace a corroded factory cable on an older vehicle when the direct-fit part has been discontinued. If a direct-fit cable is still available for your exact year, model and brake package, it is usually the quicker option because it already matches the factory routing, brackets and end fittings.
Next, list the practical constraints. Note how the vehicle is used and stored, whether it sees road salt or wet winters, how much space you have near the exhaust, fuel lines and suspension, and whether you have the tools to cut cable cleanly and secure the ends. A universal mechanical kit is not a substitute for an electronic parking brake system; vehicles that use electric actuators need components specified for that system.
Check compatibility
The rear brake design sets the starting point. Rear drums use the cable to pull a lever attached to the brake shoes. Rear discs use either a small drum-in-hat parking brake inside the rotor or a caliper with an integrated parking brake lever. Each design expects a particular cable end at the brake, commonly a barrel, ball or eye fitting, and a particular way of anchoring the housing, such as a spring-finger retainer that locks into the backing plate, a threaded fitting or a clip on the caliper bracket. Check that the inner cable diameter fits the slot in the lever and that the housing end matches the anchor hole. These details decide vehicle fitment far more than any general compatibility claim in a listing.
At the front, identify the pedal or hand lever, how the cable attaches to it, and whether the system uses a single front cable feeding an equalizer that splits force to two rear cables. Measure housing and inner cable lengths along the real route with the suspension at ride height and at full droop, then leave allowance for adjuster threads and end fittings. Avoid tight bends and sharp edges, since every bend adds friction and reduces the force reaching the shoes or caliper. Finally, confirm which parts the kit actually includes: some supply only cable and housing, while others add an equalizer, adjuster, clamps, brackets or a complete pedal assembly.
Features that affect the choice
Cable and housing construction matter most. Stainless steel inner cables and housings resist corrosion, which helps on vehicles driven through wet or salted roads, and polished stainless is popular on show builds. A lined housing reduces friction so the brake releases cleanly and lever effort stays reasonable. Look for housing that resists compression under load; if the housing shortens when you pull the lever, you lose travel and holding force. Be aware that a braided or polished outer finish can be largely cosmetic, so judge the kit by the stated inner cable diameter, housing type and liner rather than appearance alone.
End fittings and adjustment are the other major trade-off. Pre-attached ends are factory secured but mean you can trim the cable only from the opposite end. Clamp-on or set-screw cable stops allow precise length setting, but they must be tightened to the kit maker's instructions and checked after initial use, because an under-tightened stop can slip. A threaded adjuster or adjustable equalizer makes it easier to take up slack as the rear brakes wear. Treat labels such as heavy duty or premium quality as marketing unless they are backed by specific information: cable diameter, lengths, end types, included hardware and clear installation diagrams are the useful evidence.
Limitations and ownership costs
Setup takes more time than bolting in a direct-fit cable. Expect to measure carefully, cut the inner cable with a proper cable cutter so it does not fray, finish or seal the cut ends, and possibly fabricate or relocate brackets and routing clips. Adjust the rear brakes first, using the vehicle-specific service procedure, and only then set cable tension. A new cable cannot compensate for worn or contaminated friction material, glazed shoes, drums or brake rotors beyond their wear limits, or a seized parking brake mechanism inside a caliper. The parking brake is mechanical and does not use brake fluid, but on integrated caliper designs the condition of the brake pads, rotors and caliper still affects how well it holds.
Ongoing ownership means periodic inspection for fraying, rust, kinked or cracked housing and binding at pivots, plus lubrication only where the kit instructions allow it, since some lined cables are meant to run dry. Re-adjust as rear shoes or pads wear. Stop using the vehicle and have the brakes professionally inspected if the brake drags after release, will not hold on an incline, needs excessive lever travel, has a cable that will not release, or causes rear wheels to run noticeably hot. These symptoms can indicate faults that affect the service brakes as well.
Build a practical shortlist
Write down your measurements and interfaces before comparing products, then check each candidate against the same list. Confirm the rear brake type the kit supports and the cable end it uses at the lever. Confirm the housing anchor matches your backing plate or caliper bracket. Check inner cable diameter, available housing and cable lengths with room for adjustment, and the routing hardware supplied. Note whether an equalizer, adjuster, cable stops and brackets are included or must be bought separately. Choose cable and housing materials that suit your climate and how the vehicle is used. Make sure installation instructions or diagrams are provided, and read the return terms, because cut cables are often not returnable.
Eliminate any universal parking brake cable that fails a fitment item, then decide between the remaining options on material, finish and installation convenience. If a listing does not state a detail you need, ask the seller or check the service information for your rear brakes before buying. A kit that matches every interface and is installed and adjusted correctly is a better choice than one picked on finish or price alone.