Tail Lights Not Working? Fuse Location and Switch Troubleshooting
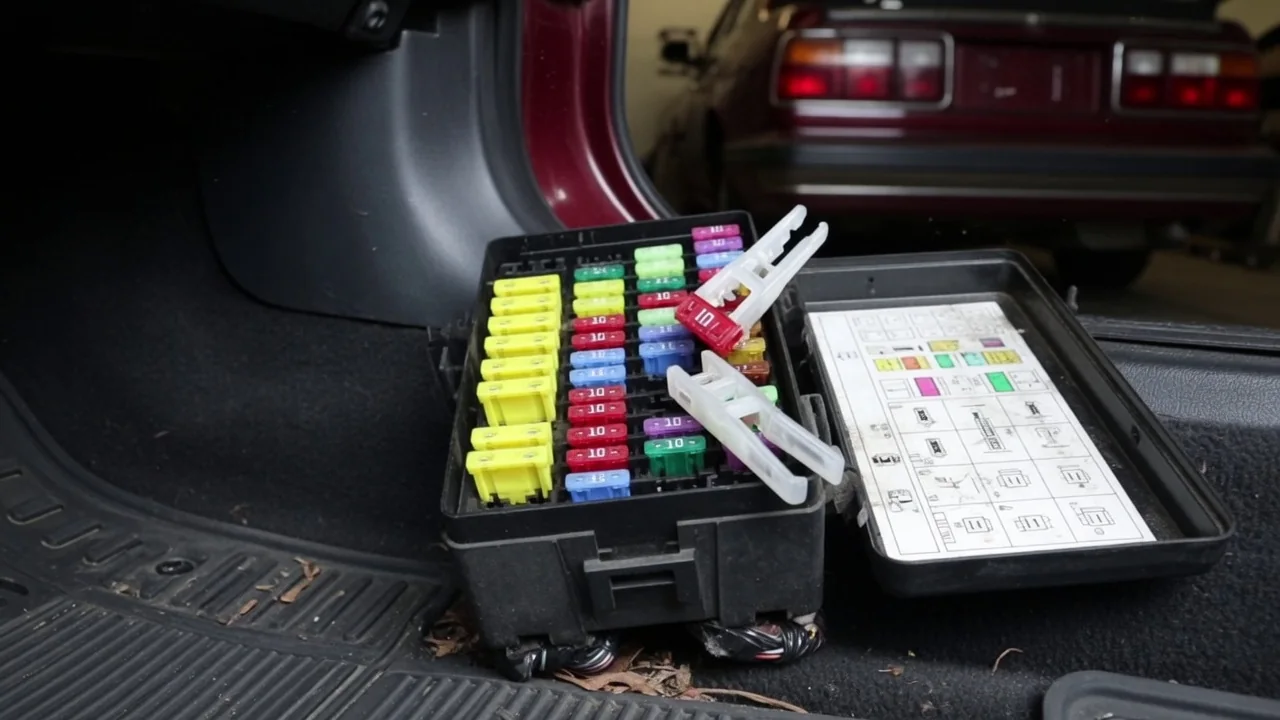
Dark tail lights make your vehicle hard to see at night, so the problem deserves prompt attention. Many drivers start by searching for the tail lights not working fuse location, yet the answer depends on the vehicle, and the fuse is only one possible cause. Here is how to find the right fuse, check it safely, and judge when the switch, relay, bulb or ground deserves a closer look.
Where to Find the Tail Light Fuse on Most Vehicles
There is no single place where every manufacturer puts the tail light fuse. Fuse box locations change with make, model and year, and many vehicles have more than one box. Common spots include an interior fuse panel at the end of the dash, in the driver footwell or behind a kick panel, plus an under-hood fuse box that handles higher-current circuits. Start with the owner's manual, which shows where each panel sits, then check the fuse box diagram printed on or inside the cover to identify the right circuit.
Labels are not standardized either. One manufacturer may mark the circuit as tail, another as parking lights, and another as exterior lamps, often using short abbreviations or symbols. Match the label to the diagram for your own vehicle rather than pulling whichever fuse looks likely. Keep in mind that some designs split rear lighting across separate left and right fuses, or route it through a tail light relay or body control module, so one fuse may not protect every lamp at the back of the car.
Reading the Symptoms Before Pulling Any Fuses
The pattern of the failure tells you a lot before you touch the fuse panel. When both tail lights are out together, a shared cause such as a fuse, switch or relay becomes more likely. A single dark side leans toward a bulb, socket or wiring problem at that lamp. Tail lights out while brake lights still work suggests the fault sits in the tail lamp circuit itself, since the two functions are usually powered separately. Also check whether the license plate light, side markers or dash illumination have gone out, because those often share the circuit.
Observing the rear lamps safely is easy with a helper standing behind the parked vehicle while you operate the switch. Working alone, back up near a wall or garage door at dusk and watch the reflection in the mirrors. Treat what you see as a guide to where to look first, not a diagnosis. Identical symptoms can come from different faults, and a dark lamp alone cannot tell you whether the fuse, the switch, the wiring or the bulb is responsible until each is actually checked.
Safely Checking and Replacing a Tail Light Fuse
Before removing any fuse, switch off the ignition and all lights so the circuit is not live while you handle it. Many fuse boxes include a small plastic fuse puller clipped inside the cover; use it or another suitable non-metal tool rather than metal pliers, which can bridge terminals. Hold the blade fuse up to the light and look at the metal element visible through the plastic body. A break in that strip, or dark discoloration, indicates a blown fuse, though some hairline failures are hard to spot by eye.
Any replacement must carry exactly the fuse amperage rating shown on the diagram. The rating is chosen to protect the wiring, so fitting a higher-rated fuse, or bridging the slot with wire, foil or any other bypass, removes that protection and can let wires overheat. Press the new fuse fully into its slot, since a partly seated fuse can make poor contact and mimic an electrical fault. Then turn the lights on and have your helper confirm that both tail lamps and the related marker lights are working again.
What It Means When the Tail Light Fuse Keeps Blowing
A fuse that fails again immediately, or after a short drive, is doing its job. Repeat failures usually point to a short circuit or an overload somewhere downstream, not to a defective fuse. Some clues can be gathered without dismantling anything. Think about whether a trailer was recently connected, whether aftermarket lighting or wiring work has been done, and whether water is visible inside the lamp housings. A cracked, melted or visibly damaged tail light bulb socket is another observation worth noting.
Resist the urge to keep feeding in new fuses. Every failure confirms the underlying fault is still present, and repeated current surges through damaged wiring add heat where it is least welcome. Locating a short generally requires proper circuit testing along with the wiring diagrams for that exact vehicle, because the harness may run through body panels, the trunk lid or a trailer connector. That makes a recurring blown fuse a sound reason to book a professional inspection rather than continue guessing.
Checking the Headlight Switch, Auto Lamp Settings and Relays
Sometimes nothing has failed at all. Confirm the headlight switch is actually in the parking or headlight position rather than an automatic setting, since automatic headlights rely on an ambient light sensor and may leave the lamps off in conditions the system reads as bright. If the lights flicker, or work in one switch position but not another, the switch itself becomes a suspect. Those signs are suggestive rather than conclusive, because a loose connector or failing relay can behave the same way.
On many newer vehicles the switch does not carry lamp current directly. It sends a signal to a body control module or relay, which then powers the lamps, so the fault may lie somewhere other than the control you touch. Any stored fault codes from that module are evidence to interpret for the specific vehicle, not proof that a part has failed. Avoid taking apart the steering column or dash, where airbag components may be located. Switch replacement and module diagnosis belong with a qualified technician.
Bulbs, Sockets and Grounds: When the Fuse Isn't the Problem
When the fuse is intact and only one side stays dark, attention shifts to that lamp. A failed bulb, a corroded socket or a poor ground connection nearby are common explanations, and a weak ground can also cause dim or erratic lighting. With the lights off, look for a darkened bulb, a broken filament, moisture in the housing or green corrosion on the contacts. Keep these checks visual and avoid probing live circuits, which risks creating a short.
Many modern vehicles use LED tail lamp assemblies that may not contain serviceable bulbs, meaning the repair could involve the whole unit or a section of it. Confirm the correct replacement part for your specific vehicle before buying anything. Stop and arrange professional testing if the fault comes and goes, if connectors look melted, if you notice a burning smell or if wiring insulation is damaged. Those signs indicate heat or resistance problems that need measurement, not more trial and error.