RV water accumulator and pressure tanks
The short answer
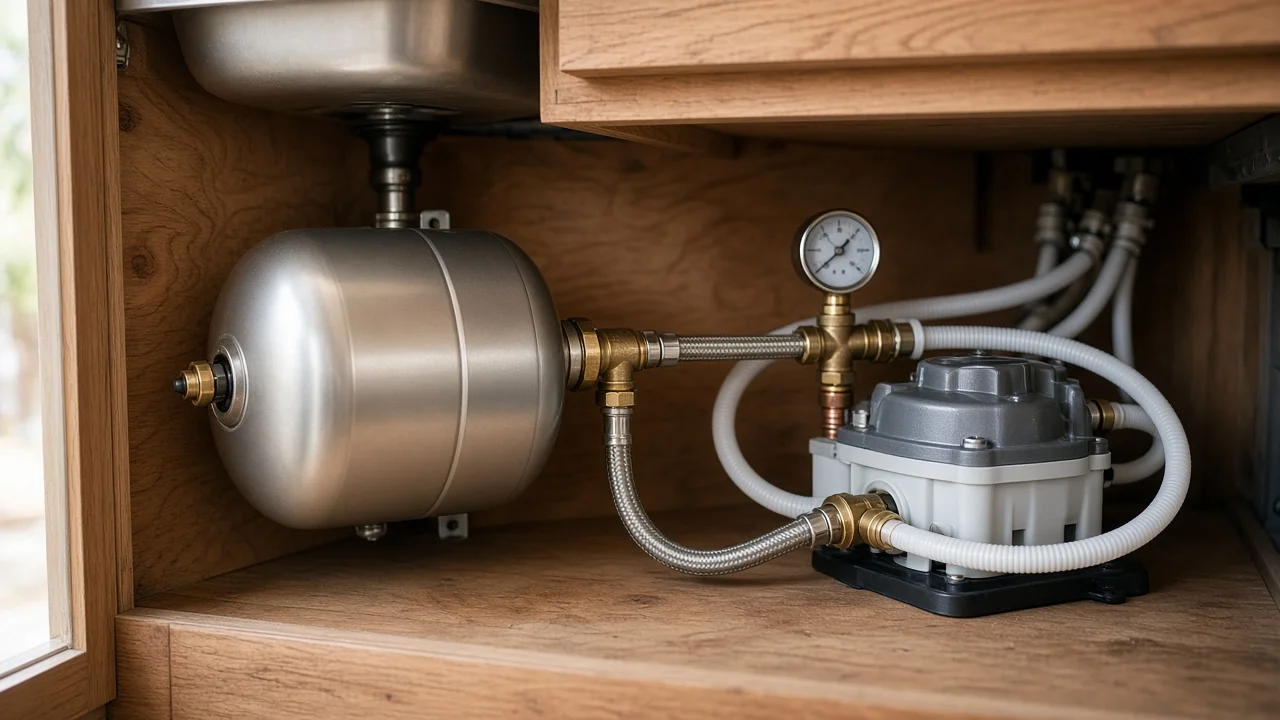
An RV accumulator tank is a small pressure tank installed on the outlet side of the fresh-water pump. Inside, a flexible diaphragm or bladder separates a cushion of compressed air from the water. When the pump runs, water pushes against that air cushion and stores a small reserve under pressure. When you open a tap, the stored water flows out before the pump has to restart. The result is steadier water pressure, less pulsing at low flow, and fewer rapid on-off pump cycles.
Whether you should buy one depends mainly on your pump. A conventional pressure-switch pump that pulses or cycles rapidly at low flow, such as a slow-running faucet or a low-flow shower head, is the classic case where an accumulator helps. Some variable-speed pumps are designed to deliver smooth flow on their own, and their makers may say an accumulator is unnecessary or advise against one. Check your pump manufacturer's guidance before buying.
Accumulator tank vs. pressure tank: is there a difference?
In RV plumbing the two terms are mostly used for the same thing. "Accumulator" usually means the compact tank sold for RV and marine pumps. "Pressure tank" is the broader term and also covers the much larger tanks used with household well systems. Both work the same way: a pressurized air chamber stores water and releases it on demand. For an RV, search for and compare tanks sold for RV or marine 12-volt pump systems. They are sized and fitted for that use.
When an accumulator helps and when it won't
Symptom | Likely to help? | Why; Pump pulses or chatters when a tap is partly open | Usually yes | The stored reserve covers small demands between pump cycles; Pump starts and stops rapidly during low-flow use | Usually yes | A larger buffer means fewer, longer run cycles; Pump runs briefly on its own when no taps are open | No | This usually points to a leak or a failing check valve, so find and fix the cause; Weak pressure even with the pump running continuously | No | An accumulator stores pressure the pump already makes; it does not raise maximum pressure or flow; Noise from the pump vibrating against its mount | Not directly | Mounting and isolation affect vibration noise more than pressure buffering does
What to check before buying
Pump compatibility: confirm the pump maker supports an accumulator and check for any specific recommendations on tank type or precharge. Maximum pressure rating: the tank's rating must exceed the highest pressure it can see. That includes the pump's cut-off pressure and, if your plumbing exposes the tank to it, city water pressure at campgrounds. Connection type and size: match the tank's fittings to your pump outlet and plumbing, whether threaded, quick-connect or barbed. Budget for adapters if they differ. Physical size and mounting: measure the space near the pump. Check whether the manufacturer specifies a mounting orientation. Drinking-water suitability: look for materials and certification intended for potable water, such as a listing to a recognized drinking-water standard like NSF/ANSI 61. Adjustable precharge: a tank with an accessible air valve lets you check and set the air pressure with an ordinary tire gauge. Winterizing: confirm the tank can be drained and that its materials tolerate the RV antifreeze you use.
Precharge: the setting that makes or breaks performance
Precharge is the air pressure inside the tank when it holds no water. It is normally set relative to the pump's cut-in pressure, the pressure at which the pressure switch turns the pump back on. A common general principle is to set it slightly below cut-in. The correct figure depends on your specific pump and tank, so use the values in their manuals.
If the precharge is too high, the tank holds little water and does little smoothing. If it is too low, the bladder can overstretch and the tank may behave as if it is waterlogged. To check or adjust it, switch off the pump, open a faucet to release system pressure, and then read the air valve with a gauge. Tanks are shipped with a factory precharge, which may not match your pump's settings, so check it at installation and periodically afterward.
Installation and ownership trade-offs
The tank goes on the pressure side of the pump, between the pump outlet and the fixtures, and as close to the pump as practical. Installation is usually a simple plumbing job. It does add another component and more connections that could leak, so inspect the joints after the first fill and during routine checks.
Ongoing care is mostly checking the precharge from time to time and including the tank when you drain and winterize. A tank that stops smoothing flow after previously working well may have lost its air charge or have a failed bladder. If pressing the air valve releases water instead of air, that points to a failed bladder or diaphragm, and the usual fix is replacement.
Alternatives to consider
If your main complaint is pump cycling or pulsing, a variable-speed pump is the other common route. It addresses the problem at the pump rather than adding a buffer, but it means replacing a working pump rather than adding a component. If the pump cycles with every tap closed, look for a leak or a faulty check valve first. An accumulator can mask that symptom without fixing it.
What this guide does not cover
No verified data was available for specific brands, models, capacities, pressure ratings, prices or retail availability. This guide therefore does not recommend particular tanks or quote figures. Before buying, confirm compatibility with your exact pump model and your RV's plumbing layout using the manufacturers' documentation. Plumbing layouts can differ by RV make, model year and floor plan.