Replace Windshield and Bonded Auto Glass: A Practical Guide
Direct Answer: Defective Windshield Glass Requires Replacement, Not Repair
Defective windshield glass cannot be safely repaired; it must be replaced. The essential qualification is that a windshield is a structural and safety component, not just a window. It supports the roof in a rollover, manages airbag deployment, and retains occupants during a crash. If the glass has a manufacturing defect such as optical distortion, lamination failure, spontaneous cracking without impact, or improper tempering, the only correct action is to replace the entire bonded glass panel. Repair is only appropriate for minor impact damage like small chips or cracks under a certain size; a true defect in the glass itself is a replacement condition.
Understanding Bonded Auto Glass
Bonded auto glass refers to fixed glass panels that are glued to the vehicle body using a urethane adhesive. This includes the front windshield, rear back glass, and often rear quarter glass panels. The bond is not a simple gasket; it is a structural adhesive that cures to form a strong, watertight, and load-bearing connection. Modern vehicles rely on this bond for rigidity and crash performance. Replacing bonded glass means cutting the old adhesive, removing the glass, preparing the pinch weld or bonding surface, applying fresh primer and urethane, and setting the new glass with the correct positioning.
Diagnosing a Defective Windshield
A defective windshield shows problems without a clear impact point. Signs include a crack that starts from the edge and runs inward without any chip or star, visible waviness or distortion in the glass that makes straight lines look bent, delamination where the plastic interlayer separates from the glass and creates a milky or bubbled area, or a spontaneous crack that appears after a temperature change with no stone impact. If you can run a ballpoint pen along the crack and it does not catch on an impact point, the failure is likely from glass stress, poor installation, or a manufacturing flaw. Such glass must be replaced, not filled.
Do It Yourself Auto Glass Replacement: Scope and Limits
Do it yourself auto glass replacement is possible for some fixed side glass and rear quarter glass panels, but it is not recommended for windscreens. A windshield replacement requires two people, specialized cold-knife or wire cutting tools, exact urethane bead sizing, precise clamping, and a cure time before the vehicle can be driven safely. If the adhesive bond fails, the windshield can separate during a crash or airbag deployment. For a rear quarter glass panel, DIY replacement is more feasible because the panel is smaller, lighter, and often uses a simpler bonding scheme, but it still requires the same primer and urethane system. Ford Focus rear quarter glass replacement, for example, typically involves removing interior trim, cutting the old urethane from inside, cleaning the bonding surface, applying primer to both the body and glass, and setting the panel with urethane plus tape to hold it in place while curing.
A front windshield for a Hyundai Verna Fluidic is a direct-bonded, laminated safety glass panel. Replacing it requires removing the cowl and side moldings, cutting the urethane bond with a cold knife or wire, cleaning the pinch weld to bare metal where necessary, applying a metal or glass primer depending on the substrate, and running a continuous triangular bead of high-modulus urethane. The new glass must be set within the adhesive’s open time and secured with tape or blocks until the urethane cures. This is a professional-level job for most owners.
Front and Back Glass Replacement: What Changes
Front and back glass replacement share the same basic bonded process, but the details differ. Front windshields are laminated glass with a plastic interlayer, while many rear back glasses are tempered glass that shatters into small cubes when broken. Some rear windows have embedded defroster grids, antenna lines, or third brake light housings. During back glass replacement, the electrical connectors for the defroster and antenna must be disconnected and reattached correctly. The back glass may also have hinge points for a tailgate or liftgate, so alignment is critical. Rear quarter glass, such as the Ford Focus rear quarter glass, is usually fixed and bonded, and may be tempered or laminated depending on the model year and whether it sits next to a passenger seat.
Professional Replacement Steps
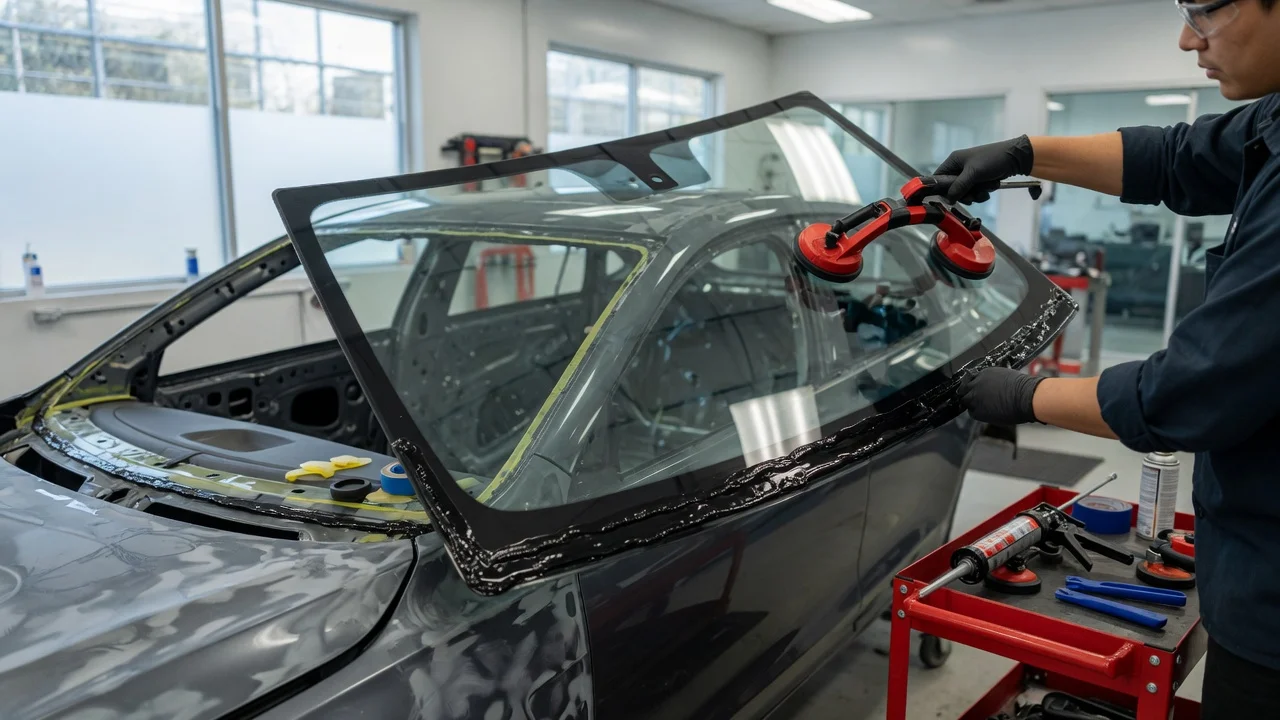
A professional bonded glass replacement follows a controlled sequence. First, protect the interior from glass dust and debris. Remove exterior cowls, wipers, and side moldings. Remove interior trim around the glass. Cut the urethane bond using a cold knife, power tool, or wire. Lift out the old glass. Clean the bonding surface thoroughly and repair any paint damage with a corrosion-resistant primer. Apply the correct primer to the glass frit and the body pinch weld. Apply a continuous, correct-size urethane bead to either the body or the glass. Set the new glass within the adhesive open time using alignment blocks or a suction-cup rig. Reinstall trim and connectors. The vehicle must remain stationary for the adhesive’s safe-drive time, which can range from one to several hours depending on temperature and humidity and the specific urethane used.
Choosing Quality Replacement Glass
Replacement glass comes in Original Equipment, OEM-equivalent, and aftermarket grades. Original Equipment glass carries the vehicle maker’s logo and part number. OEM-equivalent glass is made by the same supplier but without the vehicle logo. Aftermarket glass may vary in optical quality, thickness, and frit design. For a defective windshield, choose glass that meets the same safety standards, usually marked with the Department of Transportation code and the glass manufacturer’s logo. Check that any camera or sensor bracket for lane-keep assist or automatic emergency braking is included or transferable, because many modern windshields require recalibration after replacement.
After Replacement: Curing, Calibration, and Inspection
After installation, the urethane needs time to reach full strength. Do not wash the car, slam doors, or drive at high speed for at least the time specified by the adhesive manufacturer. If the vehicle has a forward-facing camera or sensor mounted to the windshield, a static or dynamic recalibration procedure is required. Without recalibration, features like automatic emergency braking, lane departure warning, and adaptive cruise control may not function correctly. Inspect the new glass for distortion by looking through it from the driver’s seat with the head in a normal position. Straight lines should remain straight. Check for water leaks after 24 hours using a gentle water spray, not a high-pressure washer.
Common Mistakes and Material Gaps
The most common mistakes are using the wrong primer for the substrate, applying an undersized or interrupted urethane bead, touching the primed surface with bare fingers, and driving the car before the adhesive reaches safe-drive strength. Another error is reusing old trim clips that are brittle and break, causing wind noise or water leaks. The supplied evidence does not specify exact cure times for all urethane brands or the specific primer system for every vehicle, so always follow the adhesive manufacturer’s technical data sheet and the vehicle service manual. When a specification is not stated, treat the safe-drive time as unknown and leave the vehicle stationary until the installer confirms it is road-ready.