Repair car interior plastic
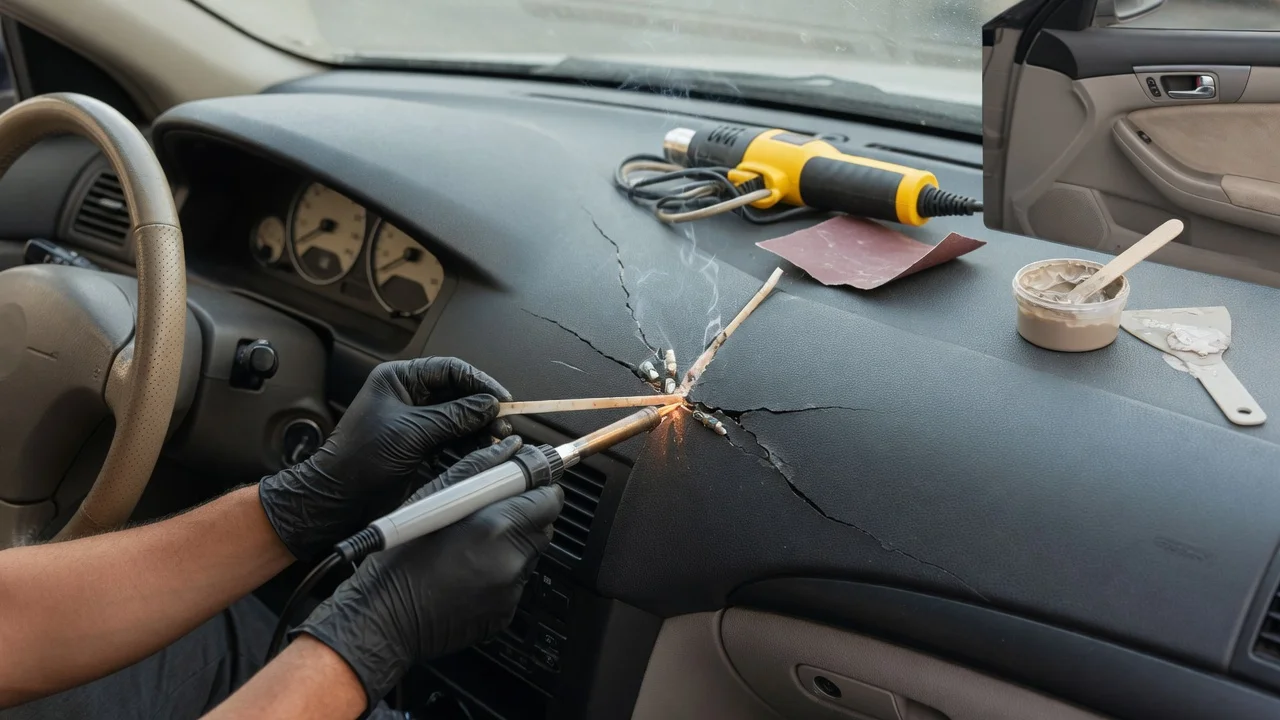
What actually fixes interior plastic damage
Light surface scratches on hard, uncoated interior plastic can often be reduced by cleaning, then using a plastic-safe polish or a matching interior dressing. Deep scratches that cut through grain, color, or a soft-touch coating, and cracks that split a panel, need filling, texture repair, adhesive bonding, or plastic welding. The usable method depends on the polymer, the surface finish, and whether the part is only cosmetic or tied to an airbag, fastener, or structural mount. Vehicle-specific interior materials and finishes vary by model year, generation, trim, and market, so a method that works on one panel can stain, gloss, or melt another.
This guide covers cosmetic interior hard plastic, textured trim, and related crack repair. It does not replace a workshop manual for a named vehicle, and it does not treat glass, leather, fabric, or painted exterior plastic as the same job.
Match the repair to the plastic and the depth of damage
Interior parts are commonly molded from polypropylene, ABS, PC-ABS blends, TPO, or PVC-type vinyl, then left as raw textured plastic, painted, wrapped, or given a soft-touch coating. Many parts are unmarked. A recycling symbol or polymer code on the reverse of a removable panel is useful when it is present; if it is absent, treat the surface as unknown and test any cleaner, solvent, heat, or polish on a hidden area first.
Check depth before choosing a method. A scuff that has not broken the grain often responds to cleaning and dressing. A scratch you can catch with a fingernail has removed material or coating and will still show unless it is filled, recut into the texture, or color-matched. A white or pale line on dark trim is often the base polymer showing through a coating. A crack is a split through the part; closing the face without supporting the reverse usually lets it reopen. Piano-black and high-gloss interior pieces show swirl marks from ordinary compounds. Soft-touch coatings can haze, peel, or go sticky if they are sanded, heated, or cleaned with aggressive solvents.
What you need before you start
Work on a cool, dry interior out of direct sun. Confirm there is no manufacturer restriction on the panel, especially airbag covers, steering-wheel modules, seat-side airbag trim, and any part that locates a fastener or clip. If the panel unclips, removing it usually gives a safer reverse-side repair and a hidden test area. If removal risks breaking clips or disturbing an airbag, leave the part in place or have it handled by a trim or body shop.
Typical tools and materials for a cosmetic scratch or small crack: a plastic-safe interior cleaner, microfiber cloths, masking tape, cotton swabs, a plastic trim tool, fine abrasive (often in the 800 to 3000 grit range when the surface can accept sanding), a plastic polish or interior restorer labeled safe for uncoated plastic, a color-matched interior paint or dye if the color is through-broken, a filler or plastic repair adhesive rated for the polymer when that polymer is known, backing mesh or a reverse-side patch for cracks, and optional texture paper or a grain pad. A heat gun appears in many plastic-welding procedures; it can warp, gloss, or discolor interior trim, and it can damage nearby vinyl, screens, and wiring. Exact heat settings, adhesive cure times, and paint products are part-specific; use the product label and, where available, the vehicle maker’s interior-trim procedure rather than a generic temperature or grit as a rule.
Steps for surface scratches on hard interior plastic
Clean the area with a plastic-safe interior cleaner and a microfiber cloth so dirt is not driven into the scratch. Degrease dressings and skin oils; leftover silicone can keep polish and paint from bonding. Mask adjacent leather, screens, switches, stitching, and piano-black pieces. Identify the finish. If the part is textured and uncoated, avoid sanding unless you are prepared to restore grain. If it is a smooth hard plastic, a small hidden-area test of polish is the next check. If it is soft-touch or painted, skip abrasive steps and treat the damage as a coating repair or a panel refinish. For a light scuff on uncoated hard plastic, apply a small amount of plastic-safe polish or a matching interior restorer, work it with light pressure along the scratch, then wipe residue. Repeat only while the mark is still reducing. Stop if the surface goes glossy against a matte surround, or if color lifts. For a deeper scratch that has not cracked the panel, clean again, then decide between filling and color. A shallow trough can be filled with a plastic filler or a repair compound compatible with the polymer, leveled carefully, and then textured and colored. Do not sand through a thin coating to “blend” a scratch; that usually makes a dull patch larger than the original mark. Restore texture if the grain was flattened. Texture paper, a grain pad, or a light stipple in still-workable filler can disguise a filled line. A perfectly smooth patch on a grained dash or door card will read as a repair even when the color is close. Color the repair only after the filler has cured per the product directions. Interior paints and dyes need to match both hue and sheen. Many factory interiors are a low-sheen grain, so a gloss touch-up stands out. Apply thin coats and keep overspray off vents and switches. Finish with a compatible interior dressing only if the surrounding plastic is already dressed the same way. A wet-look dressing on one patch will outline the repair.
Completion check: from a normal seating position and in mixed light, the scratch should no longer catch a fingernail, the sheen should match the adjacent plastic, and the grain should not present as a smooth island. If the mark is still a pale line, the coating or color coat is gone and dressing alone will not hide it for long.
Steps for a crack in interior plastic
A crack is a different repair from a scratch. Closing only the visible face usually fails because the panel keeps flexing. Support the reverse of the split whenever the part can be removed safely.
Stop using the panel in a way that opens the crack, including pressing on a collapsing dash pad, door card, or console lid. Remove the part if clips and airbag status allow. Photograph connector and clip locations before disconnection. Align the edges dry so the face sits flush. Tape the visible side to hold alignment. On the reverse, scuff a bond area beside the split, clean it, and apply a plastic repair adhesive or a plastic weld according to the polymer if it is known. Back the joint with mesh, a plastic strip, or a purpose-made repair patch so the load is spread. Super glue on the face of unknown interior plastic is a weak, brittle fix and can frost surrounding trim. After the reverse repair has cured, treat the visible line as a deep scratch: fill if needed, restore grain, then color-match. Refit the panel and confirm clips, screws, and any electrical connectors are fully seated. There is no single interior-trim tightening value that applies across vehicles; use the figure in the service information for that fastener when it is specified.
A heat-based plastic weld can produce a strong joint on compatible thermoplastics, typically some polypropylene and ABS parts, when the rod or melt matches the substrate. Mismatched weld material, too much heat, or welding a coated face will leave a glossy scar or a weak joint. If the polymer is unidentified, a two-part plastic adhesive system with mechanical backing is the more controllable home repair, provided the adhesive is specified for that class of plastic.
Precautions that change the method at the point they apply
Do not sand, solvent-wipe, or heat an airbag cover, steering-wheel airbag module, or seat-mounted airbag trim. Cosmetic work on those covers can hide a crack that should take the part out of service, and heat or solvents can affect cover performance. Have a qualified workshop inspect any split, crease, or repair already present on an airbag-related surface.
Keep solvents, acetone, and aggressive adhesive removers off untested interior plastic. They can craze ABS, dull coatings, and stain vinyl. Keep liquids out of switch packs, speaker grilles, and HVAC vents. Disconnect the battery only when the repair requires it for airbag or electrical safety, and follow the vehicle’s wait and reconnect procedure; that sequence is model-specific and is not interchangeable.
Stop and use professional repair or a replacement panel if the crack runs through a mounting boss, if clips have torn out of the plastic, if the part will not align flush, if a soft-touch coating is peeling across a wide area, or if a color-matched refinish is required on a large, high-visibility surface such as a dashboard. Replacement is often the cleaner result when the grain cannot be reproduced or when the panel is inexpensive relative to a refinish.
What this guide cannot specify without the vehicle and the part
No single grit, heat setting, adhesive chemistry, or interior paint code applies to every cabin plastic. Factory grain patterns, soft-touch formulas, and piano-black coatings differ by maker and model year. Where a workshop manual or parts catalogue gives a material, a refinish product, a fastener torque, or a prohibition on repairing an airbag cover, that document overrides a general method. If the polymer is unmarked and a hidden-area test is not possible, limit work to cleaning and a plastic-safe dressing, or have the panel identified before filling, welding, or painting.