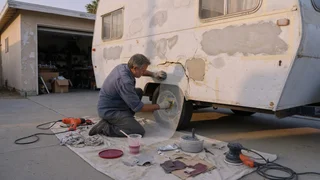
Repair a Winnebago RV body
A damaged Winnebago body affects more than appearance: it can weaken the coach structure, let water reach hidden framing, and change how sidewalls, caps, and compartment doors fit together. Winnebago body repair spans fiberglass panels, aluminum or steel framing, roof membranes, moldings, and painted or gel-coated surfaces. The right approach starts by identifying the substrate material and the failure type. That distinction drives surface preparation, repair method, panel alignment, coating compatibility, and corrosion protection. Without matching the repair to the existing construction, a quick patch may hide deeper movement or moisture damage.
Essential answer
Winnebago body repair is best understood as a system repair rather than a single panel patch. Many coaches combine molded fiberglass, metal framing, bonded sidewalls, and sealed roof structures. A crack, bulge, delamination, or loose molding is a signal that stress, impact, or water intrusion has reached that area. The repair should restore not only the outer surface but also the structural bond and weather seal around it. On a motorhome, small visible damage can indicate a larger hidden issue behind the exterior skin, so the scope must include the substrate material and surrounding attachment points.
The exact method depends on the body area and material condition. Fiberglass may be repaired with compatible resin and reinforcement when the underlying panel is sound. Aluminum or steel supports may need mechanical repair if they are bent or corroded. Trim and compartment openings require careful panel alignment so doors and covers operate correctly after the work. Since Winnebago construction varies by model and generation, the first step is to inspect from both outside and inside the affected area, then choose a repair method that preserves the original structure and corrosion protection.
Diagnosing a problem
Begin by distinguishing a surface blemish from structural movement. A hairline crack in gel coat may be cosmetic if it stays narrow when the area is lightly pressed, but a crack that opens under load often means flexing behind the panel. View the surrounding wall, floor, or roof transition with a straightedge to check for bulges or depressions. Inside the coach, look for stains, soft trim, or fastener movement near the damaged area. These observations help separate ordinary weathering from a failing bond or weakened framing before any repair material is applied.
Water staining around windows, moldings, or roof edges changes the diagnosis. If moisture has reached a laminated sidewall or wood-based backer, surface patching alone will not stop the deterioration. Tap gently with a plastic tool and listen for dull or dead sounds compared with a known solid area. Loose or misaligned compartment doors and entry steps may also point to body distortion. When framing appears shifted, fasteners pull through, or the affected area moves while driving, stop using the vehicle until the structure can be professionally evaluated. A repair that ignores these warning signs can hide progressive damage behind new paint or filler.