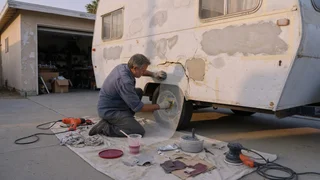
DIY caravan and RV body repair
Tackling DIY caravan body repairs or a DIY RV body repair starts with one clear distinction: the fix is rarely about forcing metal back into shape. Most recreational vehicle exterior panels are thin aluminum, fiberglass, or laminated composite bonded over a wood or foam frame. A successful repair therefore depends on identifying the substrate material and choosing methods that preserve water tightness and coating compatibility. The work is approachable, but it rewards careful surface preparation and an honest look at whether the damage is cosmetic or structural before the first tool comes out.
Essential answer
The essential answer is that DIY caravan and RV body repair is realistic for localized exterior damage that has not compromised the wall structure or roof framing. Typical jobs include resealing trim, patching small punctures, filling shallow cracks in fiberglass, touching up stone chips on aluminum skin, and replacing a damaged corner molding. The scope of the work changes when a panel is delaminated, a sidewall is soft, or water has wicked far behind the visible surface. In those cases, the repair method must address the hidden damage rather than only the outer skin.
Panel alignment matters because a recreational vehicle body flexes constantly during travel. A patch that looks flat in a driveway may develop a ridge or crack after a few hundred miles of chassis twist. For that reason, small-area repairs on a taut flat section are usually more forgiving than work near corners, wheel openings, or roof edges. Matching the repair material to the original substrate is also critical; a polyester filler formulated for steel can bond poorly to aluminum or flexible plastic, creating a new failure point at the edge of the repair.
Diagnosing a problem
When a crack, bubble, or soft spot appears, the first observable check is the surrounding material. Press firmly around a fiberglass crack with the palm of your hand or a blunt tool handle. A hollow or spongy feel suggests the backing layer beneath the laminate has begun to deteriorate from moisture. Discoloration flowing downward from a window, molding, or roof seam points to a water entry point above the damage, not the visible stain itself. If the exterior skin moves slightly under light pressure around a crack, the structural bond may already be compromised and the repair should stop at the surface only if the area remains rigid.
Wrinkled or wavy aluminum siding often indicates the panel was stretched or buckled, which is different from a simple dent. A dent with crisp creases can sometimes be addressed with an oversized cover plate that spreads the load, while a broad oil-canning wave may require partial disassembly to release tension. Loose sealant that peels away in one continuous strip usually failed adhesively, meaning the surface was never properly cleaned or primed for that coating. Cracked sealant that remains bonded suggests movement beyond the product’s flexibility, so resealing alone will not last unless the joint movement is reduced or a more elastic sealant class is selected for that specific automotive application.