How to Remove Transmission Cooler Lines and Choose a Disconnect Tool
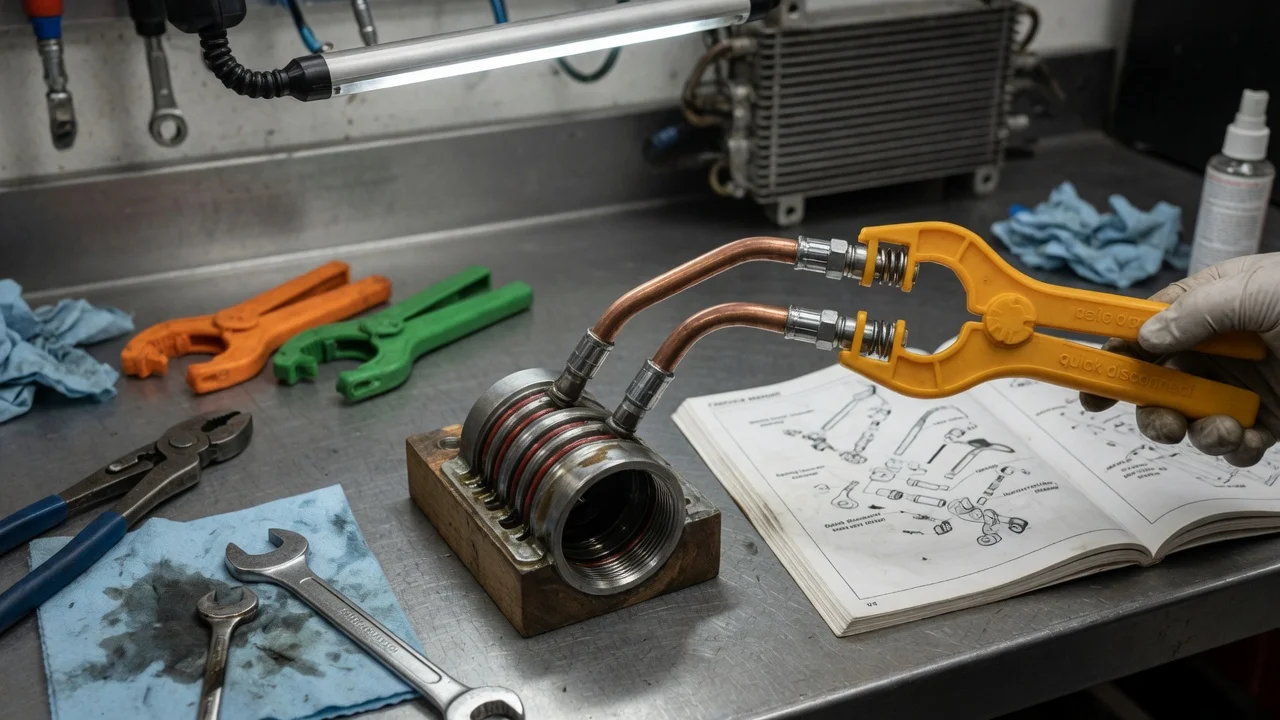
Transmission cooler lines carry fluid between the transmission and its cooler, which may sit inside a radiator tank or in a separate auxiliary unit. You have to disconnect them to replace a radiator, remove a transmission, flush a cooler or repair many leaks. The line ends may use quick-connect couplings that release only with the right tool, threaded tube nuts or simple hose clamps. This guide shows how to identify those fittings, remove the lines without damaging them and choose a disconnect tool that fits.
Define the job the product must do
Start with the job, then choose the tool. Replacing a radiator usually means separating the lines at the radiator tank. Pulling a transmission or replacing a corroded line may also require disconnecting them at the transmission case, and the two ends do not always use the same style of fitting. Note the year, make, model and engine. Confirm the exact transmission type from the vehicle documentation, an identification tag on the case or the service history. Two versions of the same model can use different transmissions, line routing and connectors.
Next, look at the working conditions. Fittings near the radiator are often reached from underneath, around a fan shroud or behind skid plates, so the available room limits which tools you can use. Vehicles from regions that use road salt often have corrosion that makes fittings stiff or seized. Decide whether you need a single tool for one repair or a set you will reuse on other vehicles. That choice affects cost more than any feature on the packaging.
Check compatibility before you buy
Fitment depends on the connector design and the line size. Many Ford vehicles use spring-lock couplings, where a garter spring inside a cage holds the raised end of the line and a sleeve-style tool expands the spring to release it. Other vehicles, including some GM and Chrysler applications, use quick connectors held by an external retaining clip, a wire ring or plastic tabs. Some of these release by hand or with a pick once the clip is out. Many vehicles use threaded tube nuts that need a flare-nut wrench instead of a disconnect tool, and some have rubber hose sections secured with clamps.
A sleeve-style tool must match the outside diameter of the line. Cooler lines are commonly 5/16, 3/8 or 1/2 inch, and some vehicles use metric sizes that are close to these but not identical. Look at both ends of the line before ordering, measure the tube with calipers if you can, and compare the result with the sizes the tool maker lists. A tool that is slightly too large may not expand the spring evenly, and one that is too small will not fit over the line.
How to remove transmission cooler lines step by step
Work on a cool engine and transmission. Park on level ground and support the vehicle on stands if you need to get underneath. Place a drain pan below each fitting, because fluid will run out of both the line and the cooler. Clean dirt and grit off the connector before opening it so nothing falls into the system. Photograph the routing and any brackets so the lines go back in the same position.
For a spring-lock coupling, snap the tool around the line, push it into the cage until it seats against the spring, then pull the line out while holding the tool in place. For a clip-retained quick connector, remove or release the clip first. Pushing the line slightly inward often takes the load off the retainer before you pull it apart. For threaded fittings, put a flare-nut wrench on the tube nut and a backup wrench on the fitting so you do not twist the radiator tank or the case fitting. Cap or plug the open ends right away.
Before reassembly, inspect the O-rings, clips and line ends. Replace damaged or flattened O-rings with ones made for that fitting and lubricate them with clean transmission fluid. Push the connection together until it locks, then pull on it firmly to confirm it is engaged. Top up with fluid that meets the manufacturer's fluid specification. Check the level using the procedure for your transmission, because many current units have no dipstick and require a fill check at a specific temperature. Run the engine and look for leaks at every joint you disturbed.
Removing cooler lines without the special tool
Whether you can do the job without a dedicated tool depends on the fitting. Threaded fittings only need the correct wrenches, hose sections need basic hand tools, and many clip-retained connectors come apart once you lift the clip out with a small pick. Spring-lock couplings are the difficult case. Improvised sleeves cut from plastic tubing or similar material sometimes work, but they tend to expand the spring unevenly. That can stretch or dislodge the spring and scratch the line where the O-ring seals.
Do not pry between the fitting halves with a screwdriver. A distorted cage, bent line end or cracked plastic connector usually means buying a new line, a repair connector or a replacement radiator, all of which cost far more than a basic disconnect set. If an improvised method does not release the fitting easily, stop and get the proper tool. Adding force is what causes the damage.
Features that affect the choice
Plastic sleeve tools are inexpensive and less likely to mark the tube, but they can split or deform with repeated use, especially in cold weather. Metal sleeves last longer but need care to avoid scratching the line. Plier-style or scissor-style tools add leverage and help where you cannot get your hand around the fitting. Angled designs make tight spaces near the radiator easier to reach. Sets that cover several diameters suit people who work on more than one vehicle.
Treat labels such as universal, heavy duty or professional grade as marketing unless the listing backs them up. The useful information is concrete: line sizes in inches or millimeters, the connector style the tool is designed for, any application notes from the tool maker and clear pictures of the tip shape. Some fuel and air conditioning systems also use spring-lock couplings, so a set may include those sizes. Do not assume a fuel or A/C tool fits a transmission cooler line until you have matched the diameter.
Limitations and ownership costs
A disconnect tool releases a fitting that is in good condition. It cannot free a seized or rusted connector, repair a corroded line or seal a leak. Plan for consumables: replacement O-rings, retaining clips, line caps and enough of the correct fluid to replace what drains out. Badly corroded lines may need replacement sections or complete new lines, which raises the cost of the job. Keep tools clean and throw away plastic sleeves that are cracked or spread, because a worn tool can damage the spring it is meant to release.
The tool also cannot diagnose anything. Fluid on a line can come from the fitting O-ring, the line itself, the cooler or a component above it, so a wet connector does not tell you which part has failed. Low fluid can change shift behavior and may set diagnostic codes, but those symptoms have several possible causes. If you are unsure of the leak source or the transmission's condition, have it inspected before you choose a repair. Options include resealing a fitting, replacing a line or servicing the cooler.
Build a practical shortlist
Before comparing products, confirm the vehicle, engine and transmission type. Identify the connector style at both the radiator end and the transmission end, measure the line diameter and note how much room you have around each fitting. Your answers tell you whether you need a sleeve tool, a plier-style release tool, a pick for retaining clips or just a pair of flare-nut wrenches.
Then compare tools on the sizes they list, the connector types they claim to fit, their material and likely durability, and whether a set includes sizes you will actually use. Add the cost of O-rings, clips and the correct fluid to the total, and have a drain pan and caps ready. The right choice is a tool that matches your fitting and line size, both in the listing and when you hold it against the line. Brand claims and rankings matter less.