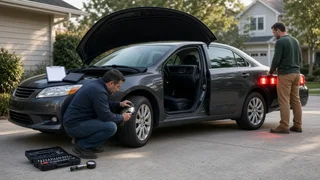
Mechanical Inspection Checklist for Buying a Used Vehicle
A mechanical inspection for a used vehicle is a structured check of the engine, transmission, brakes, suspension, steering, electrical system, body structure and road behavior before you commit to buying. Its purpose is to reveal current faults, signs of past damage and likely near-term repair costs. It is not the same as a state safety inspection or emissions test, which only confirm that a vehicle meets minimum legal requirements on the day it is tested. A car can pass those tests and still need expensive work soon. The checklist below follows a standard vehicle inspection procedure you can use for your own walkaround, or to judge how thorough an independent inspector's report is.
Pre-Purchase Inspection vs. State Safety and Emissions Testing
Buyers often confuse these inspections because they share vocabulary. The difference matters because they answer different questions. A pre-purchase inspection asks whether this particular vehicle is a sound purchase. A state inspection asks whether it is legal to register and drive. In the US, safety and emissions requirements are set by individual states, and sometimes by county or metro area. Some states require periodic safety inspections, some require only emissions testing in certain regions, and some require neither for most passenger vehicles. Check your state's motor vehicle agency for the rules that apply to you.
Aspect | Pre-purchase mechanical inspection | State safety inspection | Emissions test; Main question | Is this vehicle worth buying, and what will it need? | Does it meet minimum safety standards? | Does it meet pollution limits for its class? Who requests it | The buyer, usually | Required by state law where applicable | Required by state or regional law where applicable; Inspection criteria | Broad: wear, leaks, past damage, drivability, repair outlook | Fixed legal checklist, such as lights, brakes, tires, horn and glass | Exhaust readings or onboard diagnostic data, depending on program; Result | Written report, photos and repair estimates | Pass/fail, often with a test certificate or sticker | Pass/fail, often with a certificate; If problems are found | Negotiate, request repairs or walk away | Repair and retest | Repair and retest
A current test certificate is useful evidence, but it shows only that the vehicle met legal minimums at the time of testing. It does not replace a mechanical evaluation.
Before the Inspection: Vehicle Identification and Paperwork
Confirm you are inspecting the vehicle described in the listing and that its history is consistent. Paperwork problems can make an otherwise sound car a bad purchase.
Match the vehicle identification number (VIN) on the dashboard plate, the driver's door jamb label and the title. Look for tampered or replaced labels. Run a vehicle history report using the VIN to check reported accidents, title brands such as salvage, rebuilt or flood, odometer records and ownership history. Check for open safety recalls using the VIN through the federal recall lookup or a franchised dealer. Ask for service records. Regular oil changes and documented major services, such as timing belt replacement where applicable, are good signs. Confirm that the seller's name matches the title and that any lien has been released. Ask whether the vehicle has a recent safety or emissions test certificate, if your state uses them.
Vehicle Mechanical Inspection Checklist
Inspect the car in daylight, on level ground, with the engine cold. Ask the seller not to start or warm up the car before you arrive, because a warm engine can hide hard-starting problems, noisy components and some leaks.
Cold Start and Engine Bay
Feel the hood or engine to confirm it is actually cold before starting. On start-up, listen for prolonged cranking, knocking, ticking, rattling or squealing belts. Watch the exhaust at start-up. Persistent blue-gray smoke can indicate oil burning. Thick white smoke that continues after warm-up can point to coolant entering the combustion chamber. Black smoke suggests a rich fuel mixture, which is more often a concern on gasoline engines than on older diesels under load. Check that all warning lights come on briefly with the ignition, then go out. A check-engine or airbag light that never illuminates may have been disabled. Look for oil residue around the valve cover, oil filter and oil pan, and coolant crust around hoses, the radiator and the water pump. Inspect belts for cracks or glazing and hoses for swelling, softness or brittleness. Check the battery terminals for corrosion and look for a date code on the battery case. Be cautious if the engine bay is freshly pressure-washed. It may simply be clean, or it may be hiding leaks.
Fluids
Engine oil: check the level and condition on the dipstick. Milky or foamy residue, on the dipstick or under the oil filler cap, can indicate coolant contamination. Interpret this with care, because short-trip driving in cold weather can also leave condensation under the cap. Coolant: with the engine cold, check the level in the reservoir. Look for oily film or rusty discoloration. Transmission fluid: where a dipstick is provided, check the level and smell. Dark fluid with a burnt odor is a warning sign. Many newer transmissions have no user dipstick, so this check may need a shop. Brake fluid: check the level. A low level may simply reflect worn pads or may indicate a leak. Power steering fluid: check where applicable. Many newer vehicles use electric power steering and have no fluid reservoir.
Underneath: Leaks, Exhaust, Suspension and Structure
Look for fresh drips on the ground under the engine, transmission and differential. Inspect the frame rails, subframes, rocker panels and floor pans for rust, especially in regions that use road salt. Surface rust is common. Flaking, holes or rust on structural members is serious. Look for signs of collision repair: wrinkled or welded frame sections, mismatched paint, overspray on rubber seals, uneven panel gaps or fresh undercoating in only one area. Check the exhaust system for rust-through, loose hangers and soot marks at joints that indicate leaks. Inspect shocks and struts for oil seepage. Check CV joint boots on front-wheel and all-wheel-drive vehicles for tears and spattered grease. Check ball joints, tie rod ends and control arm bushings for cracked rubber or play. Detecting play reliably usually requires a lift and a trained eye. Look for signs of flood exposure: silt or rust in unusual places, corroded seat rails, damp carpet or a musty smell.
Brakes, Tires and Wheels
Check the tread depth across each tire. Uneven wear patterns can reveal alignment, suspension or tire pressure problems. Read the tire date code on the sidewall. Older tires can be unsafe even with good tread. Confirm the tires match in size and type, which is especially important on all-wheel-drive vehicles. Look through the wheels at the brake pads and rotors. Check for deep grooves, a heavy lip on the rotor edge or thin pads. Check the wheels for cracks, bends or curb damage. Verify that a spare tire or inflator kit, a jack and a wheel lock key are present if the vehicle came with them.
Electrical Systems and Onboard Diagnostics
Gasoline cars and light trucks sold in the US from the 1996 model year onward have a standardized OBD-II diagnostic port. An inexpensive scan tool can read stored and pending trouble codes and show readiness monitor status. Readiness monitors are self-tests the car runs to confirm its emissions systems are working. If several monitors show as incomplete, the battery may have been recently disconnected or the codes recently cleared, which can temporarily hide a fault. Many emissions test programs check these monitors, so a car that is not ready may fail and need a retest.
Scan for stored, pending and permanent trouble codes. Check readiness monitor status. Test all exterior lights, including headlights, high beams, brake lights, turn signals, reverse lights and hazards. Test the horn, wipers, washers, power windows, locks, mirrors and seat adjusters. Run the air conditioning and heater through all modes and fan speeds. Confirm that the AC blows cold and the defrost works. Check the infotainment system, backup camera, parking sensors and driver-assistance features, if equipped.
Interior and Safety Equipment
Compare wear on the steering wheel, pedals and driver's seat with the odometer reading. Heavy wear on a low-mileage car is a red flag. Confirm the airbag warning light turns off after start-up. Check that every seat belt latches, releases and retracts properly. Look for water stains on the headliner, in the trunk or around door seals, which can indicate leaks. Note any persistent odors, such as mildew, burning oil, sweet coolant or fuel.
Road Test
Drive for long enough to bring the engine to full operating temperature. Include city streets, a highway run, some rough pavement and a safe, empty area for low-speed maneuvers. Turn the audio system off so you can listen.
Engine: smooth idle, steady acceleration, no hesitation, misfire or unusual noise under load. The temperature gauge should settle and stay stable. Transmission: shifts should be prompt and smooth, with no slipping, flaring, harsh engagement or delay when selecting drive or reverse. On manual transmissions, check for clutch slip, a high engagement point or grinding between gears. Brakes: straight, confident stops with no pulling, grinding, squealing or pulsing pedal. The pedal should feel firm, not spongy. Steering: centered steering wheel when driving straight, no wandering and no clunking on turns. At full lock in a parking lot, listen for clicking, which can indicate a worn CV joint. Suspension: no clunks over bumps and no excessive bouncing or body lean. Vibration: note any shimmy through the steering wheel or seat at highway speed. After the drive: recheck for leaks and smells, and rescan for any new trouble codes.
Powertrain-Specific Checks
Inspection criteria shift with the vehicle's powertrain, and known weak points vary by model, generation and model year. Research common issues for the exact vehicle you are considering. The checks below are general starting points.
Turbocharged engines: listen for whistling or whining that changes with throttle, check for oil around intake piping, and watch for smoke under acceleration. Diesel engines: check for hard starting, excessive smoke and the health of emissions equipment such as the particulate filter and exhaust fluid system, where fitted. These parts can be costly to repair. CVT (continuously variable) transmissions: watch for shuddering, whining or a slipping sensation. Ask whether the fluid service schedule has been followed. All-wheel and four-wheel drive: test engagement where selectable, listen for driveline clunks, and confirm all tires match. Hybrids and electric vehicles: high-voltage battery condition is often the largest cost factor. A dealer or specialist shop with the right diagnostic tools can report battery health. Also check the remaining warranty coverage on the battery and drive components, which varies by manufacturer and model year.
DIY Walkaround vs. Independent Inspection Service
A careful buyer can catch many obvious problems with the checklist above. Some checks, however, require a lift, specialized tools or experience: measuring suspension play, reading compression or leak-down results, assessing frame damage and interpreting manufacturer-specific diagnostic data. An independent pre-purchase inspection by a mechanic who has no connection to the seller adds that depth. It also produces a written report you can use in negotiation.
Choose an inspector who is independent of the seller, rather than one the seller recommends. Prefer a shop or mobile inspector familiar with the make, especially for European brands, diesels, hybrids and EVs. Ask in advance what the inspection includes, whether the inspector will do a road test, whether they will put the car on a lift, and whether the report includes photos. If a seller refuses a reasonable independent inspection, treat that as a significant warning sign. Remember that even a thorough inspection cannot predict every future failure. It reduces risk but does not eliminate it.
Using Inspection Videos and Photo Reports
A vehicle inspection video can help in two ways. Before your inspection, walkthrough videos can show you where components are located and what normal and abnormal conditions look like. During remote purchases, a video recorded by an inspector or the seller can document a cold start, the underside and the road test. A video is only as useful as what it shows. Ask for an unedited cold start with the exhaust visible, a clear view of the underside and frame, a close look at the tires and brakes, and the dashboard warning lights at ignition. Edited clips or footage shot only on a warm engine leave important gaps.
Interpreting the Results
Most used vehicles will have findings. The goal is to separate routine maintenance from costly or safety-critical problems and to factor repair costs into your decision. Get written repair estimates for anything significant.
Usually negotiable: worn tires, brake pads and rotors, wiper blades, the battery, minor fluid seepage, overdue routine services and cosmetic wear. Investigate carefully: active trouble codes, transmission shifting complaints, suspension clunks, AC that does not cool and moderate rust. Often deal-breakers: structural frame damage or rust-through, signs of flood damage, evidence of engine coolant contamination, a slipping transmission, title or VIN discrepancies, odometer inconsistencies and a seller who blocks inspection.
Safety Inspections, Test Certificates and Retests After Purchase
If your state requires a safety inspection or emissions test, find out whether the vehicle must pass before registration and who is responsible for it. In some states the seller must provide a valid certificate at the time of sale. In others the buyer handles testing after purchase. Rules on how long a certificate remains valid also vary. If the vehicle fails, the usual process is to repair the listed items and return for a retest. Some programs have specific retest windows, fees or waiver provisions. Clarify these points before you buy, because a failed emissions test can add unexpected repair costs or delay registration. Where possible, make the purchase contingent on the vehicle passing any required inspection.
Next Steps
Start by verifying the VIN, history and recall status. Then do your own cold-start walkaround and road test using this checklist. If the car still looks promising, book an independent pre-purchase inspection before paying or signing. Use the findings and repair estimates to negotiate, request repairs or walk away. Finally, confirm your state's safety and emissions requirements so you know whether a test certificate or retest will be needed to register the vehicle.