Make an old car interior look new
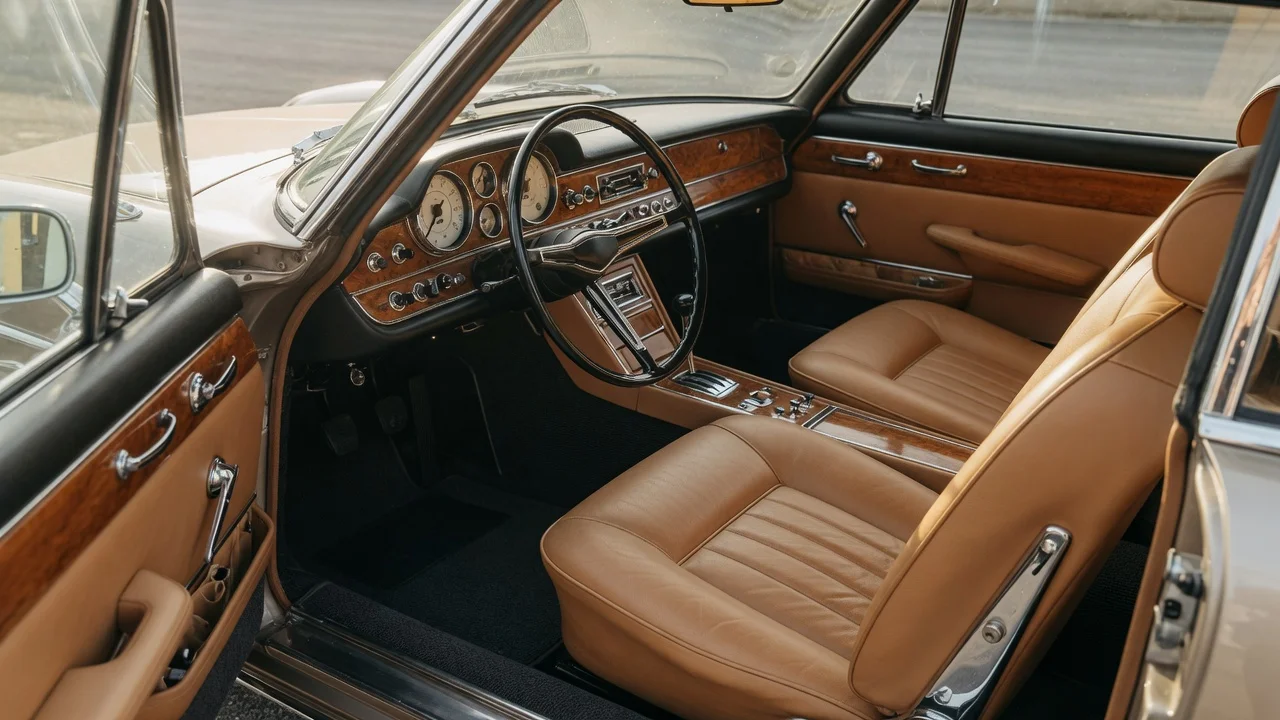
What actually restores an old cabin
An old car interior looks new again when soil, oxidation, and faded coatings come off, remaining materials are conditioned, and the parts that cannot be revived are repaired or replaced. Cleaning and dressing change appearance quickly. Tears, collapsed foam, cracked dashboards, stained headliners, and worn pedal pads change it only after repair or replacement. Results depend on the original materials—cloth, vinyl, leather, plastic, wood, or painted metal—and on how far UV, heat, smoke, and moisture have gone. A thorough refresh is realistic on most daily drivers. A factory-new look is not, if the foam, dye, or grain is already gone.
What to inspect before you start
Work from a dry, well-ventilated space with the battery disconnected if you will remove electrical trim, airbags, or seats. Photograph each area in even light so you can judge progress. Note material type on seats, door cards, dash, console, headliner, and carpets. Check for water under carpets, mildew, rodent damage, and sticky residue from old dressings. Confirm airbag locations, seat-belt pretensioners, and side-curtain modules before prying any pillar or steering-wheel trim. Interior fasteners, clip styles, and torque values vary by model year, generation, and market; use the service information for that vehicle before you pull seats or airbag covers.
Tools and supplies
Vacuum with crevice and brush tools, plus a shop vac for wet extraction; Microfiber towels, soft detailing brushes, and a plastic trim tool set; pH-balanced interior cleaner or all-purpose cleaner diluted for the surface; Dedicated leather cleaner and conditioner if the seats are genuine leather; Vinyl and plastic restorer or a non-greasy interior dressing; Fabric or carpet cleaner and a small extractor or steam cleaner rated for automotive interiors; Isopropyl alcohol for adhesive residue on hard trim, used sparingly and tested first; Melamine foam only on hard, non-gloss plastics after a hidden-spot test; Replacement clips, weatherstrip, pedal pads, shift boot, or floor mats as needed; Nitrile gloves, eye protection, and a respirator if using solvent-based products
Do not use household bleach, undiluted all-purpose cleaner, dish soap as a standing soak, or silicone-heavy dressings on pedals, steering wheels, or anything a driver must grip. Those products can stain fabric, dry leather, leave a slippery film, or attract dust. Manufacturer-approved cleaners, if listed in the owner’s manual, take priority over generic products.
Step-by-step refresh
1) Empty and dry-clean first
Remove floor mats, seat covers, trash, and loose items. Vacuum seats, carpets, console bins, seat tracks, and the rear shelf. Use compressed air or a detailing brush in vents, around buttons, and along stitching. Dry soil that stays in the pile will turn to mud once you add cleaner. If carpets feel damp or smell musty, lift the edges and check the padding and floor pan before any wet work. Standing moisture under carpet is a rust and odor problem; cleaning the surface will not fix it.
2) Degrease hard trim, glass, and controls
Wipe dash, door caps, console, and steering-column shrouds with a lightly damp microfiber and a cleaner safe for interior plastics. Work in small sections and dry immediately so cleaner does not sit in grain or around switches. Clean interior glass and mirrors last among the hard surfaces, with a dedicated glass cleaner and a towel that has not carried dressing. Avoid spraying liquid directly onto screens, speaker grilles, or switchgear; apply product to the cloth instead. Test any restorer on a hidden patch of textured plastic. Some restorers darken faded grain permanently; that can look even, or it can look blotchy if the UV damage is uneven.
3) Wash and extract fabric and carpet
Pre-treat spots with a fabric cleaner, agitating with a soft brush along the nap. Extract or blot until the rinse water runs clear. Do not soak foam cushions; over-wetting leaves a long dry time and can set odor in the padding. For carpets, work from the rear forward so you do not track soil onto cleaned areas. Allow the cabin to dry with doors open or with a dehumidifier and circulating air. Mats can be washed separately; rubber mats take a simple wash and dry, while carpeted mats follow the same extraction method as the floor.
4) Treat leather or vinyl upholstery
Genuine leather and vinyl need different products. Leather cleaner lifts soil from the grain; a follow-on conditioner replaces oils so the hide does not dry and crack. Vinyl is a plastic skin over foam; it responds to vinyl cleaner and a UV-stable protectant, not a leather oil. If you are unsure which you have, check the original window sticker, owner’s manual, or a hidden edge of the seat cover. Perforated leather needs extra blotting so cleaner does not pool in the holes. Do not use heat guns or household oil on either material. Deep cracks, torn bolsters, and flattened foam are beyond dressing; those areas need a trim shop, a cover, or a replacement skin.
5) Restore or replace the parts that still look old
Headliner: surface stains on intact cloth can sometimes be lifted with a dedicated headliner cleaner and almost no pressure. Sagging or water-stained boards usually need recovering. Do not saturate a foam-backed headliner; the foam fails and the cloth detaches. Steering wheel and shift knob: degrease, then assess wear. Smooth, shiny leather can be recoded by a specialist; cracked urethane wheels are typically replaced. A new wheel cover hides wear but can slip if it is not sized for that wheel. Pedal pads and scuff plates: replacement pads and door-sill plates reset the high-wear zones that cleaning cannot. Door cards and armrests: vinyl repair compound can fill small splits after the area is cleaned and color-matched. Large tears or crumbling foam need a new panel or a retrim. Dash and console: fine scratches in textured plastic often improve after a plastic restorer. Deep cracks, especially on older vinyl dashes, are a repair or replacement job; filling them is cosmetic and may not last in heat. Lights and lenses: cloudy interior lamp lenses can be cleaned; failed bulbs or yellowed map-light covers should be replaced with the correct type for that circuit.
6) Deal with odor and leftover film
Odor lives in foam, carpet backing, and the HVAC evaporator as often as it lives on visible surfaces. After the cabin is clean and dry, replace the cabin filter if the vehicle has one. A musty smell that returns when the air conditioner runs points to evaporator or drain issues; that is an HVAC service, not a spray-over. Smoke and pet odor may need ozone or hydroxyl treatment by a shop after the source material is cleaned or removed. Skip masking fragrances; they mix with old dressing and make the cabin smell chemical.
7) Finish with protection and small new parts
Apply a thin, matte or satin protectant to plastics once they are clean and dry. Wipe off excess so vents and screens stay film-free. Condition leather on a regular schedule recommended by the product maker, not as a thick weekly coat. Fit new floor mats, a fresh shift boot, and matching seat or steering-wheel stitching if those pieces are worn. Color-matched plastic dye or trim paint can even out faded bezels; follow the product’s flash and recoat times, and mask adjacent grain you do not want to tint. Park out of direct sun when possible. UV is the main reason restored interiors fade again.
How to know the job is done
The cabin is finished when carpets and cloth are dry to the touch, hard trim is free of greasy film, glass has no smears, and remaining defects are either repaired or listed for replacement. Sit in the driver’s seat and check sightlines: dusty defroster vents, a shiny dash reflection, and worn pedals are the details that still read as old. A second vacuum after everything dries picks up lint that wet cleaning left behind.
Where a professional should take over
Leave airbag modules, clock springs, seat-belt pretensioners, and occupancy sensors to a technician with the correct procedure for that vehicle. Seat removal on cars with side airbags or pretensioners can store a crash fault or, if handled wrongly, deploy a device. Dye jobs on leather, dashboard recasting, headliner recovering, and flood or mold remediation are shop work. If the floor pan is rusted or the padding is contaminated, replacing carpet over the damage only hides it. Specific fastener torque, airbag connector handling, and material specifications belong in the factory service information for that model year and trim; those values are not interchangeable across cars and are not listed here.
What this will not do
Cleaning will not restore crushed seat foam, stretched leather, a melted dash, or dye that has worn through to the backing. Aftermarket dressing can darken faded plastic, which improves contrast with fresh carpets, but it will not recreate original grain. Match your effort to the car’s value: a deep clean, new mats, and a few trim pieces change how a usable interior feels; a full retrim is the path when the covers themselves are finished.