How to Use a Yakima Hitch Bike Rack
A Yakima hitch bike rack carries bicycles on a receiver mount at the rear of a vehicle, but its security depends on correct assembly and loading. The process is straightforward when the hitch class, load rating, and rack style match the vehicle and bikes. Understanding the retaining pin, anti-rattle hardware, and bike attachment points prevents wobble and damage before driving. This guide explains the essential steps and practical checks so the rack stays stable, the bicycles remain secure, and the load does not exceed the receiver’s capacity or reduce critical ground clearance.
Direct answer
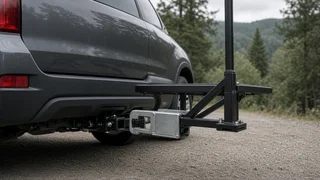
To use a Yakima hitch bike rack safely, first confirm the rack shank fits the vehicle’s receiver size and that the hitch class supports the expected tongue weight. Slide the shank fully into the receiver mount until the cross holes align, then install the supplied retaining pin through both holes. A pin clip or locking hitch pin keeps the pin from backing out. The rack should not sag sharply; a small amount of play is normal, but excessive movement usually means the receiver is oversized or the anti-rattle wedge needs adjustment.
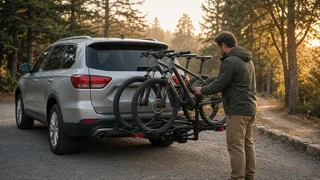
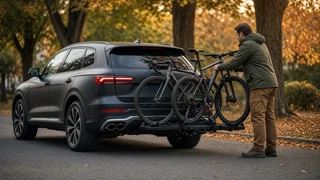
The carrying position is correct when the mast or tray sits level or nearly level behind the vehicle and the rack does not obstruct the taillights or license plate beyond local visibility rules. Folding arms and wheel trays must clear the bumper and exhaust outlet, because hot exhaust gas can damage a tire positioned too close. Check the bike capacity of the specific tray or hanging rack and do not exceed the number of bikes it is designed to hold, even if the receiver could physically accept more weight.
How to proceed
Start by parking on level ground and setting the parking brake, then insert the rack shank into the receiver mount and align its pin hole. Push the retaining pin through and close the clip, or thread and tighten the locking pin if equipped. Some Yakima racks include a threaded anti-rattle pin or tension wedge; snug it only enough to reduce side-to-side rocking without forcing the receiver to distort. Before adding bikes, shake the rack from side to side and upward. If it moves more than slight play, remove it and inspect the receiver, pin, and shank for corrosion, wear, or an incorrect hitch class fit.
Load the heaviest bicycle closest to the vehicle and position each bike so the frame contact points line up with the rack’s cradles or wheel trays. Tighten the hook or strap against the top tube, or secure the wheels and frame arm according to the rack style. After all bikes are attached, pull outward on each saddle and wheel to confirm the hook did not loosen. Rotate handlebars and pedals so adjacent bikes do not strike each other, then fold or secure loose straps. Walk around the rear and check that the rack and bikes remain clear of the ground, especially at driveways or dips where reduced ground clearance can cause the outer bike to scrape.