How to Replace a Serpentine Belt Yourself: Step-by-Step Guide
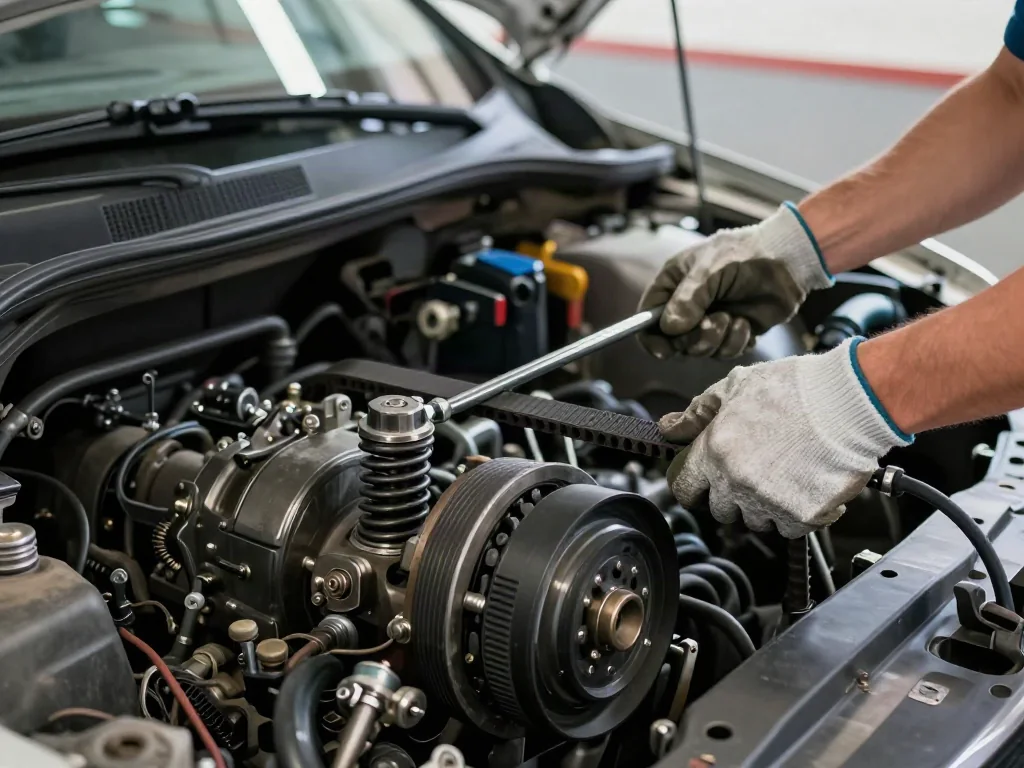
A worn serpentine belt can leave you with a dead battery, heavy steering, and a climbing temperature gauge. Swapping it is still one of the easier jobs under the hood. With a tool that gives you good leverage, a clear routing diagram, and some care around the spring-loaded tensioner, many owners can replace the belt at home and check their work before driving.
Why the Serpentine Belt Matters and When It Needs Replacing
On most modern engines, one ribbed belt wraps around the crankshaft pulley and turns the alternator, power steering pump, water pump, and air conditioning compressor. Because that single belt carries all of those loads, its condition matters more than its low price suggests. Look at the ribbed side with a flashlight. Cracks across the ribs, a shiny glazed surface, frayed edges, or missing chunks of rib all mean the belt is near the end of its life. Oil or coolant on the belt is another warning sign, since it softens the rubber and makes it slip.
A belt often gives warning signs while you drive before it breaks. Squealing at startup or when the air conditioning kicks on, a battery warning light, heavier steering, or an engine running warmer than usual can all come from a slipping drive belt. Noise alone doesn't prove the belt is bad, though. A weak tensioner or a pulley with a worn bearing can chirp just as loudly, so have a shop inspect it if you can't find the source. As for timing, go by your owner's manual and how the belt actually looks, not a single mileage number.
Tools and Preparation Before You Start
The most important tool is something that can turn the tensioner with good leverage. That can be a dedicated serpentine belt tool with slim adapters, or a long breaker bar with the correct socket. You'll also want a ratchet, a flashlight, and gloves. Find the belt routing diagram before you touch anything. It's usually on a sticker under the hood or in the owner's manual. Also take a clear photo of the old belt on the engine, because stickers fade and a photo shows exactly how your engine is set up.
Work only with the engine off and cool, and take the key out of the ignition. If the belt runs close to the alternator or the car has push-button start, disconnecting the negative battery terminal adds a sensible safety margin. Before you start, lay the new belt beside the old one and compare length and rib count. A big difference means you have the wrong part. On some vehicles you'll also need to remove a splash shield, air intake tube, or wheel well liner to reach the belt, which can take extra tools.
Releasing the Tensioner and Removing the Old Belt
Most engines use an automatic tensioner. It's a spring-loaded arm, and you can usually spot it by the square drive hole or hex bolt head on the arm or its pulley. Fit your tool and turn the arm in the direction that moves its pulley away from the belt, which takes the tension off. Hold it there and slip the belt off the smoothest or easiest-to-reach pulley first, often an idler or the alternator. Once that loop is free, ease the tensioner back and pull the rest of the belt off.
Treat the spring with respect. If the tool slips or you let go, the tensioner snaps back hard, so keep your fingers out from between the belt and pulleys and always release it slowly. Some older or simpler engines use a manual adjustable tensioner instead. On those, you loosen a lock bolt and back off an adjuster screw to create slack. With the belt off, spin the tensioner and idler pulleys by hand. If you feel roughness or grinding, hear noise, or see a wobble, have the part checked before the new belt goes on.
Routing and Installing the New Serpentine Belt
Start at the crankshaft pulley, usually the lowest pulley on the engine, and follow the routing diagram around each accessory. Save the easiest pulley to reach for last. Watch which side of the belt touches each pulley. The ribbed side has to sit in the grooved pulleys, and the smooth back rides on the flat idler pulleys. Mixing these up is the most common routing mistake, and the belt can look almost right while being badly out of place.
Once the belt goes around everything except the last pulley, turn the tensioner again and slip the belt over that pulley. Then let the tensioner return slowly instead of letting it snap back. With the engine still off, check every pulley by eye and by running a finger along its edges. The belt should sit centered in each groove, with no rib hanging off the side. If the belt seems too short to reach or so long that the tensioner runs out of travel, stop. Recheck the routing and the part number instead of forcing it.
Putting a Belt Back On After It Slipped or Came Off
A belt that jumps off its pulleys is a sign of another problem. Before putting it back on, find the cause. It might be a seized or dragging pulley, an accessory that's out of alignment, a tensioner too weak to hold pressure, or debris caught in the belt path. Look closely at the belt itself too. A thrown belt is often torn at the edges, stretched, or has damaged ribs from coming off a spinning pulley. A damaged belt usually fails again soon, so replacing it is normally the safer choice.
Putting the belt back on works the same way as installing a new one. Route it from the crankshaft pulley using the diagram, release the tensioner, slip the belt over the last pulley, and let the tensioner return gently. Pay extra attention to alignment: look along the belt path to check that every pulley lines up with the others. Stop and have a professional test the system if the belt keeps coming off, the tensioner won't hold steady pressure, or any pulley doesn't spin freely. A new belt alone won't fix those problems.
Checking the Job and How Long It Takes
Before the first start, reconnect the battery if you disconnected it and make sure no tools are left in the engine bay. Start the engine and let it idle briefly while you watch, keeping hands, hair, and loose clothing away from the moving belt. The belt should run straight on every pulley without drifting toward an edge. Listen for squealing or chirping. Then check that the charging warning light is off, the steering feels normal, and the air conditioning compressor engages when you turn it on.
On engines with easy access, replacing a serpentine belt often takes under an hour, including time spent studying the routing. Expect it to take longer when splash shields, intake parts, or a crowded engine bay get in the way, especially the first time. A new belt may make a brief noise on the first start. Noise that doesn't go away points to misalignment, wrong routing, or a worn pulley that needs attention. With the engine off, check again that the belt is seated properly after a short drive and again after a few days of normal use.