How to Inspect Brake Pads and Measure Minimum Thickness
The Short Answer
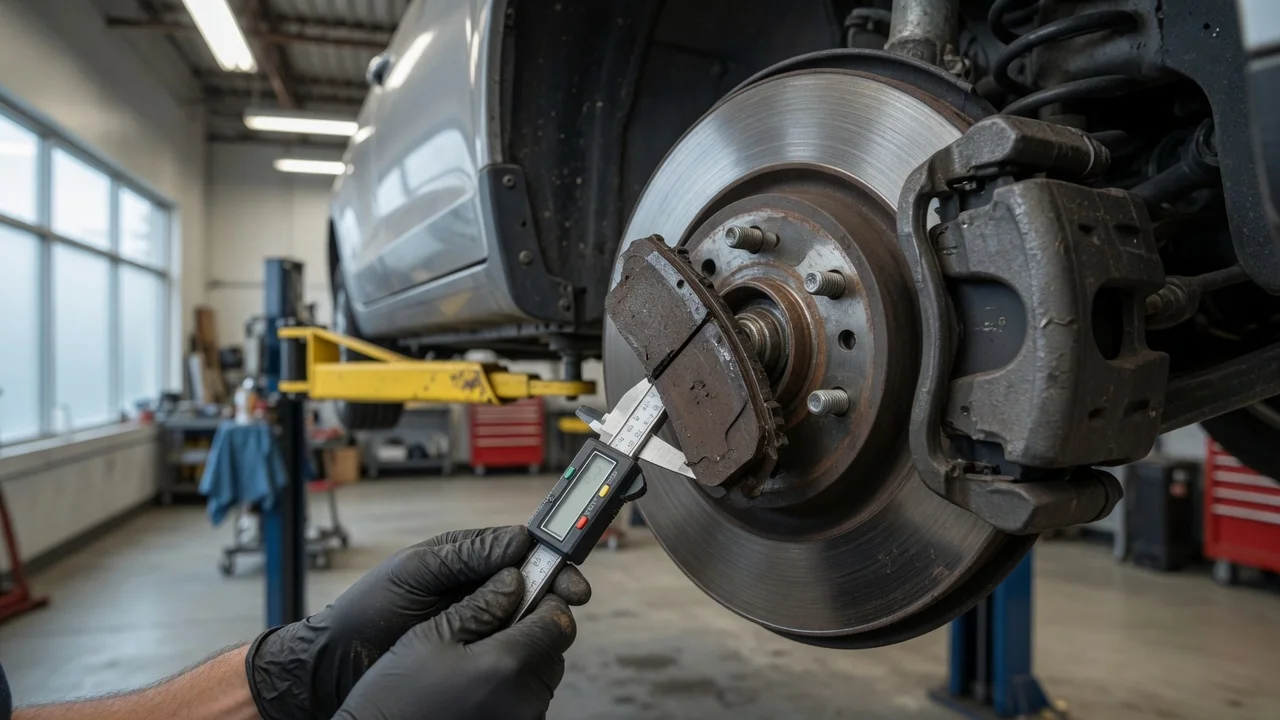
To inspect brake pads, you look at the friction material, the replaceable layer that presses against the brake rotor (the metal disc that turns with the wheel). You then measure how thick that layer is. Do not include the steel backing plate it is bonded to. Compare the measurement with the minimum thickness in your vehicle's service information. Replace the pads if they are at or below that figure. Also replace or investigate them if they are cracked, separating, contaminated or wearing unevenly.
Many people work to a general rule of about 3 mm (roughly 1/8 inch) of remaining friction material. Some manufacturers set a lower limit, often around 2 mm. These are general figures only, not a specification for your car. The correct minimum depends on the make, model, model year and brake package. Rear brakes and performance brake options can have different limits from the standard front brakes. Legal requirements also differ between jurisdictions. Your owner's manual, the manufacturer's service information or a qualified technician is the authority for your specific vehicle.
This guide covers disc brakes. Some vehicles use drum brakes on the rear axle. Drum brakes use curved brake shoes inside a drum instead of pads and a rotor, and they need a different inspection method.
Signs Your Brake Pads May Be Worn
Worn pads often give warnings before you inspect them. Any of the following signs is a reason to check the pads soon. Some of them mean you should check before driving further.
A high-pitched squeal when braking. Many pads have a small metal wear indicator, sometimes called a squealer tab, that contacts the rotor as the pad nears the end of its life. Grinding or scraping noises. This can mean the friction material is gone and metal is contacting the rotor. Stop driving and have the brakes checked. A brake pad wear warning light. This appears on vehicles fitted with electronic wear sensors. Longer stopping distances, or a brake pedal that feels different from normal. The vehicle pulling to one side under braking. Vibration or pulsation through the pedal or steering wheel. This is often linked to rotor condition rather than pad thickness alone.
Before You Start
Brakes are a safety-critical system. Inspecting the pads is within reach of many owners who can safely lift a vehicle and remove a wheel. If you are not confident lifting the vehicle, have a qualified technician carry out the inspection. Follow your vehicle's manufacturer instructions for the lifting points, the wheel removal procedure and the wheel fastener torque.
Some vehicles need extra precautions. Check your service information first if your vehicle has any of the following:
An electronic parking brake. Many of these have a procedure for retracting the rear calipers for service, and that procedure may need a scan tool or a dashboard service mode. A visual inspection through the wheel does not normally involve this. Removing a caliper or pushing back its piston may. A hybrid or electric powertrain, or a brake-by-wire system. On some of these systems, opening a door or pressing the pedal can activate the brake system. The manufacturer may specify how to disable it before working on the brakes. An optional or performance brake package. Its pads and minimum thickness can differ from the standard brakes on the same model.
Equipment You Will Need
A suitable jack and appropriately rated jack stands; Wheel chocks; A lug wrench or socket, plus a torque wrench for refitting the wheels; A flashlight; A brake pad thickness gauge, a vernier caliper or a small steel ruler with millimetre markings; An inspection mirror for viewing the inner pad, which is optional but useful; Gloves and a dust mask or respirator; Your owner's manual or the vehicle's service information
Step-by-Step Brake Pad Inspection
1) Prepare the vehicle
Park on firm, level ground and switch the engine off. Put an automatic transmission in Park, or a manual in gear. Apply the parking brake unless you will be lifting the rear wheels and your service information advises otherwise. Chock the wheels that will stay on the ground. Let the brakes cool before touching them, because rotors and calipers can be very hot after driving.
2) Take a quick look through the wheel
Many alloy wheels have openings large enough to see the outer pad and the caliper with a flashlight. This can give you a rough idea of pad condition without lifting the car. However, it usually shows only the outer pad. The inner pad can wear faster than the outer pad and is often hidden. For an accurate measurement, remove the wheel.
3) Lift and support the vehicle
Loosen the wheel nuts slightly while the tyre is still on the ground. Raise the vehicle at the jacking point specified by the manufacturer. Then lower it onto jack stands placed at the approved support points. Never work beside or under a vehicle held up only by a jack. If the vehicle moves or the stands are not seated securely, stop and reposition before going further.
4) Remove the wheel
Remove the wheel nuts and take off the wheel. You will now see the rotor and the caliper. The caliper is the clamp-like assembly that holds the pads on either side of the rotor.
5) Locate and examine both pads
Each caliper holds an outer pad, facing you, and an inner pad, facing the centre of the vehicle. Use the flashlight to view each pad edge-on through the caliper opening or from the top or bottom of the caliper. Use the mirror if the inner pad is hard to see. Avoid breathing brake dust. Do not blow it away with compressed air, and wear a mask. Some older or non-original pads may contain hazardous materials.
6) Measure the friction material
Measure only the friction material. Measure from the surface that touches the rotor to the point where the material meets the steel backing plate. Do not include the backing plate in the figure. Measure at the thinnest point you can reach, and check both ends of each pad because pads can wear into a taper. Record the readings for the inner and outer pads at every wheel you inspect.
For context, new pads commonly have a friction layer of roughly 10 to 12 mm. The exact figure varies by vehicle and pad type, and this guide has no supplied specification for any particular model. Use the new-pad thickness only to judge roughly how much wear has occurred. The manufacturer's minimum is the limit that matters.
7) Check pad condition, not just thickness
A pad with enough thickness can still need attention. Stop the inspection and arrange professional service if you find any of the following:
Friction material at or below the manufacturer's minimum, or a backing plate touching the rotor; Cracks, chunks missing, or friction material lifting away from the backing plate; Pads soaked with brake fluid, grease or oil. A pad cannot be cleaned once it is contaminated, and the source of the leak must be found. Wet patches or fluid around the caliper or brake hose, which may be a brake fluid leak; A large thickness difference between the inner and outer pad, or between the left and right sides. This can point to a sticking caliper or seized slide pins. A wear indicator tab touching or nearly touching the rotor
8) Look at the rotor
While the wheel is off, check the rotor surface for deep grooves, scoring, heavy rust ridges at the edge, cracks or blue heat discoloration. Rotors also have a minimum thickness, and it is often stamped on the rotor itself. Measuring a rotor accurately usually needs a micrometer. If the rotor looks damaged, have it assessed when the pads are serviced.
9) Refit the wheel and lower the vehicle
Refit the wheel and snug the nuts by hand in a crisscross pattern. Raise the vehicle off the stands, remove them, and lower it to the ground. Tighten the wheel nuts to the torque value specified by your manufacturer, again in a crisscross pattern. Repeat the process for each wheel you need to inspect. Front and rear pads often wear at different rates.
10) Completion check
Before you drive, confirm that all the wheel nuts are torqued, all tools and stands are cleared away, and the brake pedal feels firm. Then make a slow, low-speed test stop. If you only inspected the pads and did not disturb the calipers, the pedal should feel the same as before. If the pedal feels soft, sinks or travels further than normal, do not drive the vehicle. Have it checked.
Deciding What to Do Next
Comfortably above the manufacturer's minimum and in good condition: no action is needed now. Recheck at your next service or tyre rotation. Approaching the minimum: plan a replacement soon, especially before a long trip or heavy use. At or below the minimum, damaged, contaminated or unevenly worn: replace the pads and have the cause of any abnormal wear investigated before driving normally.
Pads are normally replaced in axle sets, meaning both wheels on the same axle at once, so braking stays balanced. Replacing pads involves retracting caliper pistons, checking the slide pins and hardware, possibly servicing the rotors, and on some vehicles using electronic service procedures. If you lack the tools, the specifications or the experience for that work, it should be done by a qualified technician.
Limits of This Guide
No vehicle-specific specifications or authoritative test data were supplied for this guide. All thickness figures above are commonly cited general values, not verified limits for any particular make, model, model year, market or brake system. Legal minimums for pad thickness, where they exist, depend on the jurisdiction and are not covered here. Always confirm the minimum pad thickness, lifting points and wheel fastener torque in the manufacturer's information for your vehicle.