How to Inspect Brake Pads and Measure Their Thickness
What the inspection tells you
Brake pad inspection is a check of remaining friction material on each pad, together with wear pattern and pad condition. The figure that matters is lining thickness only: the distance from the disc-contact face to the steel backing plate. Compare that remaining thickness with the minimum published for your vehicle in the manufacturer’s service information. Pads at or below that minimum, or pads that are cracked, oil- or grease-contaminated, detached from the backing plate, or worn markedly unevenly, are due for replacement.
A generic millimetre figure from a parts listing or a workshop “rule of thumb” is not a substitute for the specification that applies to that model year, market, and brake package. If you do not have the vehicle’s minimum lining thickness, treat the measurement as information only and have the figure confirmed from the applicable workshop data before deciding that the pads are still serviceable.
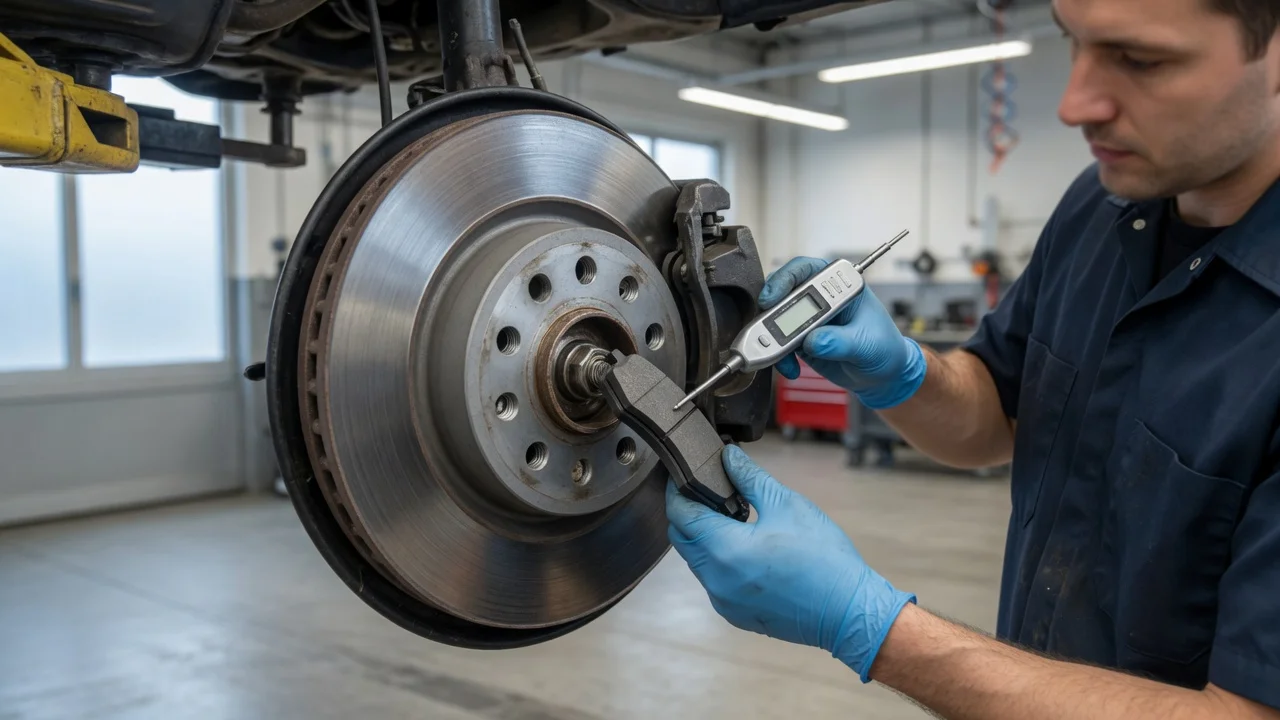
A brake pad thickness gauge (also sold as a pad wear gauge) is a small stepped or marked tool held against the lining edge, or in a caliper inspection window where the design provides one. A steel ruler can serve when the full lining edge is visible. The gauge reads remaining material; it does not set the legal or service limit. That limit is the manufacturer’s minimum remaining thickness for the pad set fitted to the vehicle.
What you need
Park on firm, level ground. You need the owner’s manual or workshop data that states minimum pad lining thickness for that vehicle, a torch, and a brake pad thickness gauge or a steel ruler marked in millimetres. For a through-the-wheel look, that may be enough. For a reliable measurement of both inner and outer pads, plan to remove the road wheel: a wheel chock, a jack rated for the vehicle, axle stands, and a lug wrench. Wear eye protection. Avoid breathing brake dust; dampen dust and wipe it rather than blowing it off.
On vehicles with an electronic parking brake, putting a rear caliper into service mode often requires a scan tool and the procedure in the workshop information. Treat that as qualified service if you do not have the tool and the documented method. Do not pry or force an electronic parking-brake caliper closed.
Hazards that stop the job
Brakes and discs can be hot after driving; allow them to cool before you touch the caliper or pad edge. Never work under a vehicle supported only by a jack. If the vehicle cannot sit securely on axle stands, if a wheel will not come off without force that risks damaging the hub, or if you cannot get a clear view of the inner pad, stop and have the inspection done in a workshop.
Stop and seek qualified service if you find brake fluid at the caliper, a seized or stiff slider pin, a pad that has come off its backing plate, a disc that is deeply grooved, cracked, or blued from heat, or a warning lamp for the brakes or ABS. Those conditions are outside a pad-thickness check.
How to inspect and measure
Chock a wheel that will stay on the ground. If you are raising the vehicle, slacken the wheel nuts slightly with the tyre on the ground, jack at the manufacturer’s lift point, and lower the vehicle onto axle stands before removing the wheel. Confirm the vehicle is stable before you put any part of your body near the arch.
Look first through the wheel spokes or, with the wheel off, at the caliper. Identify the inner pad (between the caliper piston and the disc) and the outer pad (between the caliper body and the disc). Inner pads often wear faster; inspect both. Find the lining, not the backing plate. The lining is the friction material bonded or riveted to the plate. Measure only that material. If the caliper has an inspection opening, seat the thickness gauge or ruler on the lining edge there. Otherwise, with the wheel removed, measure at the thinnest visible point on each pad. Do not scrape the disc face with the gauge. Record remaining lining thickness for inner and outer pads at that corner. Repeat at the other corner of the same axle. Compare every reading with the manufacturer’s minimum remaining thickness for that vehicle and pad type. Check wear pattern: even contact across the pad face is expected. Taper from one end of the pad to the other, heavy inner-versus-outer difference, glazing, cracks, or oil staining are reasons to replace the pads and to have the caliper and disc assessed. Look for a wear indicator. Many pads have a metal tab that contacts the disc and squeals when lining is near the service limit; some vehicles use an electrical sensor that lights a warning. A sounding or triggered indicator means the pads should be replaced even if a spot measurement still looks close to the limit. Refit the wheel, lower the vehicle, and tighten the wheel fasteners to the manufacturer’s specified torque and sequence. Recheck torque after a short drive if the workshop data requires it.
A through-the-wheel glance can miss a thin inner pad. Treat a visual estimate as a screen, not a pass. The inspection is complete only when you have a millimetre reading for both pads at each inspected corner, those readings are compared with the published minimum, and you have looked at wear pattern and contamination.
How to read the thickness
Minimum remaining lining thickness is a vehicle-specific service specification. It is stated in the manufacturer’s workshop information, sometimes also in the owner’s manual, and it can differ between front and rear axles and between brake packages on the same model. Roadworthiness tests in some jurisdictions apply their own remaining-lining or “friction material present” rules; those legal limits belong to the inspecting authority in that jurisdiction and may be stricter or worded differently from the maker’s service figure. Confirm both the service specification for the vehicle and any test standard that applies where the vehicle is used.
If remaining lining is above the specified minimum, the wear pattern is even, and there is no contamination or damage, the pads can remain in service and be rechecked at the next interval in the maintenance schedule, or sooner if you hear grinding, a persistent squeal from a wear tab, or the brake warning lamp. If any pad on an axle is at or below the minimum, replace the pads as an axle set, using the grade and type specified for that vehicle. Do not leave a thick pad opposite a thin pad on the same axle.
Grinding during braking, a deep groove worn into the disc by a backing plate, or a pad worn to the plate means the disc must be measured against its own discard thickness and refinished or replaced as specified. That measurement and any caliper overhaul are workshop tasks when you do not have the disc specification and the tools to machine or replace the disc.
When the next step is a workshop
Have the vehicle inspected by a qualified technician if you cannot obtain the manufacturer’s minimum lining thickness, cannot measure the inner pad, need electronic parking-brake service mode, find fluid leaks or seized hardware, or if braking feels soft, pulls to one side, or the warning lamps are on. Pad thickness is only one part of brake condition; caliper function, hose condition, fluid condition, and disc thickness all affect whether the vehicle is safe to drive.