How to Clean a Transmission Speed Sensor
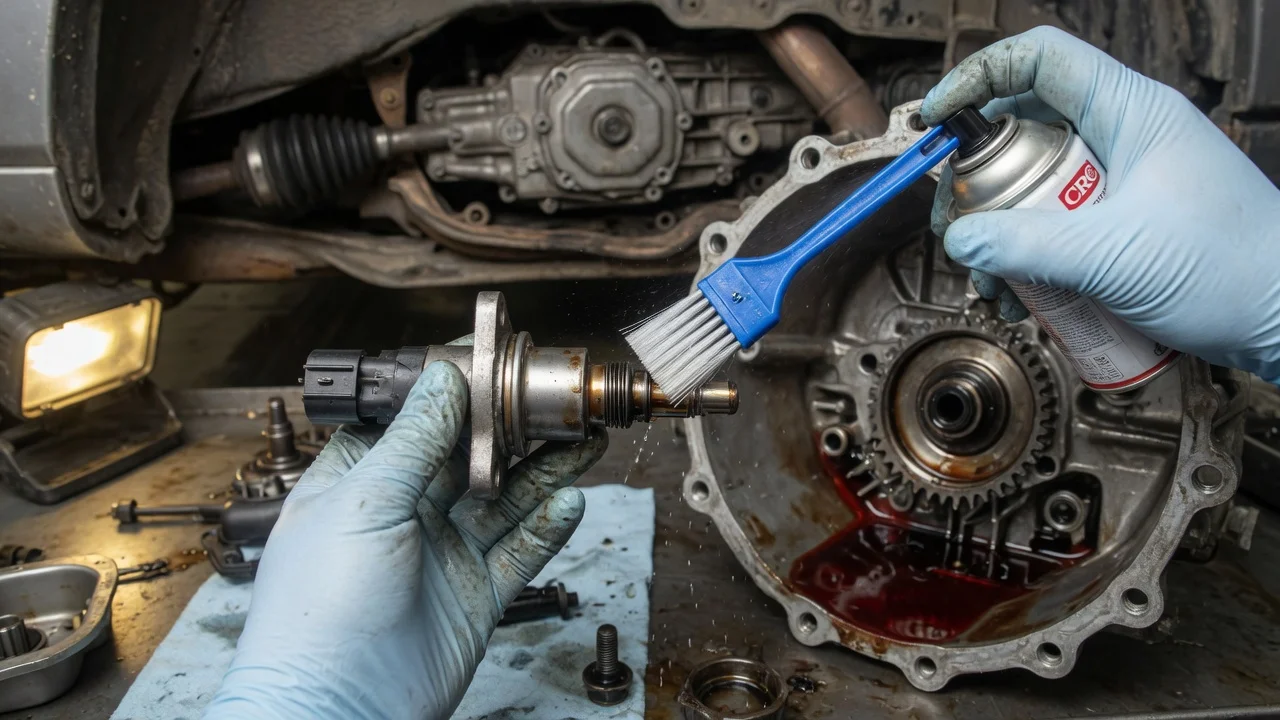
A transmission speed sensor reports shaft rotation to the engine or transmission control module. The module uses that signal to time shifts, manage torque converter lockup and, on many vehicles, drive the speedometer. When a magnetic sensor tip collects metal particles or its connector becomes contaminated, the signal can turn erratic. Cleaning the sensor is a modest job on many vehicles, but it only helps when contamination is the actual problem. This guide covers when to do it, how to prepare, how to do the work and how to confirm the result.
Decide When Cleaning Is Needed
Manufacturer maintenance schedules rarely list speed sensor cleaning as a routine item, so check the owner's manual or service information for your vehicle rather than assuming an interval exists. Transmission fluid and filter service usually has its own schedule. Many manufacturers also publish a severe-service schedule for towing, frequent stop-and-go driving, extreme heat or heavy loads. Sensor cleaning is normally condition-based, or done because the sensor is already out during other transmission work.
Condition-based reasons include stored diagnostic codes for the input or turbine speed sensor circuit (commonly P0715), the output speed sensor circuit (P0720) or the vehicle speed sensor (P0500), plus manufacturer-specific codes. Symptoms can include an erratic or dead speedometer, harsh, delayed or flaring shifts, and a failsafe mode that holds one gear. These symptoms share many causes: low or degraded fluid, damaged wiring, a corroded connector, a failed sensor, a control module fault or internal mechanical trouble. A code describes a circuit or signal problem, not a confirmed bad part. Check the fluid level and condition, inspect the wiring, and, if you have a capable scan tool, compare live sensor readings with actual road speed before deciding cleaning is worth trying.
Service history also matters. If the transmission has a history of slipping, overheating or metal in the pan, a heavily coated sensor tip points to wear inside the unit. In that case cleaning removes the symptom without addressing the source.
Identify the Correct Sensor and Materials
Start by identifying the exact transmission type. Use the VIN, the vehicle certification label or service information, because the same model can use different transmissions depending on engine, drivetrain and model year. Then confirm which sensor is involved. A transmission may have an input or turbine speed sensor, an output speed sensor and a separate vehicle speed sensor, while some vehicles derive road speed from the ABS wheel speed sensors instead. Location varies widely. Many sensors mount externally on the case with a single bolt, but others sit inside the transmission on the valve body or are built into a mechatronic unit or control module. An internal or integrated sensor turns this into a much larger job that may involve removing the pan or valve body, and it may be better left to a transmission specialist.
Speed sensors are usually either two-wire magnetic (variable reluctance) units or three-wire Hall-effect units, and both can attract metal fines at the tip. For materials, use an electrical contact cleaner that leaves no residue and is labeled safe for plastics and rubber. Some aggressive solvents, including certain brake cleaners, can attack sensor housings and seals. You will also need lint-free cloths, a soft nylon brush, a new O-ring or seal with the correct fitment for your part number, and transmission fluid that matches the fluid specification on the dipstick, fill-plug label or in the service information. Common tools include sockets, a torque wrench, a drain pan and a plastic trim tool for stubborn connector locks.
Prepare Safely
Many speed sensors are reached from underneath. Park on level ground, set the parking brake, chock the wheels and support the vehicle on rated jack stands; never work under a vehicle held only by a jack. Some sensors can be reached from the engine bay after removing the air intake or battery tray. The transmission case and fluid can be hot enough to burn after driving, so let everything cool first. Disconnecting the negative battery cable before unplugging sensors is a common precaution. Check the service information first, since some vehicles need relearn steps for windows, radio presets or transmission adaptive values after battery power is removed.
Clean the area around the sensor before removing it so dirt cannot fall into the open bore. Wear eye protection and nitrile gloves, and use spray cleaners only with good ventilation. Catch drips in a pan, and take used fluid and soaked rags to a facility that accepts automotive fluids, following local disposal rules. Never pour fluid onto the ground or into a drain.
Clean and Reinstall the Sensor
Locate the sensor using the service information and note how its harness is routed. Release the connector lock gently, since old plastic becomes brittle, and unplug it. Inspect the pins for corrosion, bent terminals or fluid that has wicked into the connector. Remove the retaining bolt or bracket, then twist the sensor slightly while pulling it straight out. Do not pry against the tip. Sensors that sit below the fluid level will let some fluid seep out, so keep the drain pan in place, and cover the bore with a clean lint-free cloth if it will be open for more than a moment.
Wipe the metal fuzz from the tip with a lint-free cloth, working toward the end of the sensor, and use the nylon brush for anything stubborn. Spray with contact cleaner and let it evaporate completely. Never use sandpaper, a wire brush or a screwdriver, because the tip surface and its distance from the reluctor are part of how the sensor works. Check the body for cracks, heat damage or a chipped tip; a damaged sensor needs replacement, not cleaning. Note how much debris you found. A light coat of fine particles is common on magnetic sensors, while flakes or chunks justify a closer look at the transmission. Clean the connector the same way and let it dry.
Fit the new O-ring and lubricate it lightly with clean fluid of the correct specification. Seat the sensor fully by hand without forcing it. Tighten the bolt to the value in the service information; these small fasteners often thread into aluminum and strip easily. Reconnect the connector until the lock engages, route the harness away from exhaust and moving parts, and reconnect the battery. Finally, check the fluid level using the manufacturer's procedure. Some transmissions require the engine running at a set temperature, and others use a fill plug and check plug instead of a dipstick. Top up only with the specified fluid.
Verify and Record the Result
Clear stored codes with a scan tool, keeping in mind that this also resets emissions readiness monitors. Start the engine and check for leaks around the sensor. Then road test in safe conditions through every gear, watching shift behavior, speedometer movement and cruise control operation. If your scan tool shows live data, watch the input, output and vehicle speed readings. They should rise and fall smoothly with no dropouts or sudden spikes.
Treat a returning code, signal dropouts, a leak or unchanged shift problems as signs that cleaning was not the fix. Next steps include testing the sensor's resistance or signal output against the service information, checking the wiring for continuity and shorts, replacing the sensor, or getting professional diagnosis. Heavy debris that comes back quickly suggests internal wear, which needs a transmission shop's assessment rather than repeated cleaning.
Keep a short maintenance record with the date, mileage, which sensor was serviced, codes before and after, the amount and type of debris found, whether the seal was replaced, and the fluid type and quantity added. That record makes future diagnosis faster and adds useful detail to the vehicle's service history.