FJ Cruiser Rear Axle Shafts: How to Confirm Replacement Fitment
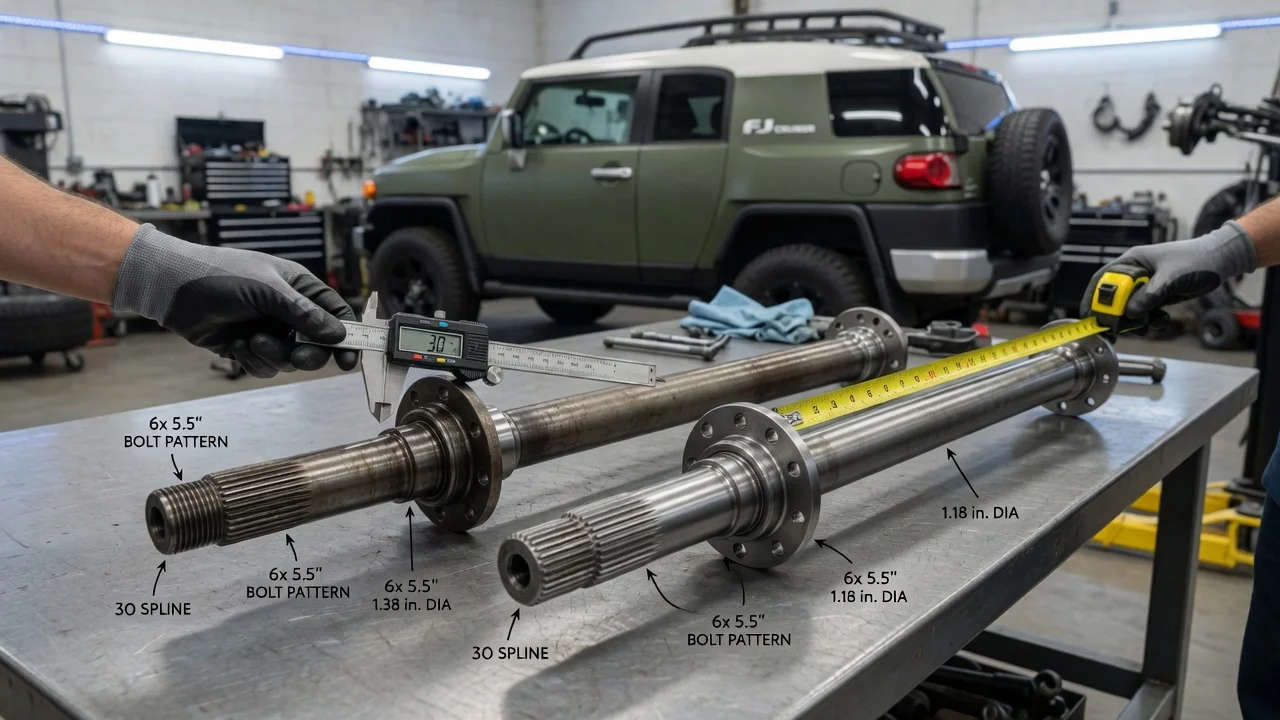
A rear axle shaft on a Toyota FJ Cruiser is not a part to order on a hunch. Side, drivetrain and factory options can all change which shaft is correct, and many symptoms blamed on a bad shaft actually come from a worn bearing, a leaking seal or a differential problem. This guide explains how to confirm the replacement matches your truck and the fault, then covers removal, installation and the checks that prove the repair worked.
Confirm the part and repair scope
Start with your exact vehicle configuration rather than just the model name. Note the model year, whether the truck is two-wheel or four-wheel drive, the transmission, and whether it has a factory rear differential locker. The VIN is the most reliable way to tie a replacement shaft to your truck, because a parts catalog or dealer parts counter can decode it to the correct part number. Also confirm which side you need. Left and right shafts on a semi-floating rear axle can differ in length, so a listing that only says "rear axle shaft" is not enough. Compare the new part against the old one before installation: overall length, spline count, flange and stud pattern, and the position of the bearing and retainer should match.
Then make sure a new shaft actually solves the problem. A growling or rumbling noise that changes with speed often points to the wheel bearing, which is pressed onto the shaft and can sometimes be replaced on its own. Gear oil on the inside of the wheel, brake rotor or backing plate usually means a failed axle seal, and contaminated brake parts will need attention as well. A clunk on take-off may come from worn splines, a loose flange or the differential itself. A broken or visibly bent shaft is a clear case for replacement. Review the service history and the truck's operating conditions, such as off-road use, larger tires or heavy towing, because they can explain why a component failed and whether the matching side deserves an inspection too.
Prepare tools and safe access
Get the factory repair manual or equivalent vehicle-specific service information before you begin. It provides the torque values, gear oil type and capacity, parking brake adjustment procedure and any differences for locker-equipped trucks. Do not substitute numbers from another vehicle or a generic chart. Typical needs include a quality floor jack, rated jack stands, wheel chocks, a socket set and torque wrench, a slide hammer with an axle-puller adapter, a drain pan, brake cleaner, new seals and gaskets specified for the job, and the correct gear oil.
Swapping a complete shaft that already has its bearing and retainer installed is within reach of an experienced home mechanic. Moving a bearing from an old shaft to a new one is a different job. The bearing and retainer ring are press-fit, so the work requires a hydraulic press, proper fixtures and knowledge of how to remove the retainer without damaging the shaft. If you lack that equipment or experience, have a shop press the bearing or buy a shaft supplied as an assembly. Always support the truck on stands on level, solid ground; never work under a vehicle held only by a jack.
Remove without avoidable damage
With the rear safely supported and the wheel off, remove the brake caliper and hang it from the suspension with wire or a hook so the brake hose is not stretched or twisted. Leaving the hydraulic line connected avoids the need to bleed the brakes. Remove the rotor; the FJ Cruiser uses a drum-in-hat parking brake inside the rear rotor, so you may need to back off the parking brake adjustment if the rotor binds. Disconnect or protect any wheel speed sensor wiring and parking brake components as the service information directs. Draining the differential or lowering the rear before pulling the shaft limits how much gear oil runs out of the housing end.
Remove the nuts that hold the bearing retainer and backing plate to the axle housing, then pull the shaft straight out using a slide hammer attached to the flange. Keep the shaft level as it comes out so the splines do not drag against the inner oil seal or housing. Watch for shims or gaskets between the retainer and the housing and note their order and position. Once the shaft is out, inspect the housing bore, the seal surface and the differential side gear splines visible through the tube. Damage there means the problem extends beyond the shaft and must be addressed before reassembly.
Install and restore the system
Install a new inner axle seal if the service information calls for it, which is good practice whenever the shaft has been out, and lightly lubricate the seal lip. Clean the housing flange and use the gaskets, shims or sealant the manual specifies. Slide the shaft in level, rotating it slowly until the splines engage the differential side gear, then seat the bearing fully into the housing without hammering on the flange. Reinstall the retainer nuts and tighten them to the manufacturer specifications in the correct pattern.
Refit the backing plate components, reconnect the wheel speed sensor wiring and confirm it is routed away from moving parts. Install the rotor, adjust the parking brake shoes using the documented procedure, then mount the caliper with its bolts torqued to specification. If gear oil reached the brake shoes or pads, replace them, since cleaning rarely restores contaminated friction material. Refill the differential with the specified gear oil to the level shown in the manual, install the wheel and torque the lug nuts. Pump the brake pedal several times before moving the truck to restore pad contact.
Check the completed work
Before driving, rotate the wheel by hand and listen for scraping or grinding, and confirm the parking brake holds the truck on an incline. Then road test at low speed in a safe area. The noise or vibration that prompted the repair should be gone, the brake pedal should feel normal and firm, and the ABS or traction control warning lights should not come on. If the truck has a rear locker, check that it engages and disengages as the owner's manual describes.
After the road test, look for gear oil at the housing flange, backing plate and brake components, and recheck the differential fluid level. Retorque the lug nuts at the interval your service information recommends. Further diagnosis is needed if a warning light stays on, a fresh leak appears, the noise persists, or the brakes pull or drag. Persistent noise may come from the opposite bearing or the differential rather than the new shaft. Record the repair, the part number and the date in the truck's maintenance records so future inspection and planning against the maintenance schedule start from accurate information.