Choosing Steering Linkage for an Early Ford Bronco
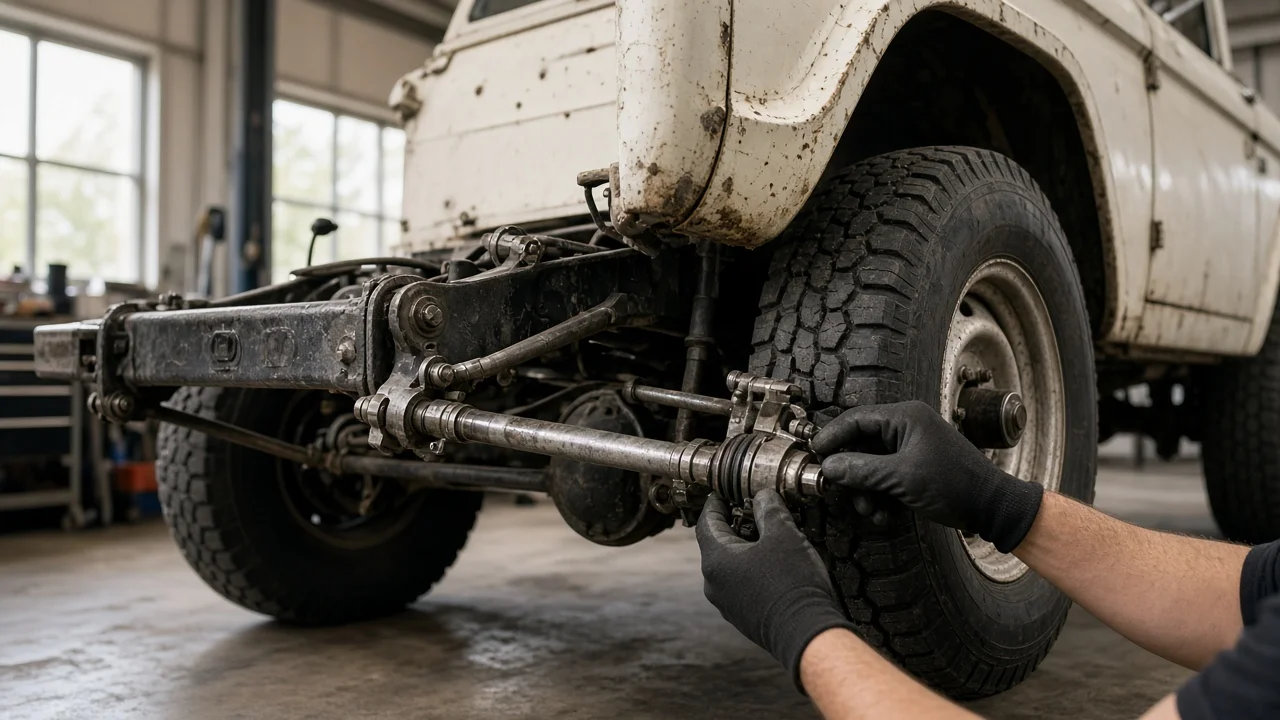
Steering linkage on an early Ford Bronco works hard. The truck has a short wheelbase and a solid front axle, and many now run bigger tires than they had from the factory. Replacement options range from stock-style tie rods and drag links to heavy-duty and high-steer systems. The label on the box matters less than your axle, steering box, ride height and how you drive. This guide covers what to check before you buy so the linkage fits, steers predictably and stays easy to service.
Define the job the linkage must do
Start with how the Bronco is used. A truck that mostly sees pavement at or near stock ride height usually needs fresh factory-style parts. New tie rod ends, a new drag link and new adjusting sleeves restore precision without changing the geometry. A lifted truck on larger tires puts more load through the joints and changes the angles the linkage works at. A rig that crawls rocks needs clearance above the axle as much as it needs strength. Write down your current lift, tire size and planned changes before shopping. A linkage chosen for today's setup may not suit next year's.
Then set your limits: budget, whether the truck is a correct-looking restoration, whether you will install the parts yourself, and what your state's inspection requires. Confirm the linkage is actually the problem before spending money. Wander and looseness can also come from a worn steering box, loose wheel bearings, tired radius arm bushings or a worn track bar. New linkage will not cure those faults, and it can hide them for a while.
Check compatibility before ordering
Identify what is really on the truck rather than going by model year alone. Early Broncos used more than one front axle during production, and on trucks this old, axle, knuckle and steering box swaps are common. Confirm the axle and knuckle type, whether the steering box is manual or power, and whether the pitman arm is original or a dropped aftermarket piece. The linkage attaches at the steering arms or knuckles and at the pitman arm. Taper sizes and mounting points must match what the supplier lists for the kit.
Ride height drives geometry. The drag link and track bar should run close to parallel and at similar lengths, which limits bump steer as the axle moves. Lifting the truck steepens the drag link angle. A dropped pitman arm or a relocated track bar mount may be part of the fix, but those parts have to be matched to each other. Check clearance to the coil springs, track bar, sway bar, differential cover and steering stabilizer through full lock and full suspension travel. Wheel backspacing and tire width affect lock-to-lock clearance too.
A high-steer conversion needs knuckles or steering arms built for top-mounted linkage. It often needs a specific pitman arm and track bar relocation as well. Treat it as a matched system rather than a single bolt-on part.
Features that affect the choice
Terms like heavy-duty or one-ton are marketing labels, not specifications. Look for stated tube diameter, wall thickness or solid bar construction, the material, and the joint type. Larger, thicker tubing resists bending when it hits rocks, but it adds weight and takes up room near the springs and differential. Ask whether individual ends can be bought separately. A kit that only sells as a complete assembly costs more to repair later.
Joint choice is a real trade-off. Conventional tie rod ends with tapered studs are proven on the street, come sealed or greaseable, and tolerate road grime well. Rod ends, also called heim joints, offer adjustability and strength. They can wear faster in dirt and water unless booted, and some jurisdictions restrict them on road vehicles, so check local rules. Adjusting sleeves with left- and right-hand threads set toe. Look for solid clamps or jam nuts that will not loosen on washboard roads.
Layout matters most on lifted trucks. Factory-style routing keeps the original look and the lowest cost. Crossover and high-steer designs move the linkage above the spring and axle, which improves trail clearance and can flatten the drag link angle. The cost is more parts and stricter compatibility. When comparing kits, useful evidence includes: • a fitment list that names the axle and knuckle; • complete installation instructions; • a clear parts breakdown; • stated warranty terms; A vague bolt-on claim without these details tells you little.
Limitations and ownership costs
Support the vehicle safely during installation. Work on level ground, chock the rear wheels, and rest the truck on rated jack stands at solid frame or axle points, never on a jack alone. Separate the tapered joints with the proper tool so you don't damage the parts you're keeping. Tighten castle nuts and clamp bolts to the fastener specification in the kit instructions or the factory service manual. Use new cotter pins, and follow the manufacturer's guidance for aligning the cotter pin slot.
Budget for a professional wheel alignment after any linkage change, because replacing the parts changes toe. Steering wheel centering is usually set through drag link adjustment. Caster is set by the axle and radius arms, not the linkage, so new linkage will not fix caster-related wander. Recheck clamp and nut tightness after the first few hundred miles, and again after the first hard trail run.
Ongoing care is simple but regular: • Grease serviceable joints. • Inspect boots for tears. • Check joint play by having a helper rock the steering wheel while you watch each connection. The linkage cannot make up for a worn steering box, a loose box mount or a weak stabilizer. On trucks with large tires, also inspect the frame around the steering box mount for cracks. Upgrades can bring added costs such as a matching pitman arm, track bar parts or a new stabilizer.
Build a practical shortlist
Narrow the options with a short checklist: • Does the listing name your axle, knuckle and steering box type, and do the tapers match your arms? • Does the design suit your ride height and tire size, with a plan for keeping the drag link and track bar close to parallel? • Will it clear the springs, differential and stabilizer through full travel and full lock? • Are the tube size, material and joint type stated, rather than implied by a label?
Then compare ownership factors: • whether replacement ends are sold individually; • whether the joints are greaseable or sealed; • whether the kit has clear instructions with fastener specifications; • whether any extra parts, such as a pitman arm or track bar bracket, are required; Include the alignment in the total cost. If two kits meet every fitment and geometry requirement, choose the one whose wear parts are easiest to find and replace. That choice will matter longer than small differences in the advertised strength.