45RFE Transmission Valve Body Identification
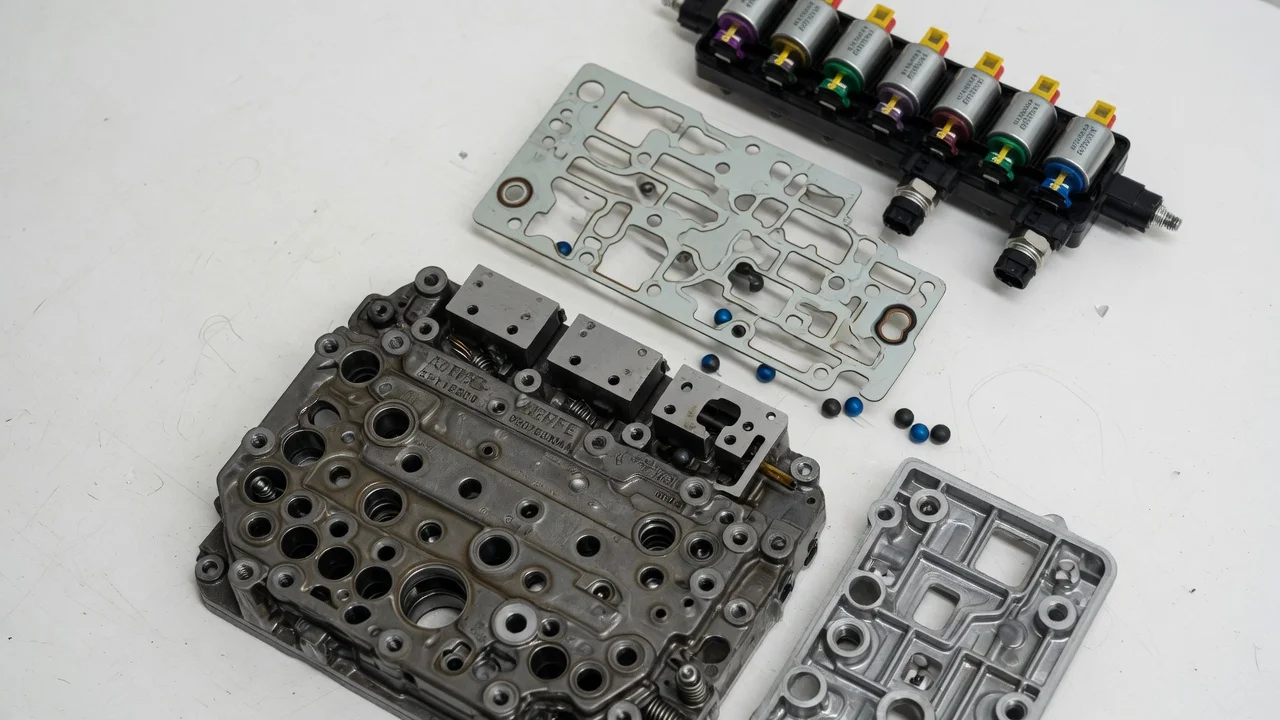
The valve body is the hydraulic control center of the 45RFE. Replacing or rebuilding it starts with knowing exactly which unit your vehicle uses. This guide explains how to confirm you have a 45RFE and how to identify the matching valve body. It also covers which details change the correct part, and when a symptom points to the valve body rather than something else in the transmission.
Short answer: how to identify a 45RFE valve body
First confirm the transmission type. Then match the part to the vehicle's VIN, model year and the number on the transmission identification tag. Chrysler used the 45RFE in Dodge, Jeep and Ram vehicles starting around 1999. It shares much of its design with the 545RFE and, in heavier-duty form, with the 65RFE. Because of that family resemblance, valve bodies that look identical can have different internal valves, springs or calibrations. Casting numbers on the valve body help, but they are not always unique to one application. The most reliable method is a parts catalog lookup by VIN, cross-checked against the numbers on your existing unit.
How the 45RFE valve body controls shifting
The 45RFE is an electronically controlled automatic. The transmission control logic may be built into the powertrain control module or housed in a separate module, depending on the vehicle. It reads inputs such as input and output shaft speed, throttle position and line pressure. It then commands a solenoid and pressure switch assembly bolted to the valve body. Those solenoids send fluid through passages in the valve body to apply and release the clutches that produce each gear. There is no throttle valve cable or governor. The hydraulic side of the system follows electrical commands.
Inside the valve body, spool valves, regulator valves and check balls direct and adjust fluid pressure. The manual valve is moved by the shift lever and selects the park, reverse, neutral and drive circuits. Several problems can change apply pressure and timing: worn valve bores, valves stuck by debris, or a leaking separator plate gasket. These may show up as harsh, slipping or delayed engagement. The module also learns clutch fill times over time. As a result, shift quality reflects both the condition of the hardware and the adaptive values the module has stored.
Configurations and conditions that change the right part
Model year is the biggest variable. Valve bodies and solenoid assemblies were revised during production. Later units may not fit earlier transmissions without matching changes or software. The 545RFE uses closely related hardware with different shift programming, and some of its parts interchange with the 45RFE while others do not. Do not assume a valve body listed for one fits the other without confirming it in a catalog. Engine, drivetrain layout and towing packages can also change the calibration the module expects.
Also check what the replacement includes. Some valve bodies are sold bare, while others come with the solenoid pack and pressure switches installed. Remanufactured units may include updated valves meant to correct known wear points. Pairing an updated valve body with an incompatible solenoid assembly or outdated software can create new shift complaints. Fluid also matters. These transmissions call for a specific Chrysler fluid type, commonly ATF+4, and the wrong fluid can affect shift quality enough to look like a hydraulic fault. Confirm the fluid specification in the owner's manual or service information.
Practical steps before buying or replacing
Start by gathering facts. Record the VIN, model year, engine and drivetrain, and photograph the identification tag on the transmission case. Scan for diagnostic codes with a tool that reads transmission-specific codes, not only generic engine codes. Note whether the vehicle goes into limp mode, which typically holds a single forward gear. Describe the shift behavior precisely: which gear change is affected, whether it happens cold or hot, and whether it feels like a flare, a bang or a delay.
Next, check fluid level and condition using the correct procedure for your vehicle. Many require the engine running and the transmission at operating temperature. Review the service history for fluid changes, earlier valve body or solenoid work, and software updates. If you remove the valve body, inspect the pan for metal debris and clutch material. Heavy contamination suggests internal wear that a new valve body will not fix. When ordering, give the supplier the VIN and the existing part numbers so fitment can be confirmed.
After installation, a quick learn or adaptive reset with a capable scan tool is generally required so the module can relearn clutch fill characteristics. Skipping this step can leave harsh or erratic shifts that look like a defective part.
Limits of DIY diagnosis and when to get help
A shift complaint does not prove the valve body has failed. The same symptoms can come from the solenoid pack, wiring or connector faults, a speed sensor, low or degraded fluid, worn clutches or a module calibration problem. Codes point to a circuit or condition, not always to a specific part. Repair options range from a fluid service and software update, to replacing the solenoid assembly, to a valve body swap or a full rebuild. The right choice depends on test results, not on the symptom alone.
Have a transmission shop perform pressure testing and review live scan-tool data if codes show pressure or ratio errors, if debris is present, or if you cannot confirm the exact part for your VIN. You will also need vehicle-specific service information for torque values, bolt locations and relearn steps, because these vary by year and model.