Windshield Wiper Arm Removal, Repair, and Replacement
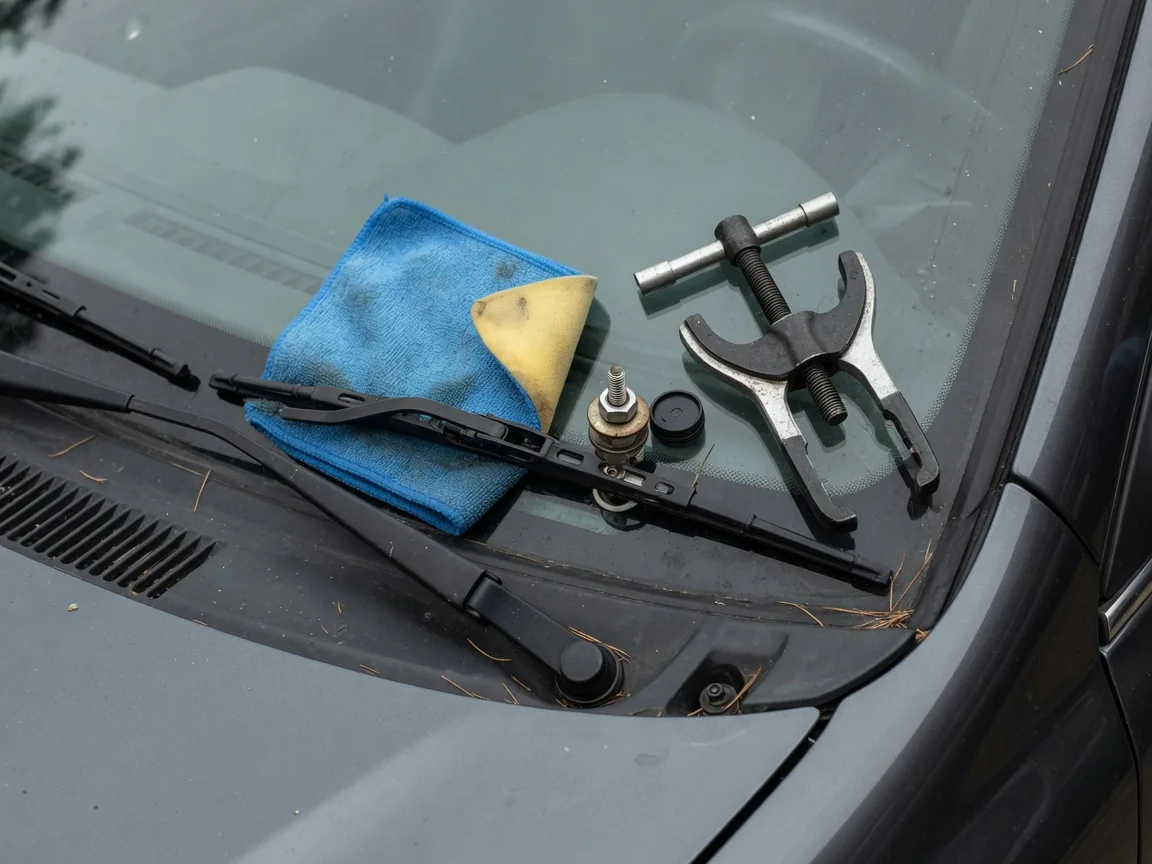
A wiper arm does more than hold the blade. It supplies spring pressure, locates the blade on a splined spindle, and decides where each sweep starts and stops. When an arm slips, bends, or parks in the wrong place, careful inspection and the right windshield wiper arm puller help you avoid damaging the glass, trim, or drive linkage under the cowl.
Identify the Arm and Check What the Symptoms Reveal
It helps to think of a wiper assembly as four separate parts. The blade clips into the end of the arm. The arm hinges near its base so it can lift off the glass. The base mounts onto a splined spindle, which is driven by a pivot joint and linkage under the cowl. Streaking, chatter, a blade that stops short of its usual resting spot, or an arm that falls out of sync with the motor each point toward a different part, but none of these symptoms proves a specific failure.
Switch off the wipers and the ignition before you look closely, so nothing can move unexpectedly. Check for a loose or cracked blade adapter, a kinked arm, debris packed around the pivot, or ice holding the blade down. A mark across the arm base and spindle can later show whether the arm is slipping at the mount. If the wipers don't move at all, move erratically, or stop in random places, have the motor, linkage, or electrical circuit tested professionally before you work on the arm.
Assess a Loose, Bent, or Broken Wiper Arm
A loose wiper arm mounting nut lets the arm's splined bore rock on the spindle, and that movement can round off the splines on both parts. Once that happens, tightening the nut may hold for a while, then slip again under the load from snow, heavy rain, or dry glass. Before you touch the nut, get the vehicle-specific fastening procedure and torque specification. Overtightening can distort the mount or strip the threads, and undertightening leaves the connection unreliable.
The arm's job is to press the blade evenly against curved glass. A bend, a crack near the hinge, a worn pivot, or weak spring tension lowers that pressure in places, which leaves unwiped bands or lets the blade lift at highway speed. Straightening, heating, welding, or adding improvised springs can weaken the metal or change the pressure pattern. An arm with cracks, a damaged hinge, or lost spring action should be replaced or assessed by a professional.
Prepare for Removal and Use the Correct Puller
Put the wipers in their specified park or service position first. On some vehicles that takes a menu setting or switch sequence. Turn off automatic rain-sensing operation and follow the vehicle's instructions for isolating power so the motor can't cycle while your hands are near the arm. If the arm currently parks correctly, mark the blade's resting position on the glass with tape. An arm that already rests in the wrong place isn't a valid reference. Cover the glass with a towel, because a spring-loaded arm that snaps down can crack it.
Attachment designs vary. Many arms use a nut under a hinged cap, while others use clips or retainers that must be released in a set order. After you remove the fastener as the procedure directs, a compatible puller separates the arm from the spindle by pushing on the spindle tip, never on the glass or trim. Position the puller according to its instructions, and stop if it slips, access is poor, or the arm won't come off under controlled force. Never pry against the glass, hammer the spindle, or apply heat. Corrosion or damaged threads call for professional removal.
Select and Install a Replacement Wiper Arm
Replacement arms are often side-specific, and the driver and passenger arms commonly differ in length, curvature, and blade connection. Confirm fitment using the vehicle's year, model, and trim, then compare the mounting bore, spline pattern, and blade attachment with the original. Before you install anything, inspect the exposed spindle for worn splines, damaged threads, or corrosion. A new arm can't make up for a stripped spindle, and pairing one with a damaged mount can bring the slipping right back.
Seat the new arm at the specified resting position and secure it according to the manufacturer's fastening requirements. Replace any nut or retainer the procedure says to replace. Move the old blade over only if it fits the new arm's connector and is still in good condition, and reconnect any washer tubing without kinking it. Make sure the blade locks fully into place, then reinstall the protective caps. Replace the other arm only if it has damage or weak tension of its own, or if the vehicle's requirements call for it.
Reindex the Arm and Verify Its Sweep
Reindexing means choosing which position on the splines the arm sits in, which sets where the blade rests and how far it travels. The motor's park position determines the spindle's rotation, so index the arm only after confirming the motor has returned to its correct park. Use the vehicle's alignment marks on the glass, cowl, or arm, or the measurements in the service information. Some vehicles also need a special parking or initialization procedure after the arm or battery has been disturbed.
Before the first test, confirm the fastener is secure, the blade clears the cowl and body trim, and the arm has room to lift. Lower the blade onto wet glass, because dry glass adds friction that can hide problems or scratch the surface. Then clear away your hands and tools and restore operation as the procedure directs. Stop right away if the blade hits trim or the other arm, slips, makes an unusual noise, or sweeps the wrong path. If the arm still parks in the wrong place after correct installation, have the motor, linkage, or park circuit diagnosed.
Handle Rear Wiper Arms and Washer Connections
A rear windshield wiper arm often works differently from the front pair. Many use smaller spindles, plastic covers, different retainers, or composite arms, and removal procedures vary enough that you need guidance for your specific vehicle. Some rear arms also carry a washer hose or nozzle that runs through the arm or sits near the pivot. Check for tubing before you loosen anything, and disconnect it as the procedure directs so you don't pull the arm away while the hose is still attached.
Rear glass often has defroster lines that scratch easily, so cover the glass and the surrounding trim before you start. Hold the arm so its spring can't slap it down, and stop if seized hardware threatens to bend the spindle or crack the tailgate cover. After installation, confirm that the arm rests in its specified position, is firmly attached, and clears the trim and spoiler through its full sweep. Also check that washer fluid sprays onto the glass without leaking at the connection.
Understand Replacement Costs and Shop Estimates
A replacement bill usually covers the arm itself, any required nut or retainer, labor, and sometimes a new blade if the old one doesn't fit or is worn. If the arm was moving erratically, diagnostic time for the motor or linkage may be billed separately. The vehicle has a big effect on the total. Arms with built-in washer jets usually cost more, tight access under the cowl adds labor, and corrosion or a damaged spindle can turn a simple swap into a larger repair.
A useful estimate names the affected arm, says whether the part comes from the original manufacturer or an aftermarket supplier, and lists installation labor and any alignment or sweep check. It should also say that the shop will need your approval before doing extra work on seized hardware or a damaged spindle. Arm prices and labor rates vary widely by vehicle and region, so a single typical cost doesn't mean much. Itemized quotes for your exact vehicle will give you a far more realistic figure than any national average.