Rear Windshield Wiper Guide: Controls and Blade Replacement
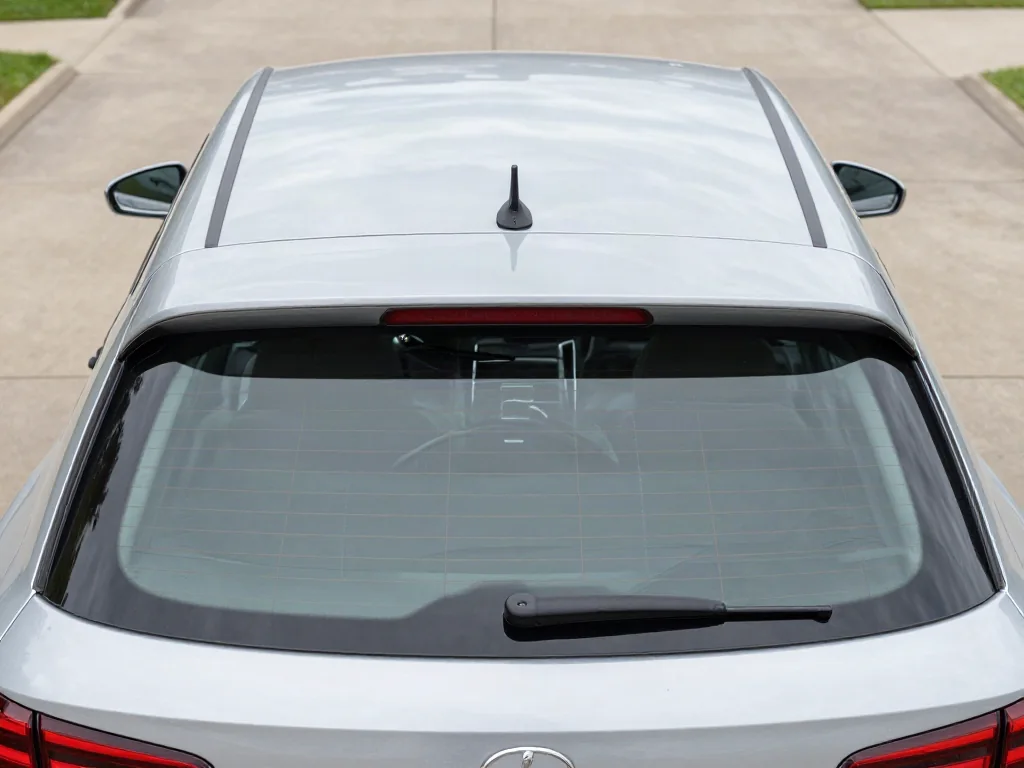
A rear windshield wiper keeps the back glass clear enough for mirrors and cameras to be useful. Its controls and blade attachment often differ from the front wipers, though. This guide covers how to turn the back windshield wiper on and off, how to tell when a rear windshield wiper blade needs attention, and how to change or replace the blade without forcing the arm or guessing at fitment.
Find the Rear Wiper and Washer Controls
On many vehicles the rear wiper control is on the right-hand wiper stalk, usually a rotary control ring near the tip. Others use a separate switch or a dashboard button. Look for a symbol showing a rectangular rear window with a wiper arc, sometimes shown next to a spray icon for the rear washer. Layouts vary between makers and even between trim levels, so check the owner's manual to confirm how to turn on the back windshield wiper and which positions your vehicle has.
Typical settings are off, an intermittent wipe, and sometimes continuous operation, but not every vehicle offers all three. To turn off the back windshield wiper, return the ring or switch to its off position. The arm may finish its current stroke before it settles in the park position, and that's normal. The rear washer is often a momentary press or twist past a detent, so only test it when the glass is clear and nothing blocks the blade. Some vehicles also wipe the rear glass automatically in reverse when the front wipers are running, where the manual documents this.
Recognize When the Rear Blade Needs Attention
Streaks, missed patches, chatter, and a rubber wiping edge that looks split, hardened, or torn are all reasons to inspect the rear blade and the glass together. On hatchbacks and SUVs with an upright tailgate, the rear window collects road spray and exhaust film, so grime can build up faster than on the windshield. Clean the glass with a product suitable for automotive glass and wipe the rubber edge gently with a damp cloth. Sometimes residue alone causes the smearing, and it goes away once both surfaces are clean.
It helps to know what a replacement actually changes. The blade assembly, meaning the rubber element and its carrier, is the part that wears out. The wiper arm is the spring-loaded lever that presses the blade against the glass and mounts on the motor spindle. A new blade can fix a worn wiping edge, but it can't restore weak arm pressure or straighten a bent arm. Poor wiping alone doesn't show which part is at fault, and no single replacement interval fits every car, so replace the blade based on its condition.
Confirm Blade Fitment and Attachment Before Buying
Before any back windshield wiper replacement, check fitment using the vehicle's year, model, and body style. Then read any application notes in the blade manufacturer's catalog or your vehicle documentation. Length matters, but it doesn't confirm compatibility on its own. The connector has to match the arm, any adapter you need must be the one specified, and the blade must clear the spoiler, washer nozzle, and glass edge through its full sweep. Many rear arms use their own attachment styles that differ from the hooks on front wipers.
If you're shopping for a Rain-X rear windshield wiper, look up your exact vehicle in the brand's current application listing and follow the package instructions. Don't assume one design fits every rear arm; the same caution applies to any brand. The Toyota RAV4 shows why this matters. Rear blade size and attachment style can change between model years and generations, so check the fitment for your specific year in the owner's manual, a Toyota parts source, or a verified catalog before you order.
Release the Old Blade Without Forcing the Arm
Removing a rear windshield wiper blade starts with preparation. Park securely on level ground, switch the wiper control off, and turn off any automatic or reverse-linked wiping as the manual directs. Some vehicles have a documented service position for the wipers; use it only if it applies to the rear arm. Then look closely at the connection. A rear blade may release with a tab, a clip, a pivot pin, or a snap-in mount, and the right motion depends on which one your vehicle has.
Rear arms often have little lifting clearance because of spoilers, hatch glass angles, or covers. Never pry a restricted arm, cap, or connector past its natural stop. Keep hold of the spring-loaded arm the whole time: if it snaps back without a blade, the bare metal can chip or crack the glass. A folded towel on the window gives some protection. Stop if the release is unclear, seized, or broken. These steps cover blade removal only; a damaged arm or corroded spindle needs a separate check.
Install the Replacement Blade and Check Its Seating
When you install the rear windshield wiper blade, support the arm with one hand. Fit the verified blade, plus any adapter specified for your vehicle, following the instructions supplied with the part. Confirm it's fully engaged using the check the manufacturer describes, such as a latch closing, a tab sitting flush, or a gentle tug. Don't assume every design clicks audibly. Then lower the arm gently and make sure the blade lies flat along the glass with no gap or looseness at the connector.
Test on wet glass from the driver's seat, with hands, cloths, and tools clear of the arm. Run a few intermittent cycles and use the rear washer. Watch for full coverage, smooth travel, and a return to the normal park position. If the blade comes off, hits the spoiler or trim, stutters, or parks in the wrong place, stop using it and recheck the fitment and seating. If you still can't find the cause after the new blade is on, have a shop inspect the arm and mounting.
Check Basic Causes When the Rear Wiper Still Misbehaves
If the back windshield wiper still misbehaves after replacement, treat each symptom separately. Streaking usually comes from the blade, the glass, or low arm pressure. No movement, unusual noise, failure to park, and missing washer spray each have different possible causes. Start with simple checks before blaming the motor. Confirm the control is in the position you intended, and clear any snow, ice, or debris that could hold the arm. Also check the manual for operating conditions, such as the tailgate or glass hatch needing to be fully closed.
A wiper that moves but sprays no fluid doesn't point to one specific cause. Check the washer fluid level as the manual describes, and look for easy-to-see signs of a leak, a kinked hose, or a blocked nozzle. A humming motor, complete silence, or movement that comes and goes can't confirm a motor, wiring, switch, or linkage fault on its own. For repeated blown fuses, ongoing electrical faults, a damaged arm, or abnormal movement, get professional testing. Don't bypass wiring, force the arm, or open up a powered mechanism.