Trailer Hitch Pins: Retention and Fit Basics
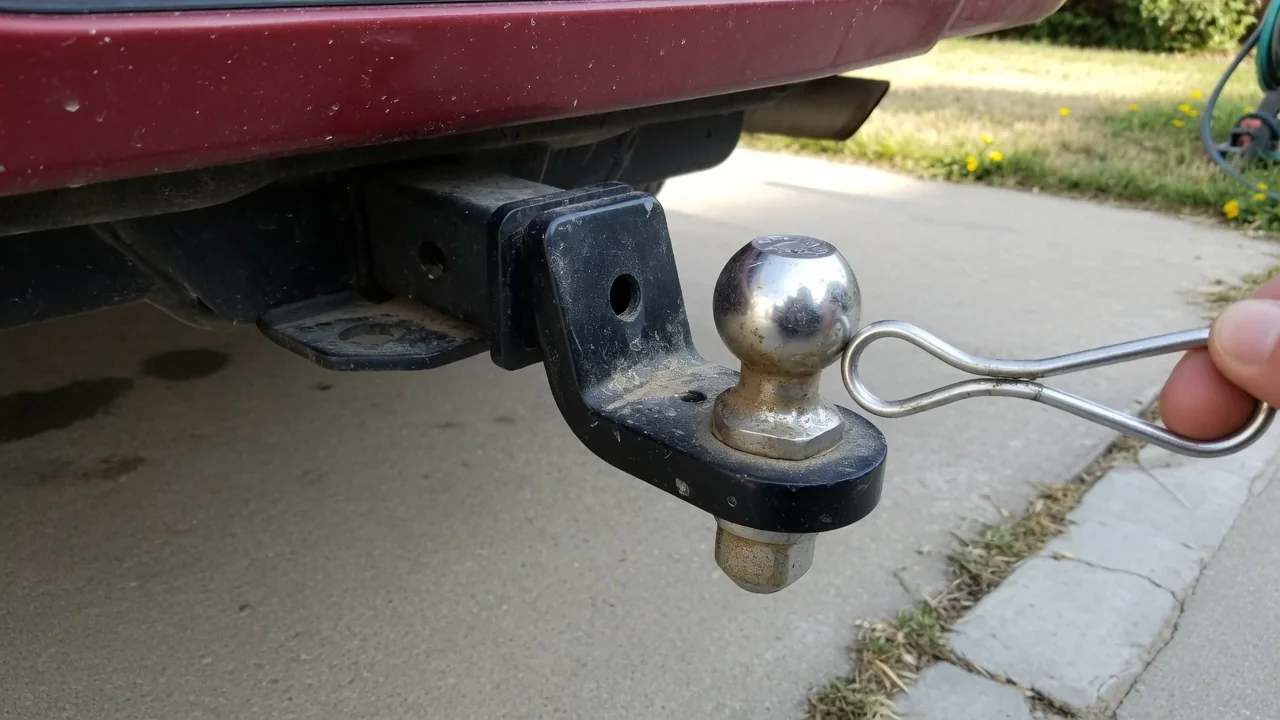
A trailer hitch pin is a small part with a large job: it keeps the ball mount or accessory shank from sliding out of the receiver tube. This guide explains how a hitch pin for a trailer setup works, how retention clips and locks keep it in place, and why matching the pin to the receiver matters before any load is attached.
What This Topic Covers
The subject here is the cross pin that passes through the side of a receiver hitch and the shank inserted in it. People describe it in many ways, including a pin for a trailer hitch or simply a receiver pin, but the part is the same: a steel rod with a head or bend at one end and a retention feature at the other. It is separate from the coupler latch pin and from the safety chains, which do different jobs.
Readers can see the relevant details without tools. The receiver tube has a hole drilled through both side walls, and the ball mount shank has a matching hole. What varies between vehicles is the receiver opening size, the hole diameter, the distance from the hole to the tube opening, and how much room surrounds the hitch. Bumper fascia, exhaust routing and spare tire placement can all affect which pin styles are practical to insert and remove.
How It Works in a Vehicle
When the shank slides into the receiver, the holes line up and the pin passes through the receiver walls and the shank between them. Pulling and braking forces try to slide the shank forward or backward in the tube, and the pin resists that movement in shear, meaning the load tries to cut across the rod at the points where the shank and receiver walls meet. The pin therefore works as a structural link, not just a locator.
Retention is a separate function from load carrying. A clip, cotter or lock on the free end only stops the pin from backing out sideways as the vehicle vibrates and the trailer shifts; it carries almost none of the towing force. That is why a missing clip is serious even though the clip itself is light wire. Without it, nothing prevents the pin from gradually walking out of the holes over rough pavement or repeated turns.
Common Variations
The most familiar design is a bent pin with a hairpin-style spring clip that snaps through a small cross hole near the tip. Straight pins with a grooved end accept a different clip or a keyed locking cap, which adds theft deterrence for an expensive ball mount or bike rack. Some designs are threaded and tighten against the shank to reduce rattle, drawing the shank against one wall of the receiver instead of leaving it loose.
Pin diameter and usable length are the fit variables that matter most. Smaller receivers generally use a thinner pin than larger ones, and a pin that is undersized for the hole lets the shank shift and concentrates wear on the hole edges. Usable length, the span between the head and the clip hole, has to clear the full outside width of the receiver. Materials and finishes vary too, with plated, coated and stainless options resisting corrosion differently.
Everyday Use and Observations
In daily use, a correctly fitted pin slides through by hand once the holes are aligned, sits with its head against one side of the receiver, and shows its clip fully seated on the other. A little fore-and-aft play in the shank is normal with a plain pin because the holes need clearance. A clunk when pulling away or stopping usually reflects that clearance rather than a defect, though it is worth a look if it grows.
Signs worth noting before hitching up include a bent pin, grooves worn into the rod where the walls bear on it, heavy rust scale, a clip that has lost its spring tension, or a lock that no longer latches positively. Receiver holes can also wear into an oval shape over time. Road salt, boat ramp immersion and long storage with the pin left in place tend to speed corrosion, which can seize the pin inside the tube.
Limits and Next Steps
A pin does not raise the capacity of anything it connects. The towing limit is set by the lowest-rated component among the vehicle, receiver, ball mount, ball and coupler, and the pin simply needs to be appropriate for that system. Substituting a bolt, a length of rod or an unrated hardware store part is a poor idea because strength and hardness are unknown. Rated values and required pin size should come from the hitch labeling and manufacturer documentation.
A sensible next step is to read the label on the receiver, confirm the opening size and pin diameter in the hitch or vehicle documentation, and compare a worn pin against a new one of the correct specification. If the receiver holes are elongated, the shank fits poorly, or the hitch shows cracks or distortion, a qualified hitch installer or repair shop should inspect it before towing. Replacing a doubtful pin and clip is a small step compared with the consequences of separation.