Leaking Tire Valve Stem: Symptoms and Fix
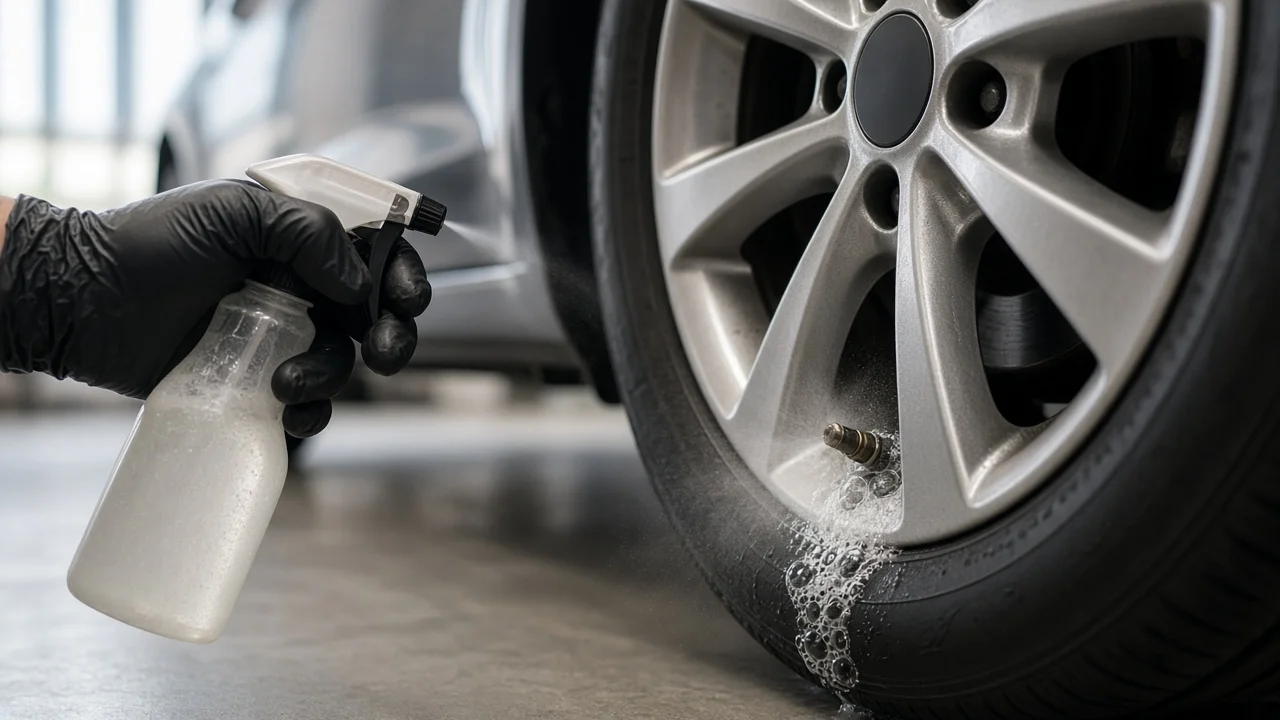
A leaking tire valve stem usually shows up as one tire that keeps losing air while the other three hold steady. The leak can come from the valve core, from the rubber or metal body of the stem, or from the seal where the stem passes through the wheel. Each source needs a different fix. This guide covers the symptoms, the likely causes, the checks worth doing in order and how to judge when the car should stay parked.
Establish the symptoms
Start by recording how the pressure loss behaves. Check all four tires cold with a reliable gauge. Compare the readings with the inflation pressure on the vehicle placard, which is usually on the driver's door jamb, rather than the maximum printed on the sidewall. Note how much pressure the problem tire loses and over what period. A slow drop over several days points to a small leak, while a tire that is low after a few hours points to something more serious. A cold morning that lowers all four tires evenly is a temperature effect, not a leak. Write down whether the tire pressure monitoring warning comes on. Also note whether the loss seems worse after driving, after parking in heat or cold, or after hitting a pothole.
Next, look and listen at the stem itself. Common signs include a faint hiss near the valve, a missing valve cap, and a stem that leans or wobbles. Look for cracks or a worn ring where the rubber meets the wheel, and for air escaping when a gauge or inflator chuck is pressed on. Recent changes matter as much as the symptoms. Any of these events narrows the search considerably: a new tire installation, a rotation, new pressure monitoring sensors, a curb strike, an automatic car wash or a roadside plug repair. Note the date and what was done.
Distinguish plausible causes
The valve core is the spring-loaded insert inside the stem. If it is loose, dirty or bent, or if its small seal has hardened, air seeps out of the tip of the stem. Two observations support this cause: bubbles form at the opening in the center of the stem, and the leak changes after the core is snugged or a cap is fitted. The cause is less likely when the tip stays dry and bubbles appear lower down.
The stem body and its seal to the wheel are the other common source. Rubber snap-in stems age, harden and crack, especially at the base where they flex at speed. A tire valve stem that leaks when pushed sideways, or that leaks at its base, usually has a split or worn rubber body. A rubber stem that feels loose in the rim hole cannot be tightened. It is held in place by a tight press fit and has to be replaced. Clamp-in metal stems, including most that carry tire pressure monitoring sensors, are held by a nut and sealed with a rubber grommet. Air can escape around the base if the valve stem nut is loose, if the grommet is flattened or aged, or if corrosion has formed between an aluminum stem and its nut.
Some leaks only look like valve stem problems. The same tire can lose air from a bead leak close to the valve, corrosion around the valve hole on an alloy wheel, a puncture in the tread or a crack in the wheel. Bubbles that come from the rim edge or the bead line, rather than from the stem itself, point away from the stem. A stem that stays completely dry under soapy water makes a different source more likely.
Checks in a useful order
These first checks need only a gauge, a spray bottle of soapy water and some patience. Park on level ground with the parking brake set before kneeling at a wheel. With the tire inflated to the placard pressure, remove the cap and inspect the stem for cracks, splits, bending or corrosion. Spray the tip and watch for bubbles for a minute or two. Then spray the base where the stem meets the wheel, including the inner side if you can reach it safely. While the stem is still wet, gently push it side to side and watch for bubbles that appear only when it flexes. Finish by spraying the bead around the rim and the tread so a leak elsewhere is not missed.
The next steps need specific tools. A valve core tool, the small tightener sold at parts stores, can snug a loose core. Use only light hand pressure, because forcing the core can damage it. Replacing a core and fitting a sealing cap is inexpensive and within reach of most owners. The nut on a clamp-in or sensor stem is a different matter. The sensor or vehicle manufacturer specifies how tight it should be, so it needs the correct wrench or torque tool. Guessing can crack the sensor or crush the grommet. Replacing any stem or grommet means breaking the bead and removing the tire from the wheel. The wheel then has to be rebalanced, and many vehicles need the sensor relearned. That work belongs at a tire shop with a qualified technician.
Interpret the findings
Bubbles at the tip that stop once the core is tightened or replaced point to the core. Confirm this by rechecking cold pressure over the following days. Bubbles at the base of a rubber stem, or a leak that appears only when the stem is pushed, mean the stem has failed. No amount of tightening will fix it, and replacement is the repair. Bubbles around the nut of a clamp-in stem suggest a loose nut or a worn seal. Tightening to the correct torque may stop the leak. A hardened grommet or corroded threads usually need the manufacturer's service kit or a new stem.
A dry stem combined with continuing pressure loss means the leak is somewhere else. A very slow seep may not produce bubbles quickly, so a shop may need to submerge the wheel in a water tank to find it. Do not replace a sensor just because the warning light is on. A low pressure reading and a failed sensor are separate faults. Before buying parts, confirm which stem type suits the wheel and whether the wheel has a sensor. Snap-in, clamp-in and sensor stems are not interchangeable.
Urgency and next action
Stop driving and fit the spare, or arrange a tow, in any of these situations: the tire is visibly low, the pressure falls noticeably within minutes or hours, the stem is torn, bent or loose in the wheel, or the tire will not hold air after inflation. If the vehicle has already been driven on a badly underinflated tire, inspect the sidewall for bulges, cuts or scuffing. That damage can make the tire unsafe even after the leak is fixed. A slow valve leak can worsen without warning, so do not assume any remaining driving distance is safe. Keep the pressure at the placard value and have the leak repaired promptly.
Bring the shop useful details: which tire is affected, how fast it loses air and where you saw bubbles. Tell them whether the stem is rubber, metal clamp-in or a sensor stem, and mention any recent tire work. Have the tire size, load index and speed rating from the sidewall ready in case the tire turns out to be damaged. A replacement tire must match the vehicle placard and the approved ratings. On all-wheel-drive vehicles, drivetrain compatibility may also require a tread depth close to that of the other tires, following the vehicle maker's guidance. After the repair, check the cold pressure again over the next few days to confirm the leak is gone.