How to Fix a Leaking Tire Valve Stem
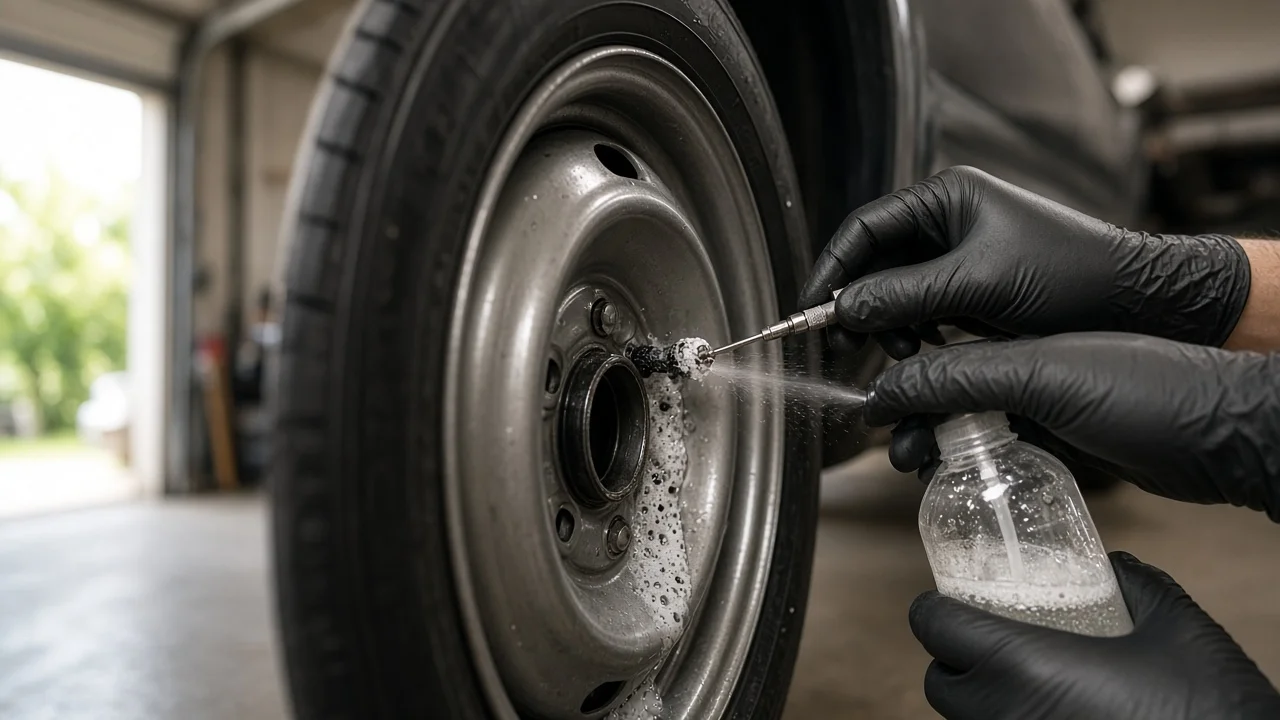
A tire that slowly loses pressure with no nail in the tread is often leaking at the valve stem. The right fix depends on which part is leaking: the removable valve core, the cap, the rubber stem body, or the seal where the stem passes through the wheel. This guide explains how to tell if a tire valve stem is bad and how to rule out other leaks. It also covers when a simple core swap is enough and when you need a new stem or seal, which means breaking the tire bead.
Establish the symptoms
Start by recording how the tire behaves. Note how much inflation pressure it loses and over what period. Measure it cold, with the same gauge each time, and compare it to the pressure on the vehicle placard in the driver door jamb, not the maximum molded into the sidewall. Write down whether the loss is steady or shows up only in cold weather, after a pothole, or after highway driving. Useful clues include a hiss when you touch or wiggle the stem, a stem that leans or wobbles, a missing cap, and a pressure warning that returns days after every top-up.
Recent changes matter as much as current signs. A leak that started after tire service, a seasonal wheel swap, a TPMS sensor replacement or a curb strike points to a different cause than one that crept in on an older wheel. Also note whether the stem is a black rubber snap-in type or a metal stem held by a nut. Many metal stems are part of a TPMS sensor and are serviced differently.
Distinguish plausible causes
The valve core is the most common and easiest culprit. A core that has worked loose, has debris on its seal, or has a hardened seat leaks at the tip of the stem. A stuck core, where the pin stays depressed or the seal does not reseat after inflation, behaves the same way. If the leak is only at the opening and stops when a known-good core is installed, the stem body is probably fine. A missing or cracked cap is rarely the leak source on its own, because the cap is a secondary seal and dust shield. Losing it does let dirt and moisture reach the core.
Rubber snap-in stems age. Ozone, heat and flexing at speed crack the rubber near the base, so a stem that leaks when bent sideways or shows surface cracking is suspect. Metal clamp-in and TPMS stems seal with a grommet or o-ring and a retaining nut. A loose nut, a flattened or deteriorated grommet, or corrosion between an aluminum stem and its core or nut can all cause a slow leak. The leak may also not be the stem at all. Rim corrosion around the valve hole, a nearby bead leak, a cracked wheel or a tread puncture can all mimic a stem problem. Bubbles exactly at the stem base support a stem or grommet fault. Bubbles along the bead or tread point elsewhere.
Checks in a useful order
Begin with checks any owner can do safely. Park on level ground, inflate to the placard pressure and remove the cap. Spray soapy water over the valve tip, then the stem body, then the point where the stem meets the wheel. Flex a rubber stem gently while watching for growing bubbles. Spray the bead all the way around and the tread as well, so you do not stop at the first finding. Look for cracks, a bend, a missing cap, or white or green corrosion on a metal stem.
The next checks need a tool. A valve core tool lets you snug a loose core or replace it. Tighten gently: overtightening damages the core seal and can crack an aluminum TPMS stem, and TPMS cores have a specified torque that a technician will follow. Match the replacement core to the stem, because a nickel-plated core in an aluminum TPMS stem encourages corrosion. Improvising without the proper tool, such as gripping the stem with pliers, risks breaking it.
Leaks at the stem base, grommet or rim hole call for a qualified technician. Replacing a snap-in stem or a TPMS sensor's seal kit requires breaking the bead, and the TPMS nut must be torqued to the sensor maker's specification. With the tire off, the technician can also clean a corroded valve hole and check the bead seat.
Interpret the findings
A leak only at the open tip that stops after the core is tightened or replaced confirms a core fault. Check cold pressure over the next several days to confirm the fix rather than assuming it worked. If bubbles still appear at the tip with a new core, the stem bore may be damaged or corroded, and the stem needs replacement.
Bubbles at the base of a rubber stem, or cracks that open when it flexes, mean the stem has reached the end of its life, and replacement is the repair. On a TPMS stem, a leak at the nut or grommet suggests the seal kit is worn. If corrosion has seized the nut or pitted the stem, the sensor itself may need replacing, which is decided with the tire off. Valve stem sealers and aerosol tire sealants are not a dependable fix for stem leaks. At most they buy time, and liquid sealant can clog TPMS sensors, so tell the shop if you have used any. If soapy water finds nothing at the stem but the tire still loses air, the cause lies elsewhere and a new stem will not solve it.
Urgency and next action
Stop driving on the tire if the stem is broken, bent or torn, or if pressure drops fast enough to see or hear. Do the same if the tire has been driven badly underinflated, because running low builds heat that can damage the sidewall internally where you cannot see it. In those cases, fit the spare or arrange a tow. There is no reliable distance a leaking tire can be trusted to cover.
For a slow leak you can keep near placard pressure, book the repair soon and check pressure before each drive. Tell the technician which wheel leaks, how fast it loses air, where the bubbles appeared, whether the stem is rubber or TPMS, any sealant used and any recent tire work. If inspection shows the tire itself is damaged, the replacement should match the tire size, load index and speed rating on the placard. On all-wheel-drive vehicles, the shop should also compare its tread depth with the other tires for drivetrain compatibility. After a stem or sensor is replaced, the TPMS may need a relearn so the warning system reads correctly.