How to Replace Brake Pads: DIY Steps and Installation Checks
The essential answer
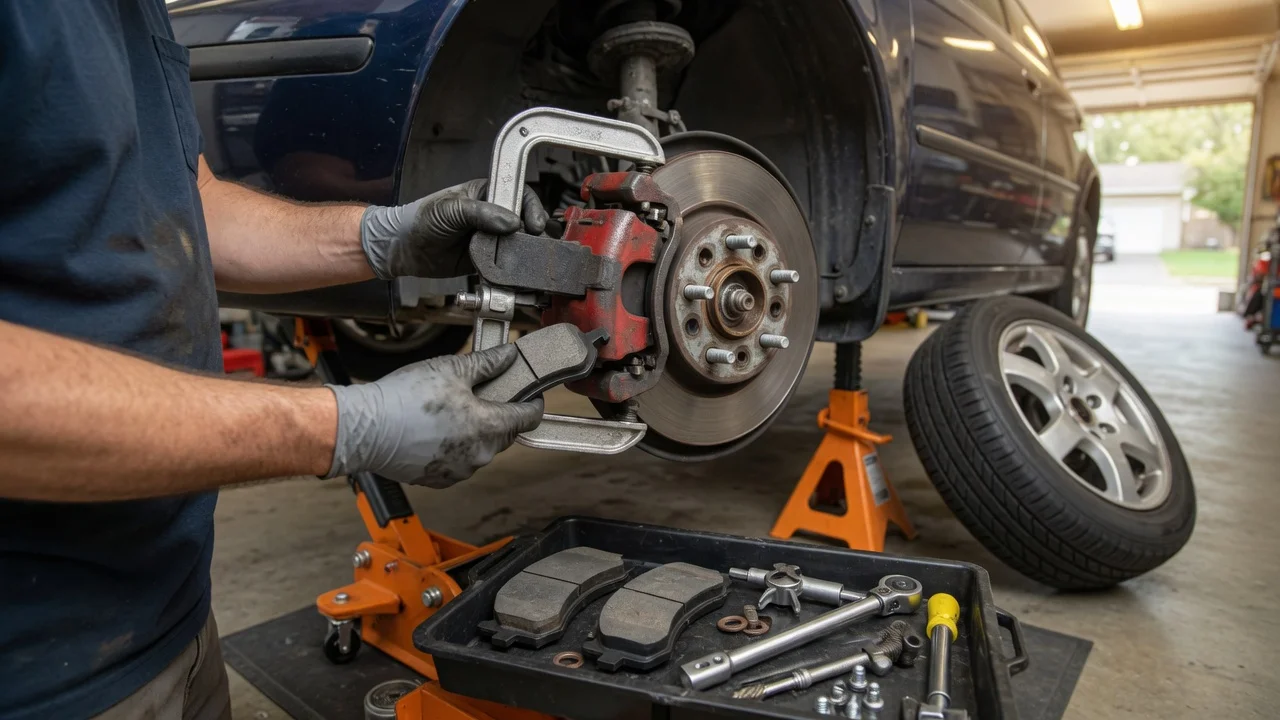
Replacing disc brake pads means removing the wheel, unbolting or unclipping the caliper so the old friction pads can come out, seating new pads against the rotor, reassembling the caliper, torquing fasteners to the vehicle’s specified values, then bedding the pads in with controlled stops. Pads are the replaceable friction material that presses on the rotor when you apply the brake pedal; they wear thinner over time. The job is a common DIY maintenance task on many passenger cars and light trucks, but it is safety-critical. Caliper design, pad shape, hardware kits, piston-retract method, rotor condition limits, and fastener torque all depend on the specific vehicle. Use the manufacturer’s service information for that model year, market, and brake package. If a step does not match what you see on the car, stop and get qualified service rather than forcing a procedure from a different configuration.
What you need before you start
Work on a level, solid surface with the parking brake set and the transmission in Park or in gear. Support the vehicle on jack stands rated for the load; a jack alone is not a work stand. Chock the wheels that stay on the ground. Confirm you have the correct pads for that axle and brake option, plus any required abutment clips, anti-rattle springs, or slide-pin boots. Replacement hardware is often sold with the pads or as a separate kit; reuse of corroded clips and dry slide pins is a common cause of noise and uneven wear.
Typical equipment: vehicle jack and jack stands; wheel chocks; lug wrench; socket and ratchet set sized to the caliper bracket and slide-pin bolts; torque wrench covering wheel and caliper fastener ranges in the service data; C-clamp or the piston-retract tool specified for that caliper (screw-in on many rear electronic parking-brake calipers); brake cleaner; lint-free cloths; high-temperature brake lubricant approved for the contact points the manufacturer names (often slide pins and pad abutments, never the friction face); a catch tray; gloves and eye protection; a bungee or wire to hang the caliper so the hose is not stretched.
Have the owner’s manual or workshop data open for lug-nut torque, caliper-bolt torque, pad orientation marks, and any electronic parking-brake (EPB) retract procedure. Those numbers and sequences are vehicle-specific and are not interchangeable across models. This guide does not supply substitute torque values, minimum pad thickness, or rotor discard thickness.
Hazards that apply to the whole job
Brake dust and solvent mist belong away from skin, eyes, and lungs; use eye protection and avoid blowing dust with compressed air. Brake fluid damages paint and is hygroscopic; keep the reservoir cap area clean and do not let the level fall so low that air enters the system when pistons are pushed back. Never let a caliper hang on the hose. Do not use petroleum grease on rubber boots or on friction surfaces. After the job, the first pedal application can feel long until the pistons take up slack; do not drive until the pedal is firm. If the pedal stays soft, sinks, or a warning lamp is on, do not road-test the car.
Step-by-step replacement
The sequence below is the usual disc-brake pad swap on a sliding caliper. Fixed multi-piston calipers, drum brakes, and some EPB rear calipers differ. Match each action to the service procedure for your vehicle. Treat any mismatch, seized fastener, leaking seal, or damaged rotor as a stop condition.
1) Record which axle you are servicing and replace pads in axle pairs so left and right friction stays balanced. 2) Loosen the wheel fasteners slightly with the vehicle on the ground, then raise and support it on stands and remove the wheel. 3) Inspect the hose, banjo fitting, slide-pin boots, and the rotor faces before you disturb anything. Fluid seepage, a cracked hose, a deeply grooved or heat-spotted rotor, or a piston that will not retract are reasons to stop for qualified service, often including rotor or caliper replacement rather than pads alone. 4) If the rear caliper has an electronic parking brake, put the system in the manufacturer’s service or retract mode with a scan tool or the specified pedal-and-switch sequence before forcing the piston. Turning a screw-in piston the wrong way can destroy the mechanism. 5) Remove the caliper slide-pin bolts or the pad-retaining hardware named in the procedure. Lift the caliper off the pads. Support it so the hose is slack. 6) Remove the old pads and abutment clips. Note inner versus outer pad, wear-indicator tab location, and any shim stack. Photograph or lay parts out in order if the new set is not an obvious match. 7) Clean pad abutments on the bracket with a brush and brake cleaner. Do not score the rotor with the cleaner overspray if you are keeping that rotor. Lubricate only the points the manufacturer allows. 8) Check remaining rotor thickness against the discard or machine-to dimension stamped on the hat or listed in the service data. If thickness, runout, or parallel wear is out of specification, machine or replace the rotor before the new pads go on. Installing new pads on a rotor that is below spec or heavily lipped will not restore braking as intended. 9) Open the brake-fluid reservoir cap. Retract the piston slowly and squarely with the correct tool so the new, thicker pads will fit. Watch the reservoir so it does not overflow; remove fluid if needed using a method that does not contaminate the remaining fluid. If the piston cocks, binds, or fluid weeps from the boot, stop; the caliper needs service. 10) Install new clips and pads in the correct orientation, with shims and wear indicators where the old parts had them. The friction material faces the rotor. Do not get lubricant on the pad face or rotor ring. 11) Reseat the caliper over the pads without pinching the boot or the hose. Start the slide-pin or caliper bolts by hand to avoid cross-threading, then tighten to the specified torque and any angle or thread-locker instruction in the data. Replace one-time-use bolts if the manufacturer requires it. 12) Refit the wheel, snug the fasteners, lower the vehicle, and torque the wheel fasteners in the specified star pattern to the specified value. Reinstall any sensor connectors you disconnected. 13) Pump the brake pedal slowly until it is firm and the pedal height is normal. Check the fluid level and refit the reservoir cap. Confirm there is no drip at fittings and no warning lamp that was not present before. 14) Repeat on the other side of the same axle before driving.
Installation checks before you drive
Pedal: several firm applications with the engine as specified (running on many power-brake systems) until travel is consistent. A long or sinking pedal means do not drive. Clearance: wheel spins by hand without pad drag that locks the rotor; light brush can be normal, lock-up is not. Hardware: every caliper bolt, slide pin, clip, and wheel fastener is present and torqued; hose is free of twists and contact with the wheel or spring. Fluid: reservoir between min and max; no fresh wetness on the caliper, hose, or ground. Warnings: ABS, brake, or EPB lamps behave as they did in a known-good state, or better. An unexpected lamp is a stop condition. Bedding: follow the pad maker’s and vehicle maker’s bed-in procedure, typically a series of moderate decelerations from a moderate speed without coming to a full panic stop, then a cool-down period with no hard use. Aggressive first stops can glaze pads or warp rotors. Road check: in a safe, empty area, confirm straight stops and the absence of grinding, scraping, or a pull. Noise from new hardware can occur briefly; metallic grinding or a pull to one side is not a break-in noise.
When the job is no longer a pad-only DIY
Qualified service is the correct next step when a piston will not retract, a caliper slides only on one pin, a hose is cracked or wet, the rotor is below the stamped limit, the EPB will not enter service mode, the pedal stays soft after bleeding is indicated, an ABS tone ring or sensor is damaged, or fasteners round off or seize in the knuckle. Pad replacement does not fix a leaking master cylinder, contaminated fluid, or a collapsed hose. Drum-brake shoes, parking-brake cables, and some rear disc parking-brake mechanisms use a different procedure entirely.
Limits of this guide
No single walkthrough can name torque, pad thickness, rotor discard thickness, or EPB retract steps that are valid for every vehicle. Those figures belong in the service information for the exact model year, market, powertrain, and brake package. Legal inspection thickness and modification rules also vary by jurisdiction; this article does not state a legal minimum. Video demonstrations can show motion and tool use, but they do not replace the specifications for the car in front of you. If identification of the brake option is uncertain, confirm the parts and procedure before you open the caliper.