How to Replace a Valve Stem With a TPMS Sensor
Replacing a tire valve stem that carries a TPMS sensor is a two-part job: you are restoring an airtight seal at the wheel and preserving the electronic pressure reporting that many modern vehicles require. The work is possible at home with the right tools, but the sensor can be damaged by careless bead breaking or improper torque. Tire size, load index, speed rating, and inflation pressure all remain relevant because the wheel and tire package must be returned to the vehicle placard specifications. Drivetrain compatibility does not change the basic seal, though all-wheel-drive systems make matching tire condition and pressure more important.
Direct answer
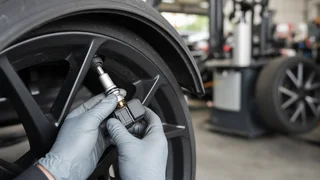
The core answer is that the valve stem and TPMS sensor are usually replaced as one service unit on a clamp-in or snap-in style assembly. You must safely support the vehicle, remove the wheel, break the tire bead away from the sensor, and demount enough of the tire to access the base inside the rim. The old sensor is unthreaded or released, and the new stem is drawn through the valve hole until the seal seats squarely against the wheel. After reassembly, the tire is inflated to the pressure shown on the vehicle placard and the sensor is relearned to the vehicle.
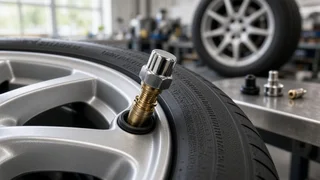
A material condition is sensor type. A snap-in rubber stem can look like a standard valve, but replacing only the visible stem while leaving the old sensor shell attached is not a proper repair for most direct TPMS designs. A clamp-in aluminum stem has a threaded body, nut, and grommet that must be replaced as a set to prevent a slow leak. The tire should not be considered fixed until it holds the specified inflation pressure, the tread remains serviceable, and the TPMS warning behaves normally after a brief drive.
How to proceed
Begin with a safe, level workspace and the parking brake set. Before raising the vehicle, note the tire size, load index, and speed rating from the sidewall and check the vehicle placard for the correct cold inflation pressure. The valve core is removed to release air, and the wheel is lifted after the lug nuts are loosened. A bead breaker must push the tire sidewall down gently. Keep the tool away from the sensor, which can be cracked if the bead is forced at the wrong angle. Rotating the wheel and working in small steps reduces the chance of pinching the sidewall or bending the rim.
After the outer bead is broken, the tire is lifted over the rim flange at the valve location rather than fully dismounted. Secure the sensor with a torque-limited wrench according to the service kit instructions, because overtightening can crack the stem or distort the grommet. Install a fresh valve core, inflate the tire in short bursts, and listen for leaks at the base and core before reaching the target pressure. Reinstall the wheel and lower the vehicle most of the way before final lug nut torque. A test drive gives the vehicle a chance to register the new sensor; if the light remains on, confirm that the correct sensor frequency and relearn procedure apply to the specific model.