How to Adjust and Tighten a Parking Brake Cable
A parking brake that pulls up too far, or lets the car creep on a slope, is often blamed on a stretched cable. Sometimes that is right. Usually, though, setting cable tension is the last step of a proper adjustment, not the first. This guide explains how parking brake cable adjustment works, what to check before you turn the adjuster, and when the job belongs in a shop.
The Short Answer
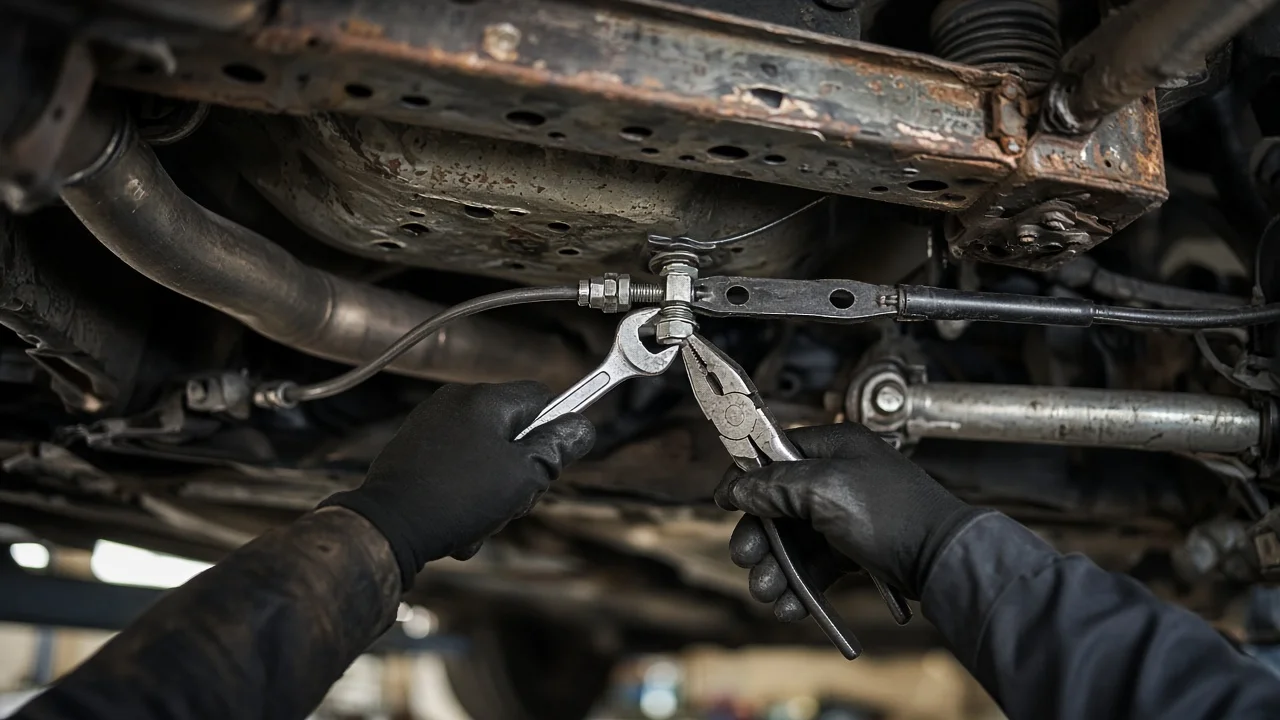
To tighten a parking brake cable, you take up slack at the cable adjuster until the brake holds fully within the lever or pedal travel listed in your vehicle's service information. The adjuster is usually a threaded rod and nut at the equalizer under the vehicle or at the base of the hand lever inside the center console. Order matters. Inspect the rear brakes first, then adjust the shoes or caliper mechanism to specification, and set cable tension last. When you finish, the rear wheels should spin freely with the brake released and lock when it is applied.
Some vehicles have no cable to adjust. With an electronic parking brake, there is usually no manual adjustment, and some systems need a scan tool to put them into service mode before any rear brake work. If the cable is frayed, kinked or seized in its housing, tightening it won't solve the problem. It needs to be replaced.
How a Cable-Operated Parking Brake Works
When you pull the lever or press the pedal, a front cable pulls on an equalizer. The equalizer splits the force between two rear cables, and each rear cable pulls a lever at its wheel. On rear drum brakes, that lever spreads the brake shoes against the drum. Rear disc systems use one of two designs. A drum-in-hat setup has a small drum and its own set of shoes inside the hat of the brake rotor. A caliper-integrated design has a lever on the caliper that drives the piston through an internal screw mechanism and clamps the brake pads against the rotor.
Slack builds up for several reasons. Friction material wears, drum self-adjusters stick, cables stretch slightly, and housings corrode so the inner cable no longer slides freely. The adjuster only controls how much cable travel is used before the brake engages. It cannot make up for shoes or pads worn past their wear limits, or for a mechanism that has seized. Overtightening the cable to hide those problems can leave the brakes partly applied while you drive.
What Changes the Procedure
The correct method depends on the rear brake design. On rear drums with self-adjusters, the shoe-to-drum clearance should be correct before the cable is touched. Depending on the design, the self-adjuster works during reverse stops or parking brake applications, or it must be set by hand. On drum-in-hat systems, the shoes are usually adjusted with a star wheel, either through an access hole or with the rotor removed. The cable is set afterward. On caliper-integrated systems, the mechanism normally adjusts itself as the pads wear. The cable is set so the caliper levers rest against their stops when the brake is released. When new brake pads are fitted, these pistons often have to be wound back in rather than pushed.
Some pedal-operated parking brakes have a spring-loaded tensioner that keeps cable slack under control automatically. These usually have no manual adjustment, and the service procedure may require locking the tensioner before working on the cables. Electronic parking brakes use motors on the caliper or a cable-puller module. Vehicle fitment also matters. Cable routing, adjuster location and parts can differ by model year, trim and drivetrain, so confirm the procedure and part numbers for your exact vehicle.
Checks to Make Before Adjusting
Set up safely before you start: 1) Park on level ground and chock the front wheels. 2) Raise the rear of the vehicle and support it on jack stands. Never work under a vehicle held only by a jack. 3) Release the parking brake fully. Then trace the cables along their full length. Look for broken strands, kinks, torn boots, rusted housings, and missing clips or brackets. Have a helper apply and release the lever while you watch the equalizer and the levers at each wheel. Both sides should move when the brake is applied and return fully when it is released.
Next, inspect the rear brakes: • Compare shoe lining or pad thickness against the manufacturer's wear limits. • Check the drums or rotors for scoring, heavy rust or heat damage. • Look for brake fluid or grease on the friction material, which usually points to a leaking wheel cylinder or caliper. A fluid leak affects the service brakes too, so the vehicle should not be driven until it is repaired. Contaminated shoes or pads generally need replacing rather than cleaning.
Adjusting the Cable Step by Step
Once the rear brakes are within specification, release the lever fully and find the adjuster. Hold the threaded rod if it tends to turn, then loosen the locknut. Turn the adjusting nut in small steps to take up slack. Some procedures have you set the lever to a specified notch before adjusting, and others call for the lever to be fully released. Use the method for your vehicle.
After each small change, check two things: 1) The lever or pedal should apply firmly within the specified travel. 2) With the brake released, each rear wheel should turn by hand without drag. Light pad contact on disc brakes can be normal. When both checks pass, tighten the locknut. Apply and release the brake several times to seat the cables, then check again. Lower the vehicle and test the hold on a gentle incline, keeping your foot ready on the service brake.
Watch for signs of over-adjustment after the first drive: • One rear wheel noticeably hotter than the other; • A burning smell; • Dragging when coasting; • A parking brake warning light that stays on after release; If any of these appear, back off the adjuster and recheck. A brake that drags wears the friction material quickly and can overheat the rotor or drum.
Limitations and When to Get Professional Help
This is a general description. Adjuster locations, specified travel and setup order vary between vehicles, so follow the service information for your exact model. Have a qualified technician take over if: • The brake still won't hold after a correct adjustment. • A cable is seized or damaged. • The lever or pedal ratchet won't latch. • An electronic parking brake shows a fault. • The rear brakes are below their wear limits or contaminated with fluid. • Dragging continues after the cable is backed off.
Until the problem is fixed, don't rely on the parking brake to hold the vehicle. Park on level ground where you can and chock the wheels. Leaving an automatic in Park or a manual in gear does not replace a working parking brake. Braking faults can get worse without warning, so if the service brakes feel different or any fluid is leaking, stop driving the vehicle and have it inspected.