Headlight Still Not Working After Bulb Replacement: What to Check
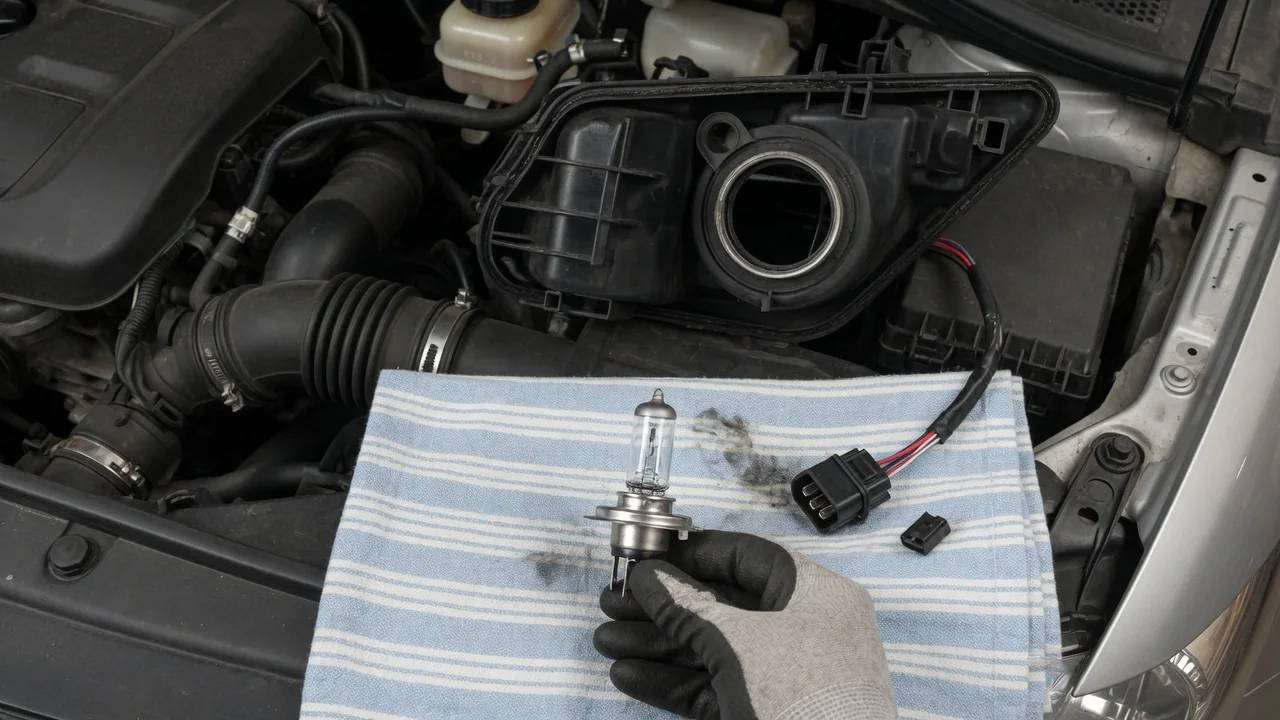
When your headlights are not working after replacing a bulb, the new part usually gets blamed first. The cause can actually be anywhere between the switch and the socket. A headlight bulb replacement disturbs the connector, the wiring and the bulb's seating, and it can also reveal a fault that was already there. Checking the symptoms in order saves money and keeps you from replacing good parts.
Narrow It Down: Which Lights Fail and When
Start by noting whether one headlight or both are dark. If only one side is out, look first at that side's bulb, connector, socket or ground. If both fail together, the cause is more likely a part they share, such as a fuse, relay, switch or control module. Also note whether the low beam, the high beam or both are out. Many vehicles power each beam through separate fuses or relay paths, so knowing which beam is affected narrows the search.
With the vehicle safely parked, check whether the daytime running lights, parking lights and dashboard high-beam indicator still work, and whether a bulb-out warning appears. These are useful clues, but one observation rarely proves the cause, because the same symptom can come from the bulb, connector, fuse, relay, switch or module. Write down whether the light failed right after installation, works on and off, or flickers over bumps. When the problem started often separates an installation mistake from a wiring fault.
Confirm the New Bulb Is Correct, Working and Fully Seated
Confirm the correct bulb type in the owner's manual or from the markings on the old bulb. Don't assume it from the make or model alone, because trim levels and production changes can call for different bulbs. Then check that the bulb is seated properly. If it isn't locked into its clip or twist-lock socket, is turned to the wrong position, or sits at an angle, it may never touch its terminals, even though it looks installed from behind the housing.
New bulbs can be defective out of the box, and a dropped bulb may have a broken filament or a cracked base. If you can reach both sides, a simple test is to swap in the working bulb from the other headlight. Hold halogen bulbs by the base only, because oil from your skin creates hot spots on the glass that shorten bulb life. LED and HID retrofit bulbs may not work with every vehicle's wiring or bulb monitoring. That mismatch can cause flickering, warning messages or no light at all.
Inspect the Bulb Connector and Nearby Wiring
Look closely at the headlight connector. Warning signs include a plug that is loose or never clicked into its latch, green or white corrosion on the terminals, bent pins or pins pushed back into the housing, and melted or browned plastic. A burnt headlight socket usually means a terminal is gripping weakly and creating electrical resistance. That resistance produces heat, and the heat will keep damaging new bulbs until the connection itself is repaired or replaced.
In a tight engine bay, reaching the bulb often means working around the battery, air box or fender liner. The wiring harness can easily be stretched, pinched or pulled from its clip during the job. Follow the wiring with your eyes as far as you can see it, looking for rubbed-through insulation or wires pulled tight. Don't touch anything with the lights switched on. Avoid improvised fixes such as twisting wires together or bypassing a connector, because they add resistance and create a fire risk.
Fuses, Relays and the Headlight Switch
Headlight fuse and relay locations vary by vehicle, so use the owner's manual or the diagram on the fuse box lid instead of guessing. Many vehicles have both an under-hood fuse box and an interior fuse panel. With the ignition off, pull the headlight fuse and look through its clear top for a broken metal strip. A replacement fuse must have exactly the same amp rating as the original, because a higher rating removes the protection the circuit relies on.
If a new fuse also blows, the circuit probably has a short or an overload that needs professional diagnosis. Installing a larger fuse only shifts the damage to the wiring. Both lights failing together, or high beams working while low beams don't, can point to a relay or the headlight switch. In some fuse boxes, swapping in an identical relay from another circuit is a reasonable test. Many newer vehicles build the relays into the fuse box or a module, so that test isn't always possible.
Ground Faults, Control Modules and Bulb-Out Monitoring
Every headlight needs a solid ground connection back to the battery, usually through a ground wire bolted to the body or a shared ground point. When that connection corrodes or works loose, resistance rises. You may then see a dim, flickering or dead headlight even though the bulb and fuse are good. Working on the bulb can disturb a nearby ground wire, so check for a loose wire end or a rusty mounting point near the headlight housing.
Many modern vehicles run the lights through a body control module or a separate lighting module, which reads the headlight switch and powers the lamps electronically. On these vehicles, the fault may be in the module itself, in a signal it isn't receiving, or in communication between modules, rather than in the bulb circuit. Bulb-out warnings and stored diagnostic codes mean different things on different makes, so check them against service information for your exact vehicle. Don't assume a module needs replacing or reprogramming until it has been properly diagnosed.
Safety Limits: HID Systems, Sealed LED Units and Driving
HID headlight systems use very high voltage at the ballast and igniter to start the light. Never probe, unplug or handle these parts while the system is powered, and don't assume the ballast is safe just because the lights were recently turned off. Many factory LED headlights are sealed units with no replaceable bulb at all. If you can't find a removable bulb, the repair may require replacing the headlight assembly or a module, not just a bulb.
Don't cut into the wiring, add resistors or bypasses to silence warning messages, or open and modify headlight housings. These changes can break the housing seals, disable bulb monitoring, and create fire or glare problems. Driving with a headlight out reduces how far you can see. It also makes it harder for other drivers to judge your vehicle's position and width, and it may break local lighting laws. Keep night driving and driving in bad weather to a minimum until the light is fixed.
When to Get Professional Electrical Testing
Get professional testing if fuses keep blowing, connectors have melted, both lights fail together, warning lights stay on, or problems started after installing an LED or HID retrofit kit. A technician will typically measure voltage and ground at the connector while the light is switched on, check that the relay and switch work, and read data from the lighting module with a scan tool. This shows whether the problem is in the wiring or the controls, so parts aren't replaced on a guess.
Bring notes that speed up the diagnosis. Include the exact bulb type you installed and whether it is halogen, LED or HID, which lights fail, when the problem started, and what you have already checked or replaced. Mention any flickering pattern or warning message you've seen. After any work on the housing or bulb that changes the beam pattern, have the headlight aim checked. A badly aimed headlight can leave the road ahead poorly lit while dazzling oncoming drivers.