14-Bolt Disc Brake Conversion: What to Check Before You Buy and Install
The short answer
A GM full-floating 14-bolt axle can be converted from drum to disc brakes, usually with a bolt-on kit that replaces the drums and backing plates with rotors, calipers and caliper brackets. A well-matched conversion can bring easier pad service, better resistance to brake fade under load and more consistent pedal feel. The axle is only part of the job, though. Whether the conversion works well depends on four things outside the axle itself: how the brake hydraulic system is balanced, where the parking brake will come from, whether your wheels clear the calipers, and whether the kit actually matches your axle's hub and flange setup.
One condition changes the answer entirely. The name "14-bolt" covers two different axles: the heavy-duty full-floating version used under three-quarter-ton and one-ton GM trucks and vans, and a lighter semi-floating version used under some half-ton trucks. Most conversion kits marketed for the 14-bolt are designed for the full-floating axle. Parts made for one do not fit the other, so confirm which axle you have before comparing kits.
Identify your axle first
Both versions take their name from the 14 bolts that hold the differential cover on, so the cover alone does not settle it. The visible difference is at the wheel end. A full-floating axle has a protruding hub with the axle shaft flange bolted to the outside of it, and the wheel bearings ride on the axle tube rather than on the shaft. A semi-floating axle has no exposed shaft flange bolts at the hub; the shaft itself carries the wheel.
Beyond full-float versus semi-float, note the vehicle's model year, whether it is a truck or van, and whether the axle has been swapped from another vehicle. Hub and bearing details varied across the years these axles were built, and axles are frequently moved between vehicles, so the donor vehicle matters as much as the one it is now under. If you cannot trace the axle's origin, compare its hub and flange against the measurements or fitment notes the kit seller provides before ordering.
How 14-bolt disc conversion kits are built
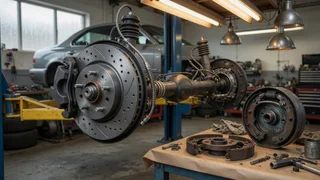
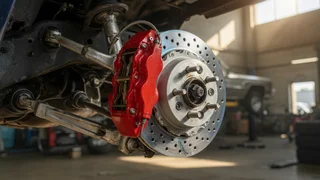
Most kits follow the same basic layout. A caliper bracket bolts to the flange at the end of the axle tube where the drum backing plate used to mount. A rotor takes the place of the drum, and a caliper mounts to the bracket. Kits differ mainly in how the rotor attaches to the hub.
Rotor mounting style | How it works | What to consider; Hat-style rotor over the hub | The rotor slides over the wheel studs and is clamped between the hub and the wheel, much like the original drum | Usually the simplest install with no hub machining; confirm the rotor centers properly and that the wheel seats flat against it; Rotor attached to a replacement or modified hub | The rotor bolts to a hub supplied with the kit, or the original hub must be machined or have its studs pressed out and back in | More work, and possibly machine-shop time; check whether new hubs, studs or bearings are included; Fabricated or junkyard-sourced setup | Brackets are made or adapted to fit calipers and rotors taken from other vehicles | Cheapest on parts but hardest to get right; bracket strength and caliper alignment become your responsibility
What a complete kit should include
Kit prices are hard to compare because contents vary widely. Some kits are brackets only, while others include everything from the axle flange to the brake lines. Before comparing cost, list what each option includes and what you would still have to source separately.
Caliper brackets, preferably machined to fit the axle flange and with a clear statement of which axle versions they suit; Rotors sized for the bracket and caliper combination, ideally a rotor available as a common replacement part; Calipers, and whether they are new or remanufactured, with or without core charges; Brake pads matched to the caliper; Mounting hardware, including bolts of the correct grade for brake-bracket use; Flexible brake hoses and any hard-line fittings or adapters needed to connect to the existing rear lines; A proportioning or combination valve, or at least clear guidance on what the existing valve needs; A parking brake solution, or an explicit note that one is not included; Installation instructions with torque specifications
Pay attention to whether replacement pads and rotors can be bought locally later. A kit built around calipers and rotors from a common production vehicle is far easier to maintain years from now than one using parts only the kit maker sells.
The parking brake problem
On a drum-brake 14-bolt, the parking brake works through the rear drum shoes. Removing the drums removes the parking brake, and many basic conversion kits do not replace it. Driving without a working parking brake is unsafe, especially with heavy loads, trailers or parking on slopes, and a working parking brake is required for road use in US states.
Common solutions include calipers with a built-in mechanical parking brake, rotors with a small drum built into the hat section that houses separate parking shoes, or a driveline brake mounted at the transfer case or transmission output. Each option has different cable-routing needs and holding ability. Decide which approach you will use before buying, because the choice may dictate which kit or caliper you need.
Hydraulic changes: master cylinder and proportioning
Drum and disc brakes need different hydraulic conditions, so bolting on rear discs without addressing the rest of the system can leave the brakes unbalanced. This is the part of the conversion most often overlooked.
Brake balance is the share of braking done by the front versus the rear wheels. A proportioning valve limits rear brake pressure so the rear wheels do not lock before the fronts. A system set up for rear drums is calibrated for drum behavior, and rear discs respond differently. An adjustable proportioning valve in the rear circuit is a common way to tune balance after the conversion.
Residual pressure valves are another issue. Some drum systems hold a small residual pressure in the rear lines to keep the wheel cylinder seals seated. Disc calipers generally should not have that drum-level residual pressure, because it can cause pads to drag. Check whether your master cylinder or combination valve contains a rear residual valve and whether the kit maker says to remove or replace it.
Fluid volume and pedal feel are the last check. Calipers usually move more fluid than drum wheel cylinders. Depending on the master cylinder and the calipers chosen, you may need a master cylinder intended for four-wheel disc brakes to get a firm pedal and adequate reservoir capacity. The kit maker should be able to say whether your vehicle's existing master cylinder is suitable.
Wheel clearance and track width
Calipers sit farther outboard and higher than drum hardware. Some wheels, especially smaller diameters or designs with little spoke clearance, may rub the caliper. Check the kit's stated minimum wheel size and, where possible, test-fit your wheel against the caliper before driving. Also confirm whether the kit changes the hub mounting surface position. A spacer-like effect can change track width and stud engagement.
Other compatibility points to confirm
ABS: some trucks use a rear ABS sensor at the differential rather than at the wheels. Confirm the conversion does not disturb any sensor, tone ring or wiring; Axle swaps: if the axle came from a different vehicle, match the kit to the axle's hub and flange, not to the vehicle it now sits under; Intended use: towing, plowing or heavy hauling puts more heat into the brakes, so ask whether the kit's rotor size and caliper suit your gross weight; Lift kits and long-travel suspension: check that flexible brake hoses are long enough at full droop; Front brakes: rear discs do not make up for worn or undersized front brakes, which still do most of the stopping
Installing the conversion
The outline below shows the general sequence. Kits differ, so the kit maker's instructions, torque specifications and fluid recommendations take priority, along with the vehicle's service information for lifting points and hub bearing adjustment.
Prerequisites
Confirmed axle identification and a kit listed for that axle; A parking brake plan and any parts it requires; A plan for the master cylinder and proportioning valve, with parts on hand; Correct brake fluid type for the system, plus a bleeding method; Jack stands rated for the vehicle, wheel chocks, a torque wrench, and the socket needed for the full-float hub nut; Press or machine-shop access if your kit requires hub work or stud replacement
Ordered steps
1) Chock the front wheels, raise the rear at the proper lifting points, support it on stands, and remove the wheels. 2) Remove the axle shaft flange bolts and pull the shafts, then remove the hub retaining hardware and the hub-and-drum assembly. 3) Disconnect the rear brake lines and parking brake cables, then remove the shoes, wheel cylinders and backing plates. 4) Clean the axle tube flange and inspect the bearings, seals and races. A conversion is a sensible time to replace worn bearings and seals. 5) Bolt the caliper brackets to the axle flange using the hardware and torque specified by the kit. 6) Prepare the hub as the kit requires, by fitting a hat-style rotor or by mounting the rotor to a supplied or modified hub. 7) Reinstall the hub and set the wheel bearing preload or endplay according to the service procedure for your axle, then reinstall the axle shafts with new gaskets. 8) Mount the calipers and pads, and check that the rotor runs centered in the caliper without rubbing. 9) Route and connect the flexible hoses, checking clearance through full suspension travel. 10) Make the planned master cylinder, proportioning valve and residual valve changes, then install the parking brake system. 11) Bleed the entire brake system, working from the wheel farthest from the master cylinder. 12) Install the wheels, test-spin for clearance, lower the vehicle and torque the lug nuts to specification.
Completion check
Before driving, confirm a firm pedal with the engine running, no leaks at any fitting, and a parking brake that holds the vehicle. Then make low-speed stops in a safe area and listen for rubbing or clicking. Bed in the pads following the pad or kit maker's procedure. Finally, test brake balance on a safe surface. The front wheels should not be overpowered by the rear, and the rear should not lock early. Adjust the proportioning valve if needed, and recheck lug nut and caliper bolt torque after the first drive.
When to stop and get qualified help
The kit requires hub machining or stud pressing and you lack the equipment; You are unsure how to set full-float wheel bearing adjustment; The pedal stays soft or sinks after thorough bleeding; The rear wheels lock before the fronts, or the truck pulls during braking, and adjustment does not fix it; The parking brake will not hold the vehicle; The calipers or brackets do not align squarely with the rotor without shims or modifications not described in the instructions
Choosing your next step
If your truck already stops well and you rarely tow, rebuilding the drums with quality shoes, hardware and wheel cylinders may be the lower-cost choice. If you tow or haul regularly, struggle with drum adjustment, or want simpler pad changes, a full-floating 14-bolt is a good candidate for a disc conversion. In that case, choose a complete kit that names your axle version, uses replacement parts you can find easily, and states clearly how it handles the parking brake and brake proportioning. Settle those three points before buying, and the rest of the installation is mostly careful mechanical work.