Winter Tire Symbols, Temperature Guidance, and When to Swap
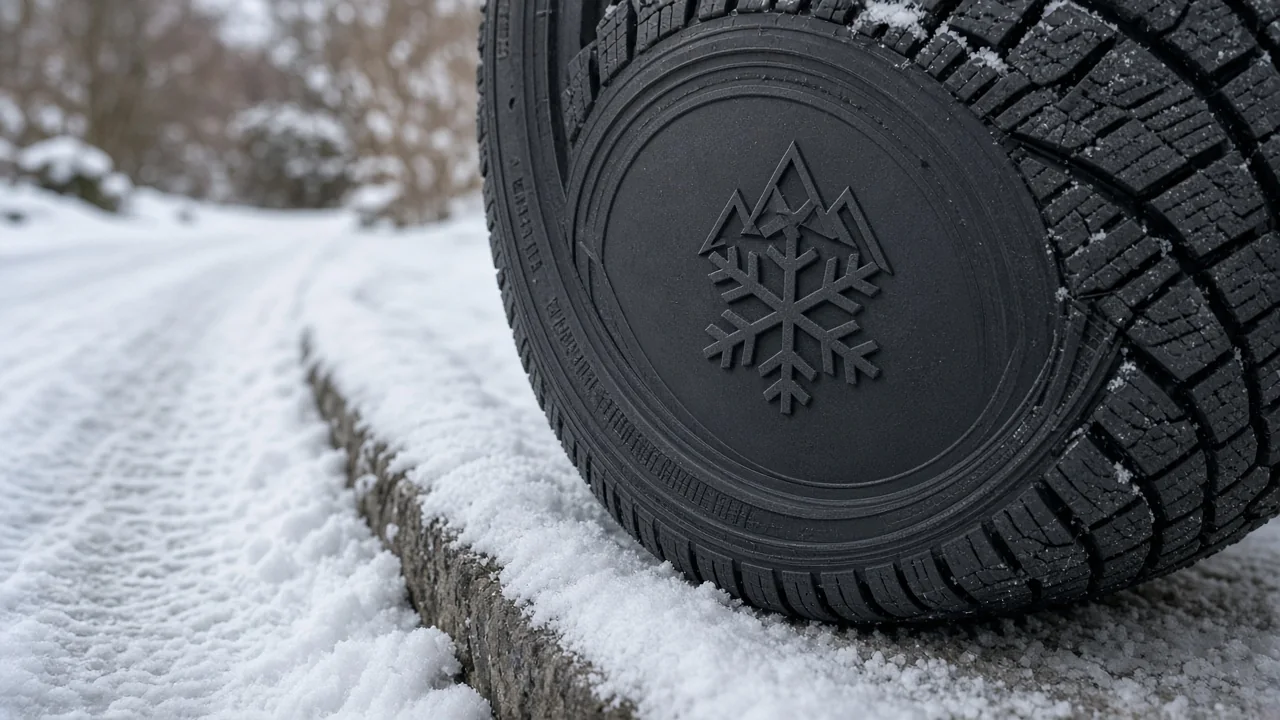
Winter rated tires are identified by sidewall markings, not marketing language. The three-peak mountain snowflake, or 3PMSF marking, is the usual winter tires symbol for a standardized snow-traction test. An M+S marking describes tread design instead. Drivers use ambient temperature to plan when winter compounds work best, and they swap those tires before warm weather accelerates tread wear.
What “Winter Rated” Tells You About a Tire
The label winter rated tires only has meaning when you look at the sidewall and the maker's intended-use statement together. The same phrase can describe a dedicated cold-weather model or a tire built for mixed seasons that still carries a snow qualification. Read the three-peak mountain snowflake and any M+S marking as separate clues, then confirm how the manufacturer positions that size for snow, ice, and year-round driving rather than assuming the label alone settles the question.
Severe snow service is a traction qualification, not a promise that a tire will hold in every storm, on every surface, or at every ambient temperature. A tire can earn that designation and still be sold as an all-season or all-weather product, so winter tires symbols on the sidewall do not by themselves prove you are looking at a dedicated winter model. Match the markings to the product literature before you treat the tire as a seasonal specialist.
Finding and Reading the Mountain Snowflake Symbol
The familiar symbol for winter tires is a three-peak mountain outline with a snowflake inside, often printed on the sidewall near other service markings. That 3PMSF marking means the tire met a standardized snow-traction performance requirement used for severe snow service. Look around the lower sidewall, close to load and speed information, and rotate the wheel if mud or curb scuffs hide the stamp. If the winter tires symbol is faint or you cannot tell mountain peaks from nearby icons, the manufacturer's tire information for that size is the next place to confirm.
Passing that snow-traction test does not, by itself, certify ice braking, wet grip, or behavior across every winter tires temperature range. Packed snow, polished ice, slush, and cold dry pavement ask different things of the tread and the rubber compound. Treat the mountain snowflake as evidence of a defined snow test, then read the maker's seasonal guidance for ice, rain, and cold-dry use. Drivers who need confirmation should match the sidewall stamp to the exact product name rather than guessing from a similar-looking icon.
What the M+S Sidewall Marking Means
M+S marking stands for mud and snow; makers also print M&S and MS for the same idea. That stamp is about tread-design criteria, such as groove and void patterns associated with mud and snow travel, not about a laboratory snow-traction result. A tire can carry M+S without having passed the severe snow service test that produces the three-peak mountain snowflake. Read mud-and-snow lettering as a design category on the sidewall, then look separately for 3PMSF if you are hunting for that snow-traction qualification.
Many winter rated tires, and some all-season or all-weather products, show both M+S and 3PMSF on the same sidewall. Each marking should be interpreted on its own terms: mud-and-snow lettering does not prove the snowflake test was passed, and the snowflake does not describe mud-void geometry. When both appear, you still need the manufacturer's intended-use statement to know whether the tire is a dedicated winter design or a broader seasonal product. Collapse the two stamps into one meaning and you will misread what you are comparing.
Using Temperature to Plan Winter Tire Installation
A commonly used planning number for mounting winter tires is about 45°F, or 7°C, but that figure is a seasonal guideline, not a hard performance cutoff. Winter rubber compounds are blended to stay flexible as ambient temperature falls, so the tread can conform to cold pavement instead of stiffening. Flexibility is the point of the compound, yet it does not create one universal operating window for every model. Road surface, precipitation, and the manufacturer's own temperature notes still decide when that flexibility helps you.
Schedule installation from the pattern of your weather, not from a single afternoon reading. Recurring overnight lows near or below that planning number, cold morning commute temperatures, and a forecast of snow or ice are stronger signals than a one-day warm spell. There is no single winter tires temperature range that fits every product and every region; model-specific guidance and local road conditions matter more than a calendar date. If you regularly drive before sunrise or toward higher, colder ground, move the seasonal tire changeover earlier rather than waiting for the first visible snowfall.
Why Winter Tires Wear in Warm Weather
Winter tire wear in summer is largely a compound and tread-block story. Heat softens a winter rubber compound that was meant to stay pliable in the cold, and those flexible blocks can squirm more on warm, dry pavement. That extra movement tends to scrub rubber away faster during sustained warm-weather driving than the same tire would in its intended cold window. The result is accelerated tread wear, not a sudden, guaranteed failure on the first mild day, which is why duration of heat matters more than a brief thaw.
Warm pavement can also change how the tire feels. Steering may seem less precise, and braking on dry or wet summer roads can feel different from the same vehicle on a compound designed for heat. Temperature, mileage, inflation, alignment, and driving habits all influence how quickly that wear appears, so no universal summer wear rate is reliable. Inspect for uneven shoulders, cupping, cuts, and remaining tread depth; if anything looks irregular, have a tire professional assess the set before more warm-weather miles accumulate.
Choosing When to Remove Winter Tires
Remove dedicated winter rubber when warming is sustained and the outlook for freezing nights, snow, and ice has faded, not because one afternoon felt mild or because a calendar date arrived. Mountain travel, elevation changes, and early-morning driving can still put you on cold or icy pavement after town streets have thawed. If those routes remain in your week, keep the winter set until that pattern breaks. The same 45°F planning idea works in reverse: use recurring daytime warmth and rising overnight lows, not a single spike, to time the swap.
Book the seasonal tire changeover before shops fill up, and follow the tire manufacturer's storage and reuse notes for that model. Timing the swap well does not repair a tire that is already worn, cracked, or damaged; have the set inspected before you store it or put it back on next season. Check inflation, look for irregular tread wear, and confirm the 3PMSF and M+S stamps still match the product you intend to run. A professional inspection is the right next step if remaining depth or visible condition raises doubt.